ALL LEVELS / zone 2 cardio workout / 30 minutes
Equipment: Gym mat
Contrary to what the name might suggest, ‘zone 2 cardio’ doesn’t involve working out in any specific area of the gym. Instead, it’s a form of training in which individuals monitor their heart rates during aerobic exercise to enhance fitness levels. Instead, it’s a form of training where individuals monitor their heart rates during aerobic exercise to improve fitness levels.
This type of training is divided into zones from 1 to 4, with zone 4 representing your heart pumping with no ability to talk. In contrast, in zone 2 your heart rate is steady, and you feel your heart pumping, yet you’re able to carry a conversation comfortably.
That’s where you should aim to be while performing this zone 2 cardio workout session, consisting of 8 exercises to perform for 30 seconds each, with no time to rest. The goal is to complete 7 rounds while consistently maintaining your heart rate in zone 2. All combined, this workout should last 30 minutes.
- Quadruped shoulder taps
- Jumping jacks
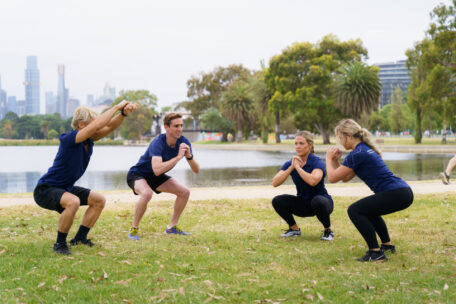
- Bodyweight Squats
- Up and down planks
- Squat to lunge
- Mountain climbers
- Burpees
- Single leg tuck-ups
Let’s get that heart pumping!

WORKOUT SETUP
- 8 exercises
- 30 seconds each
- No rest
- 7 rounds
- 30 minutes total
- Equipment: Gym mat
WORKOUT EXERCISE LIST
7 rounds
1 – QUADRUPED SHOULDER TAPS
30 seconds
- Begin on your hands and knees, all fours — knees beneath hips and hands beneath shoulders.
- Maintain your head in a neutral position.
- Lift one hand off the floor and tap the opposite shoulder. Try not to shift your hips or weight.
- Repeat the movement, but now with the other hand.
- Repeat.
2 – JUMPING JACKS
30 seconds
- Start in a standing position with your arms by your sides. Engage the core slightly and set the shoulders, ready for movement.
- Keeping arms and legs straight (but not locked out) simultaneously jump the legs out to the sides and raise the arms to shoulder height. Stabilise the hips, core and shoulder girdle.
- Return to start and continue at a controlled rhythmic pace for 30 seconds.
3 – BODYWEIGHT SQUATS
30 seconds
- Stand on your feet placing them at the same distance as your shoulder lines.
- Engage the core and go down to the floor, maintaining your knees on the line of your feet. Maintain abs and glutes tight, to control your hip and stabilize the movement.
- Keep your arms tight by your side, and use them to help your balance.
- Keep your feet attached to the floor and squat as down as possible without lifting the heels or feeling pain in your lower back.
4 – UP AND DOWN PLANKS
30 seconds
- Begin in a plank position, with your hands under your shoulders and your body in a straight line from head to heels. Engage your core.
- One arm at a time, lower yourself onto your forearms, keeping your elbows beneath the shoulders.
- Hold for a moment in the forearm plank position.
- Push yourself back up, with the same arm you started the descent, one arm at a time until you’re in the starting position.
- Repeat changing arms.
5 – SQUAT TO LUNGE
30 seconds
- Standing up tall will be the starting position.
- Do a squat and immediately get back up.
- Now do a lunge on one side and get back to the starting position.
- Squat down and back up again followed by a lunge with the other leg.
- Return to the starting position and repeat.
6 – MOUNTAIN CLIMBERS
30 seconds
- Start with your hands on the floor at shoulder-width, with arms extended.
- The hands must be in line with your chest line.
- Try to maintain your trunk straight while you pull your knee to the projected chest line on the floor.
- Pull your knees alternately to your chest.
- Make sure you’re standing on your hands with a tight core.
7 – BURPEES
30 seconds
- Start in a standing position and engage the core.
- Begin the movement by quickly bending down, reaching the hands towards the floor in front of the feet.
- As you do this, simultaneously jump, bring your legs back and land on the floor in a push-up position.
- Perform a push-up and, on the way up, drive the hips up rapidly and jump into a squat position.
- Return to upright and repeat.
8 – SINGLE LEG TUCK-UPS
30 seconds
- Lay down on your back, legs stretched and arms by your side.
- Crunch forward while bringing one knee close to the chest.
- The opposite foot stays straight and touches the ground.
- Finish with hands down by foot that you bring close to the chest.
- Repeat.
After this zone 2 cardio workout, you can start choosing your next challenge: