Do a search for “full-body workout” on the interwebs and you will get A LOT of suggestions.
Many of them require equipment … or complicated rep schemes … or lots of time.
And, I don’t know about you, but the one thing I don’t need in my life is another cumbersome thing to do or figure out. I just want to pop on some fun tunes (which, here are some good workout playlists suggestions if you need ’em!), move my body, and happily get my sweat on.
Who feels me?
So, in times like these, I follow a very simple formula for the perfect full-body workout. And, I’m sharing it with you today!
There are a few reasons why this formula is one of my go-tos:
It’s simple and easy to remember
You can use whatever equipment you have (or don’t have)
You can do it at home or at the gym
You can select the moves you love the most (or those you want to work on)
It can be as long or as short as you need it to be
You can do it alongside a friend or your partner — or on your own
It hits your upper body, lower body and your core — plus, cardio!
It goes by quickly and is FUN (gotta be fun to do it!)
Winner, winner, right?! Now, let’s get to creating YOUR perfect full-body workout.
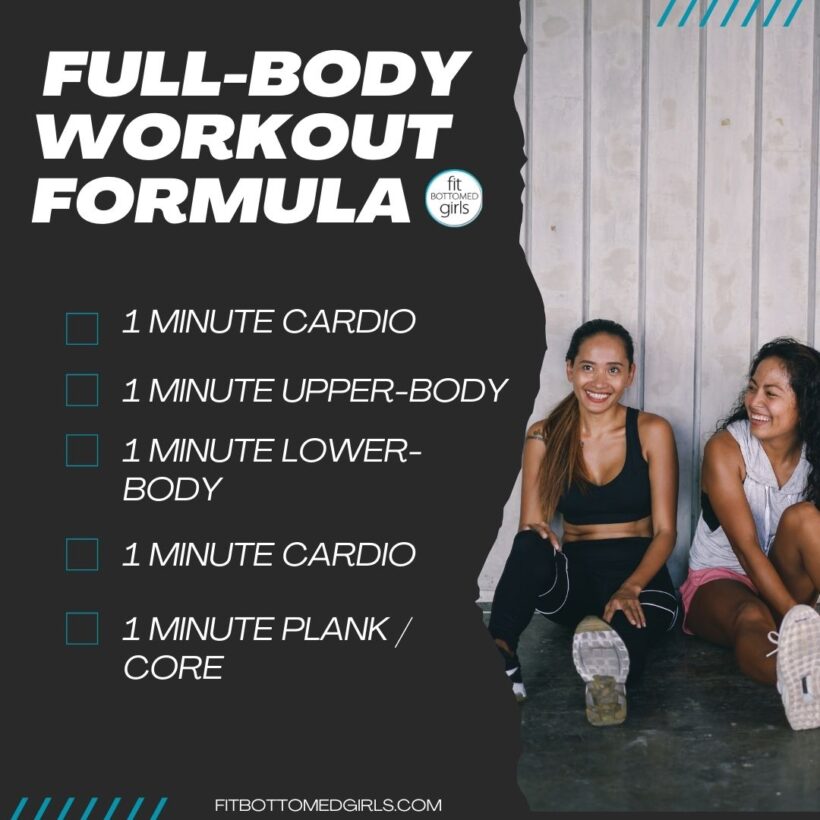
You can create your own perfect full-body workout by following a simple formula of:
1 minute cardio
1 minute upper body
1 minute lower body
1 minute cardio
1 minute plank/core
Cardio: Cardio can be anything from jumping jacks to running to marching in place to biking or rowing — anything to get your heart rate up. (And, you can do the same cardio move twice, or pick two different ones.)
Upper-Body Moves: Upper-body moves can include traditional dumbbell moves like push press, bicep curls or bent-over rows, OR it can simply be push-ups (on the wall, your knees, or your toes) or tricep dips off of a chair.
Lower-Body Moves: Lower-body moves can be weighted or bodyweight-only lunges, squats, hip bridges, deadlifts, wall sits, etc. Anything that challenges your lower half!
Plank/Core: For the core, a basic plank (on the toes or the knees) is a really great one to try for a minute, but you can also try crunches, sit-ups, v-ups, flutter kicks, or reverse crunches. You do you, boo.
All together, that formula gives you five minutes of a full-body workout that both boosts strength and gets your heart rate up. Simply repeat for as many rounds as you’d like.
Again, you pick the moves and how many rounds you do so it’s totally customizable to YOU.
Need a few ideas of what this looks in real life? Here are three of my favorite workouts using the formula above.
Bodyweight Dance Party Workout
This is my no. 1 go-to. No equipment needed.
1 minute dancing
1 minute push-ups
1 minute air squats
1 minute jumping jacks
1 minute plank
Dumbbell Workout
This one uses dumbbells for the strength work.
1 minute running
1 minute push press
1 minute lunges while holding dumbbells
1 minute running
1 minute V-ups
All the Equipment Workout
And, this is one that I like to do in my garage gym.
1 minute rowing
1 minute pull-ups
1 minute deadlifts
1 minute rowing
1 minute plank with my feet in my TRX
See? No fuss; just fitness. What will your first workout using this formula be? Let me know in the comments! –Jenn
On average, most people are accurate at predicting repetitions in reserve (RIR), usually being off by ~1 repetition.
RIR accuracy is usually higher during lower repetitions sets (≤12 reps) and when prediction is performed later in a set.
Training status or sex do not seem to influence RIR prediction accuracy.
Interestingly, coaches estimating RIR via video footage were also off in their predictions by roughly one rep, with their predictions also being more accurate when performed closer to the end of any given set.
Introduction
Proximity to failure can influence both strength and hypertrophy gains, and if you are consistently underpredicting or overpredicting how many repetitions you have in reserve on a given set, you may be doing your gains a slight disservice. In the last decade or so, the concept of autoregulation and using repetitions in reserve (RIR) to guide strength and hypertrophy programming has arguably overtaken the more traditional programming approach of fixed one-repetition maximum (1RM) recommendations (eg: 80% of 1RM for 3 sets of 5 reps).
However, training by using a RIR target (ie: a specific proximity to momentary failure) heavily relies on, you guessed it, the ability to accurately predict RIR.
But before we look at whether we’re actually good at predicting RIR and how we can perfect our ability to accurately predict RIR, let’s take a trip down “iron” memory lane.
The year is circa 2013. Programming for strength and hypertrophy is mostly centered around calculations based on one’s 1RM, the infamous Prilepin’s table, and sometimes simply on “traditional” repetition ranges without any additional guidance on proximity to failure. If the program said 3 sets of 3 reps at 80% of 1RM, and that 80% of 1RM happened to be a load that required you to absolutely grind out your sets as if your life depended on it, then that was unfortunately what you were required to do (at least on paper). Similarly, classic programs like Stronglifts 5×5 rarely made reference to any guidance regarding proximity to failure, simply instructing lifters to add weight on the bar every week, and sometimes recommending that some lifters should “start light” during the initial weeks of their training. On the hypertrophy end, things were often even more vague, with set/rep prescriptions often coming with no explicit direction regarding proximity to failure, usually because it was assumed that all sets should be “hard” or “to failure.”
Additionally, the lack of a consensus on the relationship between proximity to failure and strength/hypertrophy gains made things even more confusing. On one hand, you had top-level athletes advocating for going near or to failure multiple times, while others preached staying away from failure despite aiming to maximize adaptations.
Regardless of which school of training philosophy you adhered to, you either had to follow a program that instructed you to lift specific loads regardless of how you felt, or follow a program that gave you rather vague guidance along the lines of “train hard and make sure you get close or to failure” without necessarily having a way to quantify your effort.
When it came to alternative tools for quantifying your effort in resistance training, looking at the scientific literature was also unhelpful. Most resistance training studies either used a fixed %1RM load or instructed participants to perform repetitions to various forms of failure (volitional failure, momentary failure, etc).
Outside of the gym, though, one tool had started to garner attention, particularly in endurance training. That tool was the Borg Rating of Perceived Exertion (RPE) scale, which aimed to quantify the subjective experience of physical effort, pain, and fatigue during exercise.
Borg’s scale was based on the premise that individuals are able to introspectively evaluate their physical state during exercise and that these evaluations can be consistently mapped onto a numerical scale. This allowed both for self-regulation of exercise intensity and for communication of that intensity to others, such as coaches or healthcare providers.
The original Borg scale introduced in 1962 ranged from 6 to 20, where 6 meant “no exertion” and 20 meant “maximal exertion.” The numbers were chosen to roughly correspond with the heart rate of a healthy adult: a rating of 6 corresponds to a heart rate of about 60 beats per minute (resting heart rate for many people) and a rating of 20 corresponds to 200 beats per minute (the maximal heart rate of a young adult). In 1982, Borg introduced a revised scale known as the Borg CR10 Scale, or the Borg Category-Ratio Scale. The CR10 Scale went from 0 (“nothing at all”) to 10 (“extremely strong”), including verbal anchors at each level (e.g., moderate, strong, very strong) to help users better gauge their level of exertion.
Although the traditional Borg RPE scale can be used to assess perceived effort during resistance training, the endurance exercise origins of the scale make it somewhat inappropriate for accurately gauging/guiding proximity to failure, especially during scenarios where increased discomfort (e.g., during high-repetition sets) may lead to high ratings of perceived exertion. A set of 20 repetitions on the leg extension may feel like an 8/10 on the CR10 scale, but that rating may persist for an additional 5-10 repetitions without really allowing the lifter or person observing them (such as a coach or researcher) to really know whether the lifter is close to failure or not.
Emergence of Autoregulation and the RIR-based RPE Scale
In 2016, Zourdos et al were among the first to explore the use of a “novel resistance training-specific rating of perceived exertion scale measuring RIR” in lifters. More specifically, Zourdos et al explored the relationship between the rating of perceived exertion specifically measuring RIR and various intensities of 1RM in both experienced and novice squatters. The protocol included performing a 1RM squat followed by single repetitions at 60%, 75%, and 90% of 1RM, and an 8-repetition set at 70% 1RM with average velocity recorded for these lifts. RPE values corresponding to RIR were reported after each set.
The study found a strong inverse relationship between the RPE values (indicating the lifter’s perceived exertion and estimated repetitions left in the tank) and the actual velocity of the lift across all intensities. This relationship was observed in both experienced and novice squatters, suggesting that as lifters approach their maximal effort (higher RPE), the speed of the lift decreases, indicating fewer RIR. The study detailed RPE values at various intensities (100%, 90%, 75%, 60% of 1RM), showing how RPE tends to increase with intensity in both groups, with experienced squatters generally reporting higher RPEs. Additionally, the study found significant differences in how experienced versus novice lifters perceived their exertion and estimated RIR at these intensities. Notably, experienced lifters reported higher RPEs at maximal lifts, which might indicate a more accurate assessment of their RIR due to their greater familiarity with high-intensity efforts.
The results of the Zourdos et al study demonstrated the use of an RIR-based RPE scale could be a viable method to not only quantify effort during resistance training but also to regulate training load in real-time, offering a practical way to adjust intensity based on the lifter’s perceived capacity to perform additional repetitions.
This study was also among the first to introduce the concept of autoregulation in the context of lifting programming. As expressed by Dr. Eric Helms in the “The Science of Autoregulation” SBS article, “autoregulation, simply put, is just a structured approach for embedding a respect for individual variation within a program”. Autoregulation allows one to adjust the intensity, volume, or other training variables based on recovery state and overall readiness on a day-to-day basis. Unlike traditional training programs that predetermine load for a given exercise, autoregulation recognizes the variability in an athlete’s daily readiness-to-perform due to factors like sleep quality, nutritional status, stress levels, and residual fatigue from previous workouts. In addition to guiding appropriate load selection, autoregulation can also allow for better fatigue management, as closer proximities to failure may lead to greater neuromuscular fatigue and increase recovery time. A recently pre-printed study found that during the course of an eight-week training study, there were no differences for both subjective and objective markers of fatigue between groups training, on average, close to failure (1-3 RIR) or far away from failure (4-6 RIR).
The concept of utilizing the RPE scale based on RIR to guide programming went hand-in-hand with the concept of autoregulation becoming more mainstream and adopted by competitive and recreational lifters worldwide. More specifically, outside of the literature, the RPE scale based on RIR and the concept of autoregulation were popularized by the powerlifting coach Mike Tuchscherer, who is often credited as a significant contributor to the development of the scale itself. Fast forward to today, and the RPE scale based on RIR is among the most widely used tools in the world of strength and hypertrophy, with coaches of all levels sometimes basing their programming solely on either the RIR-based RPE scale or RIR targets and embracing the flexibility of autoregulation.
Given the popularity of autoregulation, some of the questions that then naturally arise are:
How accurate are we at predicting RIR?
What influences our ability to predict RIR?
How can we improve our ability to predict RIR?
Can others predict RIR for us?
Let’s take a closer look at the literature in an attempt to answer each one of the above!
Current evidence on RIR prediction accuracy
When trying to understand whether individuals are able to accurately predict RIR, a recent scoping review and exploratory meta-analysis by Halperin et al is the most comprehensive analysis of the topic. The study aimed to examine the accuracy of predicting repetitions to task failure in resistance exercise by looking at studies with healthy participants who predicted the number of repetitions they could complete to task failure in various resistance exercises before or during an ongoing set performed to task failure. Overall, the authors included 13 publications covering 12 studies with a total of 414 participants.
The findings revealed that participants generally underpredicted the number of repetitions to task failure by approximately one rep on average (0.95 reps to be exact), indicating a tendency toward underestimation. In other words, when someone thinks they only have two reps left in the tank, they likely still have about three reps in the tank, on average. However, prediction accuracy slightly improved when the predictions were made closer to set failure and when the number of repetitions performed to task failure was lower (≤12 repetitions). Interestingly, the participants’ experience, whether the exercise was an upper or lower body exercise, and the number of sets performed did not significantly influence prediction accuracy. Overall, there was minimal variation in predictive accuracy among participants (with a standard deviation of 1.45 repetitions), suggesting the primary source of error was systematic underprediction. The results of this review show that – although imperfect – most individuals seem to be relatively accurate with their ability to predict RIR, at least in an environment where they are being observed and are aware that they will be working to failure and will need to predict RIR.
One of the study’s limitations is that the designs of the studies included were mostly acute in nature and may not necessarily reflect an individual’s ability to predict RIR in the long term. Other limitations include the potential biases introduced by the variability in task failure definitions and prediction timing across included studies, as well as the potential for anchoring bias, where participants may have unconsciously limited their effort to their predicted repetitions.
Although the above limitations warrant caution when interpreting the results of the study, the following are some of the practical takeaways:
When instructed to gauge their proximity to failure, most people seem to underpredict their RIR by roughly one repetition.
RIR prediction accuracy may not necessarily improve with training status but may improve when performing less than 12 repetitions per set.
When predicting RIR, it’s probably best to do so as a set progresses versus trying to determine your RIR at the start of the set.
Since the Halperin et al review, more data has come out on RIR prediction accuracy both in untrained and trained individuals.
The first study to be published after the Halperin et al review was a study by Remmert et al that investigated the accuracy of RIR predictions on single-joint and multi-joint exercises at various proximities to failure. More specifically, the study involved 58 participants who performed four sets to failure of three exercises (cable biceps curl, cable triceps extension, and seated cable row) at 72.5% of their estimated 1RM. Participants then indicated their perceived RIR at various points during each set until reaching failure, which essentially allowed the researchers to measure the difference between predicted and actual repetitions until failure.
Similarly to the Halperin review, the study found that RIR predictions were more accurate when made closer to failure and improved in accuracy from one set to the next. At 5 RIR, the mean RIR difference was 1.2, and it reduced to 0.464 at 1 RIR. The mean RIR difference for set one was 0.955, which was significantly higher compared to set three where the mean RIR difference dropped to 0.706. Overall, though, the participants were again roughly one rep off from their actual RIR.
Additionally, factors such as sex, training experience, and prior RIR rating experience did not significantly influence the accuracy of RIR predictions.
The same group of researchers published another study on predicting RIR, this time explicitly looking at trained men. The study aimed to evaluate whether the accuracy of intraset RIR predictions in bench press exercises would improve over a six-week training program. The study involved nine trained men who participated in three bench press training sessions per week for six weeks after a one-week familiarization phase. In each session’s final set, participants noted when they thought they had four reps in reserve, and one rep in reserve, before continuing the set to momentary muscular failure. Just like with the previous Remmert et al study, the differences between predicted and actual RIR were recorded to assess prediction accuracy.
On average, subjects misestimated their RIR by about 1.1 reps when they thought they were 4 reps from failure, and by about 0.7 reps when they thought they were 1 rep from failure. The absolute value of RIR difference showed no significant changes over time, further suggesting that the overall accuracy of RIR predictions remained stable throughout the training period with an estimated marginal slope close to zero.
Furthermore, the study revealed that the number of repetitions performed had a significant effect on the accuracy of RIR predictions. Specifically, for every additional repetition performed, the raw RIR difference decreased by about 0.404 repetitions, demonstrating that participants were more accurate in their predictions as they got closer to the actual end of the set.
Another recently published study by Refalo et al sought to assess the accuracy of intraset RIR predictions in resistance-trained individuals, specifically during the bench press. The study involved 24 resistance-trained subjects (12 males and 12 females) who participated in two experimental sessions which were conducted roughly 48 hours apart. During these sessions, participants performed two sets of barbell bench press at 75% of their 1RM until momentary failure. They were asked to predict when they were at 3RIR and 1RIR, and their accuracy was then assessed by comparing the predicted RIR to the actual repetitions performed before reaching failure. Overall, participants were generally accurate in their RIR predictions, with mean absolute RIR difference accuracy of 0.65 ± 0.78 repetitions. No significant differences were noted between the three and one RIR predictions. Additionally, there were no significant differences in RIR accuracy based on gender or resistance training experience.
Interestingly, the Remmert et al studies and the Refalo et al study align with the findings of the Halperin et al review. Namely:
Most people are relatively accurate at predicting RIR, regardless of sex or training experience.
On average, most people may be off in their RIR predictions by approximately one repetition.
RIR prediction accuracy improves when performed later in a set and during lower repetition sets (≤12 repetitions).
As a bonus note, studies on powerlifters where they guided their load selection solely based on the RPE scale based on RIR have also found that powerlifters were probably relatively accurate at predicting RIR. I say “probably” as those studies did not actually assess RIR prediction accuracy but instead instructed participants to perform “daily max” single repetitions on the squat, bench press, and deadlift at an RPE of 9-9.5, meaning at an RIR of 0-1. In addition to the participants of the one study reporting an average RPE of 8.9-9.1, their peri-training single-repetition loads were either slightly below, the same, or slightly above their pre-intervention 1RM values, meaning that they were probably pretty close to a “daily max” 9-9.5 RPE single as instructed. Additionally, a classic study by Helms et al explored the relationship between average concentric velocity and RPE based on RIR across three powerlifting movements: the squat, bench press, and deadlift. The researchers sought to determine how these metrics correlate and how they could inform the prescription of exercise intensity in training regimes for powerlifters. The study involved 15 powerlifters who performed a 1RM for each lift and reported their RPE for all sets. Average concentric velocity was recorded for all attempts performed at 80% of estimated 1RM and above. The results showed very strong relationships between the percentage of 1RM and RPE for each lift, with correlation coefficients between 0.88 and 0.91, indicating that lifters’ perceptions of exertion closely matched the actual “intensity” of the lifts. There were also strong to very strong inverse relationships between average concentric velocity and RPE, indicating that as RPE scores increased, the speed of the lifts decreased.
Overall, it does indeed seem like both untrained and trained participants are relatively accurate at predicting RIR, with some relatively minor “terms and conditions” when it comes to improving their accuracy. It’s also important to note that in studies, participants perform exercises to failure and are actively monitored, gaining both a clearer sense of what training to failure really feels like, in addition to receiving feedback on their prediction accuracy. However, in everyday practice, especially for those who have never pushed a particular lift to failure, their sense of what 1 or 2 RIR feels like may not be as precise. Additionally, without a researcher monitoring their performance, a trainee who is self-noting their RIR on their training log may never realize that they are inaccurate in their RIR predictions. While lifters are generally accurate at gauging RIR, accuracy may be a bit lower in real-world contexts (i.e. lifting on your own, in the gym) than it appears to be from the literature. Despite the above, it’s not uncommon to think that we often see people overshoot or undershoot their sets regardless of repetition range, lift, or prescribed RIR. This may come down to availability bias –the cognitive bias that leads to people overestimating the likelihood of an event based on how easily examples come to mind. It may be that it’s easy to remember seeing posts on social media where people joke about overestimating their RIR or coaches complaining about trainees misjudging their RIR versus remembering somebody “just training.” Additionally, although we may think that someone is not accurately predicting their RIR, we did not have any direct evidence looking at whether our predictions as observers are likely to be right or wrong until recently. As a coach, although I will often assume that clients may be overshooting or undershooting some of their sets, I know that the only way for me to see if I was right is to actually have the client predict their RIR at various points of their sets while taking that set to failure, much like many of the studies above.
Interestingly, Emanuel et al recently looked at assessing coaches’ prediction of RIR. The study aimed to assess the accuracy with which coaches can predict the RIR a trainee has before reaching task failure during resistance training. The study involved 259 certified resistance training coaches who watched videos of trainees performing barbell squats and preacher biceps curls at either 70% or 80% of their 1RM until task failure and made RIR predictions at 33%, 66%, and 90% of the set’s completion. This design pretty much mimics how many online coaches assess the performance of trainees these days (i.e., via online video assessment).
Similarly to what we saw with trainees and predicting RIR, the coaches often underpredicted the RIR early in the sets but became more accurate or slightly overpredicted as the sets neared completion. Specifically, the average absolute prediction errors were 4.8 repetitions at the 33% point of the sets, 2.0 at 66%, and 1.2 at 90%, with accuracy improving significantly as sets neared failure. The analysis also showed that coaches were more accurate in predicting RIR for preacher curls compared to squats, and they performed better in sets with heavier loads. Interestingly, and again much like the research on trainees, the experience level of the coaches had a negligible impact on the accuracy of their predictions. The study noted that coaches’ prediction accuracy improved during subsequent sets of an exercise, suggesting a learning effect as they became more familiar with a given trainee’s performance capabilities during the session.
The authors noted that the use of video-based observation was one of the study’s limitations, highlighting that it might not be capable of capturing the full dynamics of an in-person training environment. In addition, they noted that the limited exposure to each trainee’s performance does not fully replicate the typical ongoing relationship between a coach and trainee in regular training sessions. However, I’d argue that although the above limitation is true for in-person coaching, it does not necessarily apply to online coaching. The design of the study actually has a relatively high level of ecological validity to how RIR is often judged by online coaches (ie: via video footage).
Can You Avoid Having to Estimate RIR?
Although the ability to predict RIR is important for the majority of trainees, it may not be necessary for people who are strictly training for hypertrophy and enjoy mostly training to failure. If you fall in that category, there is really no need to worry too much about your ability to predict RIR since the majority, if not all, of your sets will be taken to failure. However, asking yourself “how many reps do I think I have left?” toward the end of your sets and seeing whether your prediction is accurate is easy to do and may allow you to be confident in predicting RIR if you ever decide to stop taking all your sets to failure (eg: training to failure may not suit all exercises or you may find yourself wanting to do more volume and needing to take a step back as far as intensity of effort goes).
If you’re a strength training enthusiast or a powerlifter and for some reason you do not want to predict your RIR, then just using the traditional %1RM approach may be just fine. A 2018 study by Helms et al aimed to compare the effectiveness of using the traditional %1RM approach versus using an RPE based on RIR approach for load selection. The aim of the study was essentially to determine which method better enhances strength and muscle hypertrophy when other training variables are matched. The study included 21 trained male participants who were divided into two groups: one used percentage 1RM to determine loads while the other used RPE based on RIR to select loads that would achieve a target RPE range (ranging from 5 to 9 RPE depending on the training week). Both groups followed an eight-week daily undulating periodization program, performing squats and bench presses three times per week. Muscle thickness and strength were measured pre- and post-training. Without diving too deep into the study, Helms et al found the following:
Both groups showed significant increases in muscle thickness and 1RM strength for both squat and bench press.
There were no significant differences between the groups in terms of strength gains and muscle thickness, indicating both loading methods were effective, though the RPE group experienced a slightly (non-significantly) larger increase in squat strength.
So, with a well-constructed training program, you can certainly make great gains without needing to assess your RPE or RIR, but autoregulation may help you make slightly better gains than you’d achieve otherwise.
Practical Applications
The current literature suggests that trainees and coaches are imperfect but relatively accurate at predicting RIR. It does, however, seem like in order to be as close to perfect as possible, there are a few things that one can do in order to increase their RIR prediction accuracy. Those seem to be:
Assume that you may be underpredicting RIR by approximately one repetition. Performing an extra repetition and reassessing your perceived RIR may allow you to get some more feedback regarding your ability to predict RIR.
Take the last set of some exercises to failure while also predicting RIR during said set. Anecdotally, this may help you calibrate your ability to predict RIR for each exercise and allow you to appropriately select loads for subsequent sets if you do indeed end up either under- or over-predicting RIR. Note that I am not advising you to risk getting hurt by going for that extra repetition on squats without a spotter, but rather, to safely take a set to failure when appropriate. It may be that your ability to predict RIR is on point for exercises where rep ranges are very low and loads are high (e.g., sets of 1-3 repetitions), but you often find yourself struggling to feel confident in your RIR predictions for sets of 10-15 repetitions on various exercises. Taking a set of lat pulldowns and chest press to the point where you attempt another repetition and are unable to get it will not hurt your gains or generate an enormous amount of fatigue, but it may give you some valuable feedback regarding your ability to predict RIR. Additionally, it may also allow you to better familiarize yourself with the sensation of approaching failure, something that may differ from exercise to exercise, muscle group trained, etc.
If you do not train to failure, mostly opting for sets below 12 repetitions may also make your ability to predict RIR better. That’s not to say “never go above 12 repetitions because you won’t know whether you’re truly close to failure,” but to experiment with lower repetition ranges if you’re generally finding it difficult to feel confident in your RIR predictions during higher repetition sets.
Actively trying to predict RIR during a set, and specifically when the set is approaching the end, may also be a solid way to improve your RIR accuracy. Consciously trying to predict RIR mimics what some of the participants of the above studies were doing, and may allow you to actually be more on point with your RIR prediction versus assuming that a fixed load/rep range configuration will automatically land you in the “right” RIR.
Inside: Get an easy recipe for whole wheat Halloween sugar cookies. Bonus: You don’t need to chill the dough before rolling it out.
No tricks here: These whole wheat Halloween sugar cookies are soft, tasty, and yes, kid-approved.
The secret ingredient is whole wheat pastry flour, which creates a tender texture and mild flavor. (Don’t have it or can’t find it? I give you a few options below.)
Ingredients for Halloween Cookies
Butter: I use salted butter. If you use unsalted butter, add 1/4 teaspoon salt to the dry ingredients.
Sugar: This recipe calls for white sugar
Egg: Ideally at room temperature
Vanilla extract
Baking powder
Flour: You have a few options here–you can use:
Whole wheat pastry flour OR
Half regular whole wheat flour, half all purpose flour OR
All all-purpose flour
How to Make Whole Wheat Halloween Sugar Cookies
Line your baking sheets with parchment paper or silicone baking mats (such as Silpat mats).
In a medium bowl, stir together the flour and baking powder and set aside.
A month’s worth of dinners, figured out for you.
Grab my 4-week meal plans with recipes, shopping lists, and picky eater tips for every meal.
In a large bowl (or bowl of a stand mixer) cream butter and sugar well with your mixer on medium speed. Then add the egg and vanilla extract and mix well.
Add the dry ingredients to the wet ingredients, adding one cup of the flour mixture at a time and mixing after each addition. Be sure all the flour at the bottom of the bowl is mixed into the dough, but don’t over-mix.
Do not chill. That’s important! This dough does not work when chilled.
Divide the dough in half and form two dough balls. Roll the first one onto a lightly floured surface about 1/8″ thick. This is a soft, moist dough so make sure both your surface and your rolling pin are floured. (Cover the bowl with the other dough ball using either a kitchen towel or plastic wrap.)
Using cookie cutters, cut out shapes in the rolled-out dough. Keep rolling out remaining dough scraps until it’s gone. Repeat with the second dough ball.
Place shapes on the prepared baking sheets and bake cookies for 6-7 minutes. They may be ever-so-slightly golden brown–and may even look underdone–but if you want them to be soft, you don’t want to over-bake them! If you prefer a crisper cookie, increase the bake time by a couple of minutes, or until they are more golden brown.
Cool completely on a wire rack before frosting.
Halloween Cookies FAQ
Can I use regular whole wheat flour?
I have tested this cookie recipe a few ways. It works best with either ALL wheat pastry flour or ALL all-purpose flour or half regular whole wheat flour and half all-purpose flour.
What is whole wheat pastry flour?
Whole wheat pastry flour is made from a milder white wheat and has lower protein content than regular whole wheat flour. It’s great for cookies, muffins, and cakes (but not yeast bread). You’ll find it next to the flour in the baking section of the store or on Amazon.
What can I frost these cookies with?
I used royal icing for the cookies shown here.
How do I store these cookies?
Place cookies in an airtight container at room temperature and eat within 5-7 days for best quality.
How long do leftover cookies last?
These cookies will stay soft for days when kept in an airtight container. They’re best if eaten within 5-7 days.
Can I freeze these whole wheat sugar cookies?
Yes. Freeze the baked, unfrosted cookies in a freezer bag, pressing the extra air out before sealing. Defrost cookies, then ice with frosting.
Ingredients
1 cup (2 sticks) butter, softened to room temperature
1 cup granulated sugar
1 teaspoon vanilla extract
1 large egg
2 teaspoons baking powder
3 cups whole wheat pastry flour*
Instructions
Preheat oven to 400 degrees F. Move top rack to top one-third of oven. Line two baking sheets with parchment paper or silicone baking mat.
In a mixing bowl of bowl of a standing mixer, cream together butter and sugar. Add egg and vanilla and blend well.
In a separate bowl, stir together baking powder and flour.
Add flour mixture to butter mixture, one cup at a time, blending well after each addition. Combine just until all blended. Do not chill.
Divide dough into two balls. On a floured surface, roll each ball into a circle 1/8 inch thick. Cut out cookies, place on prepared baking sheets. Bake cookies for 6-7 minutes.
Let cookies sit one minute, then remove to a wire rack to cool completely before frosting.
Notes
*You can also use 3 cups all-purpose flour OR 1.5 cups each all-purpose and regular whole wheat flour
Recommended Products
As an Amazon Associate and member of other affiliate programs, I earn from qualifying purchases.
Olympics weight sets are considered essential for any workout enthusiast, whether a beginner or a professional. Because they are part and parcel of every workout regime, you can’t really follow any genuine workout plan if you don’t have at least one set of Olympic weights in hand.
Besides, Weights are an essential component of any fitness space. Especially if you are really serious about building muscle strength and toning down the fats, weights become indispensable. A full rack, bar, and 350+ lbs of plates can make anyone squatting a dream come true.
While all the weights look the same at a cursory glance, it isn’t really so. Some key features differentiate an Olympic weight set from a standard one. Additionally, there are several differences among even Olympic weight sets that can change the way you interact with them.
So, which ones are suitable for you? This article will delve deep into what things you should consider before purchasing an Olympic weight set. We will also be reviewing the top five best Olympic weight sets below to give you a starting point. Read on!
Top 5 Olympic Weight Sets
We have spent hours on this research to find out the top 5 Olympic weight sets available in the market today. We looked at aspects like size, coating, grip, and the overall package to bring you the best of the best during our research. Each of these weight sets is worth a shot. With that said, let’s dive right in with our top recommendations.
1. Body-Solid Rubber Grip Olympic Plates
Taking the first spot on our list are the body solid rubber grip Olympic plates. These weights are available in the form of three different sets. If you are a beginner, you can get the 255lbs version. And if you really want to get serious about gaining mass, then the 355lbs and 455lbs versions are also available.
Each of these weight sets is made of at least one pair of any plate size you may need from 2.5 pounds to 45 pounds. The diameter of the 45 pounds weight is calculated at 18 inches.
Alright, enough of the dimensions and weight measurements onto our thoughts about this weight set!
The plates come covered with a rubbery material. It provides excellent grip and prevents rust or damage in the long run. They have a metallic inner sleeve that makes them fit well, smooth, and snug on the bar.
The design is neat, and each plat looks nice with 4 openings. These openings allow convenient and solid grip. You can easily hold them to use in various exercises like weighted step-ups instead of using dumbbells.
However, they come covered in oily stuff and even have a bad smell. You will have to first wash and scrub them thoroughly to use in your home gym. Otherwise, they may stain your floor.
2. Troy USA Sports Olympic Weight Set
Ranking second on our list of the best Olympic weight sets is the Troy USA Sports weight set. These weight sets offer you 300 pounds of weight, including a 7-foot bar and a spring collar pair. In total, the set has 14 plates. Two of them are 2.5 lbs, four are 5lbs, two are 10lbs, two are 25lbs, two are 35lbs, and the rest of the two are 45lbs in weight.
Unlike the body solid weight set, there is no rubber casing for grip. Instead, there’s a grayish enamel finishing on these plates, which looks extraordinary. The inner sleeve has a nice finishing, and just by looking at it, you can tell the loading and unloading to and from the bar will be easy peasy lemon squeazy.
The bar is really good. It allows the weights to rotate independently of the grip portion. This keeps things stable and helps the movement when you are setting with plates on the floor.
But, this set has no opening for easy handling of the plates. The round edges are sure comfortable. However, can they beat tri-grip or quad-grip design? We don’t think so. The finishing itself is pretty smooth, so you may have a problem when the two combine with sweaty hands.
You will definitely need a good weight tree to deal with all the weights.
3. Gold’s Gym Olympic Plate Set
On third, we have the Gold’s Gym Olympic plate set. It comes in an extensive range, starting with 50 lbs and goes up to 250 lbs. These plates increase in 10 or 20 pounds increments. Therefore, you can get any plate combo you want for exercise.
Each of the plates has a nice metallic finishing. These feature yellow letters to help find out which one you need real quick. The overall design feels great with rounded edges and smooth touch.
Moreover, three openings let you handle the plates conveniently. Thanks to this tri-grip, you can use both or just one hand to load or unload the plate and then go for a round of any free weight exercise if you don’t want to use the dumbbells.
As for dirt or smell, our package arrived in a really nice condition. There was no dirt or smell on the plates. So, we didn’t have to clean them up. The plates were in tip-top condition, ready to start working out.
While we had no problems with our package, some users have complained about receiving different plate combinations. Other than that, we couldn’t find any problem with this plate set.
4. USA Sports 300 lbs. Olympic Weight Set
Next, we have the serious steel fitness USA sports Olympic weight set. It comes with two 45 lbs plates, two 35 lbs plates, two 25 lbs plates, two 10 lbs plates, four 5 lbs plates, and two 2.5 lbs plates. There’s also a 7 inches Olympic bar included in the package, along with a spring collar pair.
Do the math, and you will find out that all the plates add up to 255 lbs. So, where are the rest of the 45 lbs as advertised by the manufacturer? After a bit of research, we found out that the bar weighs 45lbs. Thus the entire package comes at 300lbs. That’s a bit misleading because we thought all the plates add up to 300. Bad advertising, Serious Steel Fitness!
As for the design, you can pick from three options.
There’s the regular black colored plate, grey as well as gray VTX, giving you enough options to choose one according to the aesthetics of your home gym. Looks-wise, they seem like a replica of the USA Sports weight set we discussed above.
In case you order grey or black options, know that they come with no openings. You will have to grip the plates from their edges when carrying around. It can get a bit uncomfortable, and if you have sweaty hands, there’s always a chance of dropping them off.
5. XMark Rubber Coated Tri-grip Olympic Weight Set
Finally, we have the XMark’s premium quality tri-grip Olympic weight set. Offering multiple combinations to select from, you can start with 90lbs and go as high as 355lbs in 50, 20, 10, or 5 lb increments. Therefore, you can get the combo that suits your exercise.
Like our top pick, the XMark is also coated with rubbery material for better grip. The coating keeps them from collecting rust or dust. Additionally, it also prevents them from making any noise when you smash two plates together. What’s more, they have a tri-grip opening, which is another plus.
The inner metal sleeve of the weights lets them slide on or off the bar very smoothly.
Unlike our top pick, the coating is pretty coarse. When you put the 2 plates together, they don’t nest that well. Other than this minor complaint, this weight set is an excellent option for any workout enthusiast looking to build some muscle.
Last but not least, as the rubber coating gets oily with a pungent smell, don’t forget to wash them a couple of times before using.
What to Look for When Purchasing an Olympic Weight Set
Olympic weight sets come in all different forms, sizes, and styles. Below are the factors you should keep in mind before buying an Olympic weight set for your home gym.
Weight & plate size
First things first, the most important thing to consider is weight & plate size. You need to figure out how much weight do you really need for exercise and in what combination. How much weight can you utilize without causing any injury? Mostly, a weight set will have at least one pair of all plate sizes. But, it’s not always a good option for you.
A beginner will be fine with not more than the standard 255lbs set. Anything more, and you will just be adding to the equipment that you don’t really need. However, if you have been training for a while and are an advanced weight lifter, you will have to get at least 2 or 3 pairs of 45-pound plates for your exercises.
You don’t want to load up the bar with 8 plates of different sizes in order to get to that 225 pounds mark. It’s not only inconvenient but also pretty time and effort-consuming. So, avoid that altogether.
Coating
As you must have noticed by going through the reviews, there are two options for protective coating. You can either go with a rubber coating or no coating at all (bare metal). Which ones are better, and what should you opt for? The answer will depend on your preferences.
Rubber coating makes the plates noiseless. It allows better handling, and the plates won’t get any rust over time. Its downside is the smell. When it’s new, the smell and oily grip can be a bit too much to handle. You will have to wash each and every plate thoroughly before exercising.
The rubber coating also makes the plates bulkier. They will require more space and may not fit snug next to each other.
On the other hand, bare metal plates are less bulky. They nest really well together. Their downside is that they are a lot noisier and can start getting rust if you live in a moist temperate zone. They are also a bit slippery as there’s nothing to provide a firm grip.
Grip
When it comes to grip, there are multiple options as well. You can go with the plates that don’t come with any openings. You will have to hold them by their sides when carrying around or when you’re loading/unloading the weight bar. Obviously, they are a bit tricky to handle – especially for a beginner.
Then there are plates with openings. You can find various different models. Some have two openings, while others come with three or even four openings. Such plates are very easy to grip. You can pick them up with the help of the holes and hold them easily as you perform exercises such as step-up or a walking lunge, etc.
Package
Finally, check whether the manufacturer is offering something else in the package to sweeten the deal?
Most of the time, vendors include a 7 inches standard Olympic bar in the package. Some others also include a pair of spring collars. But, you have to be careful because when there’s a package deal such as this, manufacturers subtract the bar’s weight from the total weight.
That means if they are advertising it as a 300lbs package, you will only get 255lbs worth of plates (after subtracting the 45lbs of the bar). This can be confusing for beginners.
Conclusion
So, that’s all you need to know about the best Olympic weight sets. It must have become very clear now that a weight set must-have equipment for any home gym. This is because you have to use these plates daily. So, don’t compromise on quality and make sure that you only get the package which you like best. Always consider your personal training needs before making the decision.
Consider how much weight you will be lifting, what plate combination will be convenient, what design and grip will suit your requirements. All of these are important questions. Better write answers to these questions on paper to remember them when you go out to make a purchase.
If you are still unsure about which weight set will better suit your needs, we are here with our top recommendation: Get the Body-Solid Rubber Grip Olympic Plates. These plates allow you to get different plate combos, and you can even use them for free weight exercises. Pretty sweet, right?
That’s all for now! Thank you for staying with us, and good luck!
By Miranda Dunnam, CCLS – March of Dimes NICU Family Support Program Coordinator
Whether just for a few hours or a couple of months, having a baby in the NICU is incredibly stressful for parents. It may be hard to think about taking care of yourself during this time because you’re so focused on your baby’s needs. However, physically and emotionally caring for yourself helps ensure you stay well and have the energy to spend with your new baby. Below are a few tips to help you through your time with a baby in the NICU.
Physical Health Tips:
Listen to your providers. Moms, make sure you follow all directions from your medical team about your postpartum care. While your baby needs extra care, you are still recovering from childbirth. Take all medicines and keep all follow-up appointments.
Stick to a daily routine. All NICU caregivers need to eat healthy foods and meals and drink water regularly. It helps to set alarms because caregivers often lose track of time while recovering and being in the NICU. A very helpful idea is to have family and friends send individually packed snacks and bottled water for quick nourishment while at the NICU and while recovering at home.
Some ideas include apple slices with peanut butter, juices, granola bars, sandwiches, popcorn, and pre-cut fruit and vegetables.
Get a good night’s sleep. It is very hard to sleep when your baby is in the NICU, but sleep is essential for good health. We recommend that NICU parents speak to the NICU social worker and/or your own medical provider if you are unable to sleep during your baby’s NICU stay. You will not sleep all night, but a good four-hour stretch each night is helpful.
Mental Health Tips:
Come to the NICU as much as you can. Get to know your baby. Help us learn about their patterns, likes, dislikes and communication. Let your baby hear your voice and feel your touch-they are comforting and familiar to your baby.
Hold your baby. Holding your baby is some of the best medicine for babies and parents. Sometimes babies are too sick to be held, so ask the NICU staff how to provide a healing touch (hand hug or containment hold). Holding a baby relieves anxiety for the baby and the parents, so skin-to-skin holding is always our goal when the baby is ready.
Ask for support. Woman’s is proud to partner with March of Dimes to offer the NICU Family Support Program, including a NICU Family Support Program Coordinator on staff. This premier program offers family education, staff training on family-centered care and an improved patient experience with the help of March of Dimes experts. We encourage you to participate in the provided activities and ask the NICU staff if you need more information.
Understand your emotions. Please remember that every emotion you feel is a normal reaction to an abnormal situation. Having a baby in the NICU is very stressful for parents. Most parents of babies in the NICU feel many positive and negative feelings at the same time. This is because your heartfelt connection with your baby includes both joy and pain.
There is no “normal” way to feel. You and your partner or support person may react or feel differently. Share your experiences and listen with empathy so that you can each feel supported and heard.
Take breaks from the NICU. Allow yourself to leave your baby’s side when you can. While your baby needs you, it is also important to make time for yourself, your partner, and your other children. Take time to do things you enjoy like read a book, listen to music, or exercise. These restful breaks will help you find the strength to keep going.
Keep a journal. Expressing your feelings on paper can help you cope with your emotional changes. A journal also strengthens your hope and patience by reminding you how far you and your baby have come.
Vent your frustrations. If your baby has a setback, you may be plunged back into fear and anxiety. Voice your worries and concerns with your NICU team. We are here for you.
Celebrate when you can. It is okay to experience joy when your baby makes progress. We love to celebrate baby’s developmental milestones and have many printed Milestone Cards to show off progress!
Explore your spiritual side. It might be helpful to reflect and lean on your spiritual beliefs. You may find comfort in talking with a pastor, priest, rabbi, minister, or imam. It is normal for a NICU experience to challenge your religious and spiritual beliefs; however, prayer, meditation, or quiet reflection can help you find emotional strength and hope during this challenging time. Woman’s has a chapel on the first floor near the cafeteria and we have chaplains who visit the NICU regularly.
Accept the support of others. It may seem difficult, but it is okay to ask for and accept help. Let people know how they can best help and support you. This could include asking for a meal or snacks for you and your family at home or the hospital, help with older children, or transportation to and from the hospital. You want to share the baby’s progress on social media and they can help with this.
While these tips are a good starting point, many NICU parents need more. NICU parents often need to meet with their own medical provider(s) for postpartum depression and/or postpartum anxiety. Any major changes in your feelings or everyday life are worth exploring with your doctor or other healthcare professionals. If you find yourself needing additional support, ask your child’s NICU social worker for help finding the right option.
*Information provided by March of Dimes and Woman’s Hospital.
There is a lot of buzz surrounding healthy morning routines and starting your day the right way. This is super important to our productivity and health. But what about evening routines? Are they not just as important? Of course they are! The better-quality sleep you get will result in an easier, more productive start to your day. Creating an effective evening routine is simple once you understand what it means to stay in sync with your circadian rhythm. This means that we are all wired to tone down our days as the sun sets as less cortisol is available for us. If we constantly chip away at our cortisol reserves because we want to work on unfinished business or schoolwork, we will have less access to us when we need it. To learn more about our circadian rhythm see this blog https://blog.totalgymdirect.com/what-is-circadian-rhythm-and-why-is-it-important
Here are my top five tips to perfecting your evening routine so that you can benefit from the gift of good sleep that leads to longevity and health
1) Finish your last meal by 7:00, so that your body can focus on digesting the food from the day. Our digestive journey is quite complex and begins around 8:00 pm. If you eat late you interfere with this process, and it can affect your ability to fall asleep. Snacking or even drinking after dinner is also not recommended. Herbal tea or just water is fine
2) Aim to be in bed the same time every night. The hours between midnight and 4:00 am are when the body is detoxifying and repairing and releasing growth hormones. The liver is also very hard at work. Getting into bed by 10:00 pm will help us fall into that deep sleep allowing these processes to take place with ease
3) Keep all artificial lights like computers, phones, TV’s, out of the bedroom. They suppress melatonin levels in the blood and therefore interfere with our ability to fall into that deep sleep. Clients often tell me that they use their cell phone as an alarm clock. This is not necessary and does affect us in a negative way even if on airplane mode
4) Start your wind down at least 90 minutes before bed. This translates to shutting down your computers and stopping scrolling on social media. Exposure to these lights before bedtime shortens melatonin production and can be stressful! These evening hours are better spent going for a walk, listening to music, spending time with family or friends etc., a relaxing bath etc.
5) The bedroom should be dark, quiet, and cool. Plants can help to increase oxygen. Having a glass of water close by is a good idea as we lose water even in our sleep!
To conclude, there is a lot that goes on in our bodies to support our health while we sleep. If you are a night owl and dismiss the importance of sleep, here is what you may be missing out on if you only sleep a few hours each night
* Increased glucose metabolism in the brain supporting memory and learning
*Proper hormone production
*Improved blood supply to muscles
*Strengthening of the immune system, tissues, and bones
The post Tips to Perfect your Evening Routine appeared first on Total Gym Pulse.
Everyone has different fitness goals they want to hit, whether it’s building muscle, losing fat, or both. If you’ve ever tried doing both at the same time, you know how tricky it can be. The diets and exercises required for losing fat and gaining muscle often seem at odds—one needs a calorie deficit, the other a surplus. You may worry about losing muscle while trying to lose fat or fear gaining fat while building muscle. It feels like you can’t win!
Well, good news: You can have the best of both worlds. With the right strategies, it’s totally possible to burn fat and build muscle at the same time.
Let’s walk through how to achieve this with a focus on smart calorie management and training.
Before moving forward, let’s clarify some key terms. What we’re really talking about when we say “build muscle and lose fat at the same time” is improving your body composition. This means changing the ratio of fat to lean mass (muscle, bone, organs, etc.) in your body.
Improving your body composition isn’t about getting as skinny as possible or bulking up like a bodybuilder. Instead, it’s about reshaping your body so you have more muscle and less fat—creating that lean, toned look.
Here’s the tricky part: losing fat typically requires you to eat fewer calories than you burn, while gaining muscle usually means you need to consume more calories than you burn to give your body the energy and nutrients needed for muscle growth. How can you do both?
The answer is calorie management, specifically calorie cycling.
Calorie cycling is a flexible eating strategy where you adjust your calorie intake based on your activity levels throughout the week. This allows you to provide your body with enough fuel to build muscle on training days and promote fat loss on rest or low-activity days. Think of it as working with your body’s natural energy needs instead of against them.
How Calorie Cycling Works
Your body can do three things with the calories you eat:
Use them for immediate energy (like during a workout).
Use them to repair and grow muscles.
Store them as fat.
When you’re trying to lose fat, the goal is to prevent your body from storing excess calories as fat. On the flip side, to build muscle, you want to make sure your body has enough energy to repair and grow muscle tissues after workouts.
With calorie cycling, you’ll eat more calories on workout days to fuel your training and help repair your muscles. On rest days or cardio-only days, you’ll eat slightly fewer calories, so your body uses fat stores for energy instead of muscle.
Finding Your Maintenance Calories
The first step in calorie cycling is figuring out your maintenance calories—the number of calories your body needs each day just to function and maintain your current weight. This includes energy for things like breathing, digestion, and basic movement.
You can calculate your maintenance calories using online calculators, which take into account factors like your age, weight, height, and activity level. If you work with a personal trainer or health professional, they can help you dial in these numbers too.
Once you know your maintenance calories, the next step is adjusting your intake based on your workout routine.
Adjusting Calories for Training Days and Rest Days
On workout days, especially when you’re lifting weights or doing intense exercise, aim to consume a small calorie surplus—about 5-10% above your maintenance calories. This ensures your muscles have enough fuel to recover and grow after your workout. Protein intake becomes even more crucial if you’re in a muscle-building phase. Focus on lean protein sources like chicken, fish, or plant-based options to repair muscles and stimulate growth.
Aim for a slight calorie deficit on cardio or rest days—maybe 5-10% fewer calories than your maintenance level. This encourages your body to burn stored fat for energy without sacrificing muscle mass. The goal is to burn more calories than you take in, but not to the point where you start losing muscle.
This balance can seem tricky at first, but over time, your body will adapt to these changes, and you’ll start seeing results.
While calorie cycling helps you manage your intake day-to-day, you’ll also hear people talk about bulking and cutting cycles for long-term muscle gain and fat loss. These are longer phases where you either focus more on building muscle (bulking) or losing fat (cutting).
Bulking: Focus on Muscle Growth
During a bulking phase, the goal is to gain muscle by eating more calories than you burn—typically around a 10-20% calorie surplus. For example, if your maintenance level is 2,500 calories, you might eat between 2,750 and 3,000 calories per day during bulking.
It’s important to remember that bulking is not about eating junk food and gaining as much weight as possible. Focus on nutrient-dense foods like lean proteins, complex carbohydrates, healthy fats, and vegetables to support muscle growth. You want to gain muscle, not unnecessary fat.
Common foods for bulking include:
Proteins: Lean meats, fish, eggs, protein shakes
Carbs: Whole grains, oats, sweet potatoes, rice
Fats: Avocado, nuts, seeds, olive oil
Cutting: Lose Fat Without Losing Muscle
After a bulking phase, you might switch to a cutting phase to shed fat and reveal the muscle you’ve built. Cutting involves creating a calorie deficit—typically about 500 calories less than your maintenance level. If your maintenance level is 2,500 calories, you’d aim for around 2,000 calories a day while cutting.
Even though you’re eating fewer calories, keeping your protein intake high and continuing strength training is crucial. This helps prevent muscle loss while you focus on burning fat. You can include foods like:
Lean proteins: Chicken, turkey, egg whites, low-fat fish
Fibrous carbs: Vegetables, brown rice, quinoa
Healthy fats (in moderation): Olive oil, seeds, nuts
Cutting can be tough on your energy levels, especially during intense workouts. However, the results—losing fat while maintaining muscle—are worth it.
One of the keys to balancing fat loss and muscle gain is managing your macronutrients (protein, carbs, and fats). While calorie intake is essential, what you eat matters just as much. Each macro serves a specific function:
Protein repairs and builds muscle.
Carbohydrates provide energy for workouts.
Fats support hormone production and overall health.
Aiming for a diet high in protein, moderate in carbs, and low in unhealthy fats can maximize both muscle growth and fat loss. During both bulking and cutting phases, it’s important to adjust these macronutrients in line with your calorie needs.
Now, let’s talk about exercise. You need a balance of strength training and cardio to successfully lose fat and build muscle,
Strength training is key to building muscle. Aim to lift weights at least 3-4 times a week, focusing on compound movements like squats, deadlifts, and bench presses that work multiple muscle groups. This stimulates muscle growth and burns calories.
Cardio, on the other hand, helps you burn fat and improve heart health. Incorporate a mix of low-intensity cardio (like walking or cycling) and high-intensity interval training (HIIT) for maximum fat burning.
The right combination of strength training and cardio will help you achieve a lean, muscular body without sacrificing one goal for the other.
Changing your body composition—losing fat while gaining muscle—takes time, patience, and consistency. By using strategies like calorie cycling, balancing macros, and incorporating strength training with cardio, you’ll be on your way to achieving your fitness goals.
Remember, everyone’s body responds differently to training and diet. It’s important to listen to your body, track your progress, and adjust as needed. Be kind to yourself during the process, and celebrate the small wins along the way!
Wall ball exercises are a staple in strength training workouts for their benefits to strength, power, and coordination. And because these exercises generally work all four limbs, you’re sure to get a full-body workout.
If you’re up for a rounded test of your fitness, then we dare you to take the wall ball challenge. Read on for more on how to incorporate wall ball exercises into your routine.
What Are Wall Ball Exercises?
Wall ball exercises offer a compound, high-energy workout that involves throwing a weighted medicine ball against a wall or other hard upright surface. Many moves incorporate a lower-body component, combining the throw with a squat, a lunge, or a side shuffle, making it a full-body exercise with a high cardiovascular demand.
Note that wall ball exercises are different from stability ball exercises, which involve a large, inflatable ball that most often remains on the floor and is used by the body for leverage. Wall ball exercises, conversely, require a smaller ball that is used specifically for throwing.
How to Choose a Medicine Ball
Medicine balls come in a range of weight options that generally run from five- to 30-pound loads. Typically, you’ll choose a wall ball based on your body size and the type of exercise you’re doing. Select lighter balls for speed training and heavier balls for power and strength workouts.
There are two different types of balls to choose from: One is rubbery and bounces a lot, while the other larger, softer ball bounces very little. Each type of medicine ball customarily has a padded outside layer so that it can be gripped and caught easily.
How to Do a Wall Ball Exercise
Although there are many different wall ball exercises, the following is a tried-and-true wall ball movement designed to hit many muscles at once.
Stand about two feet in front of a wall with your feet hip-width apart. Keep the wall ball between your hands at chest height. Squeeze your elbows into your sides.
Sink into a squat until the crease of your hip is at or below your knees. Descend as low as you can, while maintaining a neutral arch in your spine. Keep the ball close to your chest on the way down.
Keeping your chest up, push your body away from the floor and throw the ball at the wall, aiming for a spot about eight feet off the ground.
Catch the ball following contact with the wall and sink back into your next squat.
Repeat the exercise.
Benefits of Wall Ball Exercises
“Wall ball exercises are excellent additions to your fitness arsenal,” says Alison Heilig, a CrossFit coach, and NASM-certified personal trainer. Here are just a handful of reasons why we agree with Heilig.
1. Engage multiple muscle groups
It’s pretty tough to find a wall ball exercise that doesn’t work for multiple major muscle groups. Most moves combine upper- and lower-body engagement, “and work basically your entire body in one compound movement,” Heilig says. You can build strength in your shoulders, core, chest, arms, glutes, and legs in a single rep.
2. Build explosive power
Wall ball exercises are a great way to add some explosive power to your training, says Holly Janiszewski, a Minneapolis-based personal trainer and founder of Holly J Fitness. The important difference between power and strength is that power is force (strength) combined with speed.
It requires a significant amount of force to slam the medicine ball against the wall and, over time, you may notice an increase in power that allows you to throw the ball harder and faster.
3. Boost your heart rate
Because wall ball exercises recruit an impressive number of muscle groups, they’re good at getting you sweaty and breathless. So you’ll benefit from adding a few to a HIIT or circuit training routine to jack up your heart rate. You can create more of a cardio focus by choosing a lighter ball that can be thrown for more reps at a faster pace, Heilig says.
4. Improve balance and coordination
No matter which variation you choose, wall ball exercises can help you develop greater balance and coordination. To perform any wall ball exercise, you need to coordinate your mind and body.
Wall Ball Exercise Variations
Performing variations on wall ball exercises is a sure way to beat boredom. The following wall ball exercises build on the basic move for a more challenging workout.
1. Standing chest pass
To target your shoulders, chest, and arms, try the standing chest pass.
Stand at least three feet away from the wall with your feet shoulder-width apart (soften your knees to protect your joints). Hold the a soft wall ball between your hands at chest height.
Engage your core and press down into the floor with your feet. Explosively throw the wall ball into the wall as hard as possible and catch it on its return.
Continue to throw the ball back and forth repeatedly for reps.
2. Chest pass with lateral shuffle
Not only does this exercise work your shoulders, chest, and arms, it also spikes your heart rate with quick, lateral movements.
Follow the same instructions for the chest pass, but shuffle laterally from side to side (about 15 feet) as you throw the ball against the wall. So, throw, shuffle, throw, shuffle.
3. Wall ball side slam
As you rotationally slam the ball against the wall, you’ll engage all the muscles that comprise your core.
Stand sideways with your left shoulder a little more than arms-length away from a wall. Place your feet shoulder-width apart. Hold a wall ball with both hands at belly height and extend your arms out in front of you. Soften your elbows.
Twist your torso away from the wall toward the center of the room. Then, turn your torso quickly back toward the wall to throw the ball against the wall as hard as possible.
Catch the ball on the rebound and repeat continuously for the assigned rep count. Turn and repeat the drill on the other side.
4. Split-stance lateral toss
The split stance lateral toss exercise targets multiple major muscle groups (shoulders, core, chest, arms, glutes, and legs), while challenging balance.
Hold a wall ball with both hands at your chest and stand sideways about arms-length away from a wall. Come into a split-leg, lunge with both of your legs bent to 90 degrees. With the right side of your body turned towards the wall, step your left foot forward and your right foot back. Track your front knee vertically over your shin. Hover your back knee above the floor.
Bring the ball to your outside hip, then twist your torso and toss the ball against the wall as hard as possible.
Catch the ball on the rebound and immediately bring it back to your outside hip. Repeat for reps, then repeat the drill with the left side of your body turned towards the wall.
Wall ball exercises are tough, but they’re also fun — especially if you need to blow off some steam after a frustrating day. Try out any variation at the end of a bad week, and you’ll see what we mean.
Intermediate Difficulty with Advanced Modifications provided
Today’s workout will work your full body as we look to improve strength and lean muscle while simultaneously burning fat. You’ll need dumbbells and we recommend having a few pairs available so that you can switch up the weight depending on the movement and muscle group. You may also want a chair, box, or bench, but it isn’t required. This routine will be performed Tabata style, so we’ll perform 4 rounds of each exercise. You’ll complete as many repetitions as you can in 20 seconds and then rest for 10 seconds. Tabata workouts are proven to burn significant calories in a short period of time. Let’s work!
Warm up Squat to Overhead Ext Downward Dog to Multiplanar Lunge Side Leg Swings
Tabata HIIT Workout
Forward Lunge to Row Half-Kneeling Neutral Press + Iso-Hold DB Clean + Front Squat + Calf Raise Wall Hammer Curl + Lateral Raise Wide Push Ups / from Incline Iso-Hip Up + DB Pullover Goblet Cossack Squat High Plank Triceps Kickback / from Incline
Cool Down Kneeling Hip Flexor Stretch 90-90 Hip Stretch Seated V-Sit Reach to Scarecrow
It’s becoming common knowledge that knowing what oils and fats are healthiest to eat and cook with is important. Perhaps just as important, but often less discussed, is how we cook with those oils.
Cooking oils incorrectly for the types of fats they contain can damage them and make what would otherwise be a healthy choice into one that supports inflammation and contains carcinogens.
But with a little knowledge and some easy swaps, the right oils for the right meals can be both delicious and health-supporting.
What is “Smoke Point” and Why is it Important?
When we talk about oils, what we are really speaking of is fats, or fatty acids. Fat, along with carbohydrates and protein, is a macronutrient necessary for body functions. Fats come in many forms, both from animal and plant sources. They can be solid or liquid and are a combination of different types.
These types are based on the structure of the lipid molecule and whether single or double bonds are found at key junctures. Saturated fats have only single bonds and are more stable, while unsaturated fats have double bonds that are more susceptible to damage. A monounsaturated fat has one double bond but a polyunsaturated fat has more, making it even more sensitive.
While all fats contain a mix of fatty acid types, we call a fat by the type found in the highest levels.
These differences in the structures of fats lend different oil characteristics that may make it better for varying usage. The most important factor is a fat’s smoke point.
The Smoke Point and Oxidation
The smoke point is the temperature at which a fat burns, releasing smoke. That smoke is an indication of oxidation.
Unfortunately, there is research pointing to oils producing oxidation products even prior to that smoke point. These oxidation products include aldehydes, which can impair cellular function and are linked to cancer and cardiovascular disease.
The consumption of oxidized fats has been linked to a number of health concerns, including atherosclerosis, Alzheimer’s disease, cancer, and accelerated aging. This is due in part to the release of free radicals that promote inflammation in the body.
One of the biggest problems is that there is much conflicting information about what the smoke points for each oil and fat are. Refining an oil raises its smoke point but may also deplete certain nutrients.
The best way to approach these fats is with a range in mind, which can guide what type of cooking (or not cooking at all) is suitable.
Olive Oil
Partially due to its place in the well-touted Mediterranean Diet, olive oil has been regarded as one of the healthiest fat options. But olive oil is high in monounsaturated fats, so while it is not especially sensitive to heat, it cannot tolerate high heat. For higher temperatures, olive oil that is more refined and not virgin is better but contains fewer antioxidants.
Smoke point: Extra virgin 320-350°, virgin 410-420°
Usage: Great for drizzling after cooking, can be used for a light sauté
Flavor: Extra virgin has a stronger, sometimes grassier flavor, but olive oil in general tends to have a mild flavor that is especially good for savory dishes
Coconut Oil
Often vilified for its high saturated fat content, coconut oil has been used in parts of the world for thousands of years. Coconut oil, a solid at room temperature, requires very little refining and is very shelf-stable. More refined versions have a milder and less sweet flavor but are lower in naturally occurring nutrients. The saturated fat in this oil has not been found to increase the risk of heart disease and can in fact be part of a healthy diet.
Smoke point: Unrefined 350°, refined 400°
Usage: Because of its higher smoke point, it can be used in most cooking except for high-heat roasting and grilling
Flavor: Has a distinct coconut flavor that pairs well with sweet dishes, refined versions are milder
Avocado Oil
High in monounsaturated fat, avocado oil is a wonderful alternative to the very refined canola oil (aka rapeseed oil). Its mild flavor and higher smoke point have helped this oil blow up in popularity in recent years. While not the cheapest oil, and therefore not usually used for frying despite its smoke point, avocado oil is versatile and rich in vitamins.
Smoke point: 520°
Usage: Great for baking, roasting, sautéing and just about any other forms of cooking
Flavor: Very mild so it works for both sweet and savory dishes
Butter and Ghee
Besides being delicious, butter can be a great cooking option, with ghee being a better one for higher temperatures. Ghee, or clarified butter, has had the proteins removed, allowing it to stand up to higher heat without burning. Butter is a saturated fat and stays solid at a higher temperature than coconut oil, which is why it is often used in baking. Grass-fed butter will have the highest level of nutrients, including vitamin K, as well as A, D, and E.
Smoke point: butter 350°, ghee 485° (assuming highest purity or removal of milk solids)
Usage: Butter is perfect for baking, ghee works well for roasting and even grilling, but just about anything
Flavor: Buttery of course! Choose unsalted in order to control salt levels yourself
Animal Fats
Lard from pigs or tallow from cows can be a surprisingly good cooking fat, despite what many of us were raised to believe. For those who grew up in the heyday of margarine, lard was always considered a four-letter word. But as long as you can find clean, pasture-raised products, lard and tallow are healthy saturated fats with a medium-high smoke point.
Smoke point: 370°
Usage: If you are roasting meat and need added fat, these are a perfect option
Flavor: Very savory and distinct
Omega-3s
Omega-3 fatty acids, like fish, hemp, and flax oils, are polyunsaturated fats. These are great for cardiovascular and brain health but should not be heated at all. In fact, they should be stored in the fridge because of their sensitivity to heat.
The danger in cooking oils and fats at or beyond their smoke point comes in creating carcinogenic compounds. Plus they gain a burnt flavor as well. The best way to avoid this is to know the right cooking styles for all the amazing and healthy fats out there.
There are so many to choose from, each with its own benefits. This is why keeping a variety of oils in your kitchen will give you the most options, depending on what and how you’re cooking.
Roasting meat and veggies? Grab some lard!
Baking some sweet goodies? Maybe butter is better!
Pan cooking a stir fry? Olive oil can work wonders!
Have fun with trying out different combinations based on these smoke points. Still don’t know where to start? Try this Shrimp Taco recipe. Or this one for a Vegetable Bean Soup.
If you love learning how to cook in a nourishing and healthy way, you’ll love the Nutrition Therapy Institute’s Natural Food Chef program. If you’d like to know more about the program and all the career paths you can utilize with your certification, you can attend a live cooking demonstration. There are many upcoming dates to choose from!
About the author: Maya Strausberg earned her Master Nutrition Therapist certification from NTI before starting her nutrition therapy private practice. She now offers writing and editing services for nutritionists and other health practitioners around the world through her business, Family Tree Nutrition.
Images: Photo by Frank Zhang on Unsplash; Photo by Sebastian Coman Photography on Unsplash