Home Blog Page 57

4 Wall Ball Exercises That Work Your Entire Body

0
4 Wall Ball Exercises That Work Your Entire Body

Wall ball exercises are a staple in strength training workouts for their benefits to strength, power, and coordination. And because these exercises generally work all four limbs, you’re sure to get a full-body workout.

If you’re up for a rounded test of your fitness, then we dare you to take the wall ball challenge. Read on for more on how to incorporate wall ball exercises into your routine.

What Are Wall Ball Exercises?

Wall ball exercises offer a compound, high-energy workout that involves throwing a weighted medicine ball against a wall or other hard upright surface. Many moves incorporate a lower-body component, combining the throw with a squat, a lunge, or a side shuffle, making it a full-body exercise with a high cardiovascular demand.

Note that wall ball exercises are different from stability ball exercises, which involve a large, inflatable ball that most often remains on the floor and is used by the body for leverage. Wall ball exercises, conversely, require a smaller ball that is used specifically for throwing.

How to Choose a Medicine Ball

Medicine balls come in a range of weight options that generally run from five- to 30-pound loads. Typically, you’ll choose a wall ball based on your body size and the type of exercise you’re doing. Select lighter balls for speed training and heavier balls for power and strength workouts.

There are two different types of balls to choose from: One is rubbery and bounces a lot, while the other larger, softer ball bounces very little. Each type of medicine ball customarily has a padded outside layer so that it can be gripped and caught easily.

How to Do a Wall Ball Exercise

4 Wall Ball Exercises That Work Your Entire Body

Although there are many different wall ball exercises, the following is a tried-and-true wall ball movement designed to hit many muscles at once.

  • Stand about two feet in front of a wall with your feet hip-width apart. Keep the wall ball between your hands at chest height. Squeeze your elbows into your sides.
  • Sink into a squat until the crease of your hip is at or below your knees. Descend as low as you can, while maintaining a neutral arch in your spine. Keep the ball close to your chest on the way down.
  • Keeping your chest up, push your body away from the floor and throw the ball at the wall, aiming for a spot about eight feet off the ground.
  • Catch the ball following contact with the wall and sink back into your next squat.
  • Repeat the exercise.

Benefits of Wall Ball Exercises

“Wall ball exercises are excellent additions to your fitness arsenal,” says Alison Heilig, a CrossFit coach, and NASM-certified personal trainer. Here are just a handful of reasons why we agree with Heilig.

1. Engage multiple muscle groups

It’s pretty tough to find a wall ball exercise that doesn’t work for multiple major muscle groups. Most moves combine upper- and lower-body engagement, “and work basically your entire body in one compound movement,” Heilig says. You can build strength in your shoulders, core, chest, arms, glutes, and legs in a single rep.

2. Build explosive power

Wall ball exercises are a great way to add some explosive power to your training, says Holly Janiszewski, a Minneapolis-based personal trainer and founder of Holly J Fitness. The important difference between power and strength is that power is force (strength) combined with speed.

It requires a significant amount of force to slam the medicine ball against the wall and, over time, you may notice an increase in power that allows you to throw the ball harder and faster.

3. Boost your heart rate

Because wall ball exercises recruit an impressive number of muscle groups, they’re good at getting you sweaty and breathless. So you’ll benefit from adding a few to a HIIT or circuit training routine to jack up your heart rate. You can create more of a cardio focus by choosing a lighter ball that can be thrown for more reps at a faster pace, Heilig says.

4. Improve balance and coordination

No matter which variation you choose, wall ball exercises can help you develop greater balance and coordination. To perform any wall ball exercise, you need to coordinate your mind and body.

Wall Ball Exercise Variations

Performing variations on wall ball exercises is a sure way to beat boredom. The following wall ball exercises build on the basic move for a more challenging workout.

1. Standing chest pass

Athlete Does Wall Ball Chest Pass | Wall Ball Exercise

To target your shoulders, chest, and arms, try the standing chest pass.

  • Stand at least three feet away from the wall with your feet shoulder-width apart (soften your knees to protect your joints). Hold the a soft wall ball between your hands at chest height.
  • Engage your core and press down into the floor with your feet. Explosively throw the wall ball into the wall as hard as possible and catch it on its return.
  • Continue to throw the ball back and forth repeatedly for reps.

2. Chest pass with lateral shuffle

Athlete Does Wall Ball Chest Pass Shuffle | Wall Ball Exercise

Not only does this exercise work your shoulders, chest, and arms, it also spikes your heart rate with quick, lateral movements.

  • Follow the same instructions for the chest pass, but shuffle laterally from side to side (about 15 feet) as you throw the ball against the wall. So, throw, shuffle, throw, shuffle.

3. Wall ball side slam

Athlete Does Side Slam | Wall Ball Exercise

As you rotationally slam the ball against the wall, you’ll engage all the muscles that comprise your core.

  • Stand sideways with your left shoulder a little more than arms-length away from a wall. Place your feet shoulder-width apart. Hold a wall ball with both hands at belly height and extend your arms out in front of you. Soften your elbows.
  • Twist your torso away from the wall toward the center of the room. Then, turn your torso quickly back toward the wall to throw the ball against the wall as hard as possible.
  • Catch the ball on the rebound and repeat continuously for the assigned rep count. Turn and repeat the drill on the other side.

4. Split-stance lateral toss

Athlete Does Wall Ball Lateral Toss | Wall Ball Exercise

The split stance lateral toss exercise targets multiple major muscle groups (shoulders, core, chest, arms, glutes, and legs), while challenging balance.

  • Hold a wall ball with both hands at your chest and stand sideways about arms-length away from a wall. Come into a split-leg, lunge with both of your legs bent to 90 degrees. With the right side of your body turned towards the wall, step your left foot forward and your right foot back. Track your front knee vertically over your shin. Hover your back knee above the floor.
  • Bring the ball to your outside hip, then twist your torso and toss the ball against the wall as hard as possible.
  • Catch the ball on the rebound and immediately bring it back to your outside hip. Repeat for reps, then repeat the drill with the left side of your body turned towards the wall.

Wall ball exercises are tough, but they’re also fun — especially if you need to blow off some steam after a frustrating day. Try out any variation at the end of a bad week, and you’ll see what we mean.

20 Min Dumbbell Tabata Workout – HASfit

0
20 Min Dumbbell Tabata Workout – HASfit


Intermediate Difficulty with Advanced Modifications provided
20 Min Dumbbell Tabata Workout – HASfit20 Min Dumbbell Tabata Workout – HASfit

Today’s workout will work your full body as we look to improve strength and lean muscle while simultaneously burning fat. You’ll need dumbbells and we recommend having a few pairs available so that you can switch up the weight depending on the movement and muscle group. You may also want a chair, box, or bench, but it isn’t required. This routine will be performed Tabata style, so we’ll perform 4 rounds of each exercise. You’ll complete as many repetitions as you can in 20 seconds and then rest for 10 seconds. Tabata workouts are proven to burn significant calories in a short period of time. Let’s work!

Warm up
Squat to Overhead Ext
Downward Dog to Multiplanar Lunge
Side Leg Swings

Tabata HIIT Workout

Forward Lunge to Row
Half-Kneeling Neutral Press + Iso-Hold
DB Clean + Front Squat + Calf Raise
Wall Hammer Curl + Lateral Raise
Wide Push Ups / from Incline
Iso-Hip Up + DB Pullover
Goblet Cossack Squat
High Plank Triceps Kickback / from Incline

Cool Down
Kneeling Hip Flexor Stretch
90-90 Hip Stretch
Seated V-Sit Reach to Scarecrow

Best Cooking Oils: Understanding Smoke Points for Health

0
Best Cooking Oils: Understanding Smoke Points for Health

It’s becoming common knowledge that knowing what oils and fats are healthiest to eat and cook with is important. Perhaps just as important, but often less discussed, is how we cook with those oils.

Cooking oils incorrectly for the types of fats they contain can damage them and make what would otherwise be a healthy choice into one that supports inflammation and contains carcinogens.

But with a little knowledge and some easy swaps, the right oils for the right meals can be both delicious and health-supporting.

What is “Smoke Point” and Why is it Important?

When we talk about oils, what we are really speaking of is fats, or fatty acids. Fat, along with carbohydrates and protein, is a macronutrient necessary for body functions. Fats come in many forms, both from animal and plant sources. They can be solid or liquid and are a combination of different types.

These types are based on the structure of the lipid molecule and whether single or double bonds are found at key junctures. Saturated fats have only single bonds and are more stable, while unsaturated fats have double bonds that are more susceptible to damage. A monounsaturated fat has one double bond but a polyunsaturated fat has more, making it even more sensitive.

While all fats contain a mix of fatty acid types, we call a fat by the type found in the highest levels.

These differences in the structures of fats lend different oil characteristics that may make it better for varying usage. The most important factor is a fat’s smoke point.

The Smoke Point and Oxidation

The smoke point is the temperature at which a fat burns, releasing smoke. That smoke is an indication of oxidation.

Unfortunately, there is research pointing to oils producing oxidation products even prior to that smoke point. These oxidation products include aldehydes, which can impair cellular function and are linked to cancer and cardiovascular disease.

The consumption of oxidized fats has been linked to a number of health concerns, including atherosclerosis, Alzheimer’s disease, cancer, and accelerated aging. This is due in part to the release of free radicals that promote inflammation in the body.

One of the biggest problems is that there is much conflicting information about what the smoke points for each oil and fat are. Refining an oil raises its smoke point but may also deplete certain nutrients.

The best way to approach these fats is with a range in mind, which can guide what type of cooking (or not cooking at all) is suitable.

Olive Oil

Partially due to its place in the well-touted Mediterranean Diet, olive oil has been regarded as one of the healthiest fat options. But olive oil is high in monounsaturated fats, so while it is not especially sensitive to heat, it cannot tolerate high heat. For higher temperatures, olive oil that is more refined and not virgin is better but contains fewer antioxidants.

Smoke point: Extra virgin 320-350°, virgin 410-420°

Usage: Great for drizzling after cooking, can be used for a light sauté

Flavor: Extra virgin has a stronger, sometimes grassier flavor, but olive oil in general tends to have a mild flavor that is especially good for savory dishes

Coconut Oil

Often vilified for its high saturated fat content, coconut oil has been used in parts of the world for thousands of years. Coconut oil, a solid at room temperature, requires very little refining and is very shelf-stable. More refined versions have a milder and less sweet flavor but are lower in naturally occurring nutrients. The saturated fat in this oil has not been found to increase the risk of heart disease and can in fact be part of a healthy diet.

Smoke point: Unrefined 350°, refined 400°

Usage: Because of its higher smoke point, it can be used in most cooking except for high-heat roasting and grilling

Flavor: Has a distinct coconut flavor that pairs well with sweet dishes, refined versions are milder

Avocado Oil

High in monounsaturated fat, avocado oil is a wonderful alternative to the very refined canola oil (aka rapeseed oil). Its mild flavor and higher smoke point have helped this oil blow up in popularity in recent years. While not the cheapest oil, and therefore not usually used for frying despite its smoke point, avocado oil is versatile and rich in vitamins.

Smoke point: 520°

Usage: Great for baking, roasting, sautéing and just about any other forms of cooking

Flavor: Very mild so it works for both sweet and savory dishes

Best Cooking Oils: Understanding Smoke Points for Health

Butter and Ghee

Besides being delicious, butter can be a great cooking option, with ghee being a better one for higher temperatures. Ghee, or clarified butter, has had the proteins removed, allowing it to stand up to higher heat without burning. Butter is a saturated fat and stays solid at a higher temperature than coconut oil, which is why it is often used in baking. Grass-fed butter will have the highest level of nutrients, including vitamin K, as well as A, D, and E.

Smoke point: butter 350°, ghee 485° (assuming highest purity or removal of milk solids)

Usage: Butter is perfect for baking, ghee works well for roasting and even grilling, but just about anything

Flavor: Buttery of course! Choose unsalted in order to control salt levels yourself

Animal Fats

Lard from pigs or tallow from cows can be a surprisingly good cooking fat, despite what many of us were raised to believe. For those who grew up in the heyday of margarine, lard was always considered a four-letter word. But as long as you can find clean, pasture-raised products, lard and tallow are healthy saturated fats with a medium-high smoke point.

Smoke point: 370°

Usage: If you are roasting meat and need added fat, these are a perfect option

Flavor: Very savory and distinct

Omega-3s

Omega-3 fatty acids, like fish, hemp, and flax oils, are polyunsaturated fats. These are great for cardiovascular and brain health but should not be heated at all. In fact, they should be stored in the fridge because of their sensitivity to heat.

The danger in cooking oils and fats at or beyond their smoke point comes in creating carcinogenic compounds. Plus they gain a burnt flavor as well. The best way to avoid this is to know the right cooking styles for all the amazing and healthy fats out there.

There are so many to choose from, each with its own benefits. This is why keeping a variety of oils in your kitchen will give you the most options, depending on what and how you’re cooking.

Roasting meat and veggies? Grab some lard!

Baking some sweet goodies? Maybe butter is better!

Pan cooking a stir fry? Olive oil can work wonders!

Have fun with trying out different combinations based on these smoke points. Still don’t know where to start? Try this Shrimp Taco recipe. Or this one for a  Vegetable Bean Soup.

If you love learning how to cook in a nourishing and healthy way, you’ll love the Nutrition Therapy Institute’s Natural Food Chef program. If you’d like to know more about the program and all the career paths you can utilize with your certification, you can attend a live cooking demonstration. There are many upcoming dates to choose from!


About the author: Maya Strausberg earned her Master Nutrition Therapist certification from NTI before starting her nutrition therapy private practice. She now offers writing and editing services for nutritionists and other health practitioners around the world through her business, Family Tree Nutrition.

Images: Photo by Frank Zhang on Unsplash; Photo by Sebastian Coman Photography on Unsplash

A Powerful Ally in Managing Menopause — Stack House Gym

0
A Powerful Ally in Managing Menopause — Stack House Gym

A Powerful Ally in Managing Menopause — Stack House Gym

Menopause marks a significant transition in a woman’s life, signaling the end of her reproductive years. This phase can bring a mix of symptoms like hot flashes, mood swings, weight gain, and weaker bones. While these changes can be challenging, regular gym training can be incredibly effective in managing these symptoms and enhancing overall well-being during menopause.

The Benefits of Physical Exercise

Exercise is often called a miracle drug because it benefits physical, mental, and emotional health. For women going through menopause, staying active, especially with strength training, can significantly ease many common symptoms.

Managing Weight Gain: During menopause, many women notice a slower metabolism and changes in body shape, particularly more belly fat. Strength training helps build lean muscle, which increases metabolism. More muscle means burning more calories, even when resting. Combining resistance exercises with cardio workouts can help manage weight effectively.

Strengthening Bones: Reduced estrogen levels after menopause can lead to weaker bones and a higher risk of fractures. Weight-bearing exercises like lifting weights, squats, and lunges can maintain and even improve bone density. This makes gym training crucial for bone health.

Boosting Mood and Reducing Stress: Hormonal changes during menopause can cause mood swings, anxiety, and depression. Exercise releases endorphins, the body’s natural mood boosters, helping reduce stress and anxiety. A regular gym routine provides structure and a sense of achievement, enhancing mental well-being.

Improving Sleep: Many women experience sleep disturbances during menopause, often due to night sweats and anxiety. Regular physical activity can help regulate sleep patterns, making it easier to fall asleep and stay asleep. However, it’s best to avoid intense exercise close to bedtime, as it might be too stimulating.

Supporting Heart Health: The risk of cardiovascular disease increases after menopause due to changes in cholesterol levels and blood pressure. Cardio workouts like running, cycling, or swimming can improve heart health, lower blood pressure, and enhance circulation. A balanced gym routine that includes both cardio and strength training offers significant heart health benefits.

Getting Started with Gym Training

Starting a gym routine can be intimidating, but it doesn’t have to be. Here are some tips to help you begin:

  • Speak to a member of our team before starting a new exercise program, it’s also a good idea to consult your healthcare provider, especially if you have existing health conditions. A fitness trainer can also help create a personalised plan that suits your needs and goals. At Stack House we provide all new members with a training guide to get you going.

  • Begin with manageable workouts and gradually increase the intensity. This helps prevent injury and allows your body to adapt to the new routine.

  • Include a variety of exercises to keep workouts interesting and engage different muscle groups. Combining cardio, strength training, and flexibility exercises like yoga or Pilates is ideal.

  • Pay attention to how your body responds to exercise. Rest is as important as activity, especially if you experience pain or extreme fatigue.

Conclusion

Menopause is a natural part of aging, but it doesn’t have to reduce your quality of life. Adding regular gym training to your routine can provide tremendous benefits, from managing weight and strengthening bones to boosting mood and improving heart health. Embrace the power of exercise to navigate menopause with strength, resilience, and vitality.

Related articles:

Top tips for starting and sticking to a fitness routine

4 functional fitness plans for beginnings

Watch the Use of Colored Contacts this Halloween

0
Watch the Use of Colored Contacts this Halloween

Eye Injury Prevention Month is observed every October to promote awareness about eye safety and prevent injuries

Watch the Use of Colored Contacts this Halloween

“Wearing colored contacts may seem harmless. But beware: colored contact lenses can severely damage your eyes if you don’t buy them with a prescription. They can even cause permanent blindness if they’re not fitted by an eye specialist.” according to American Academy of Opthamology (AAO)

“Consumers need to know that permanent eye damage can occur from using non-prescription lenses,” says Thomas Steinemann, MD, an ophthalmologist at MetroHealth Medical Center in Cleveland, Ohio, and member of the American Academy of Ophthalmology. “I have seen far too many serious cases in both children and adults from using decorative lenses.”

Is It Safe To Wear Non-Prescription Colored Contacts?

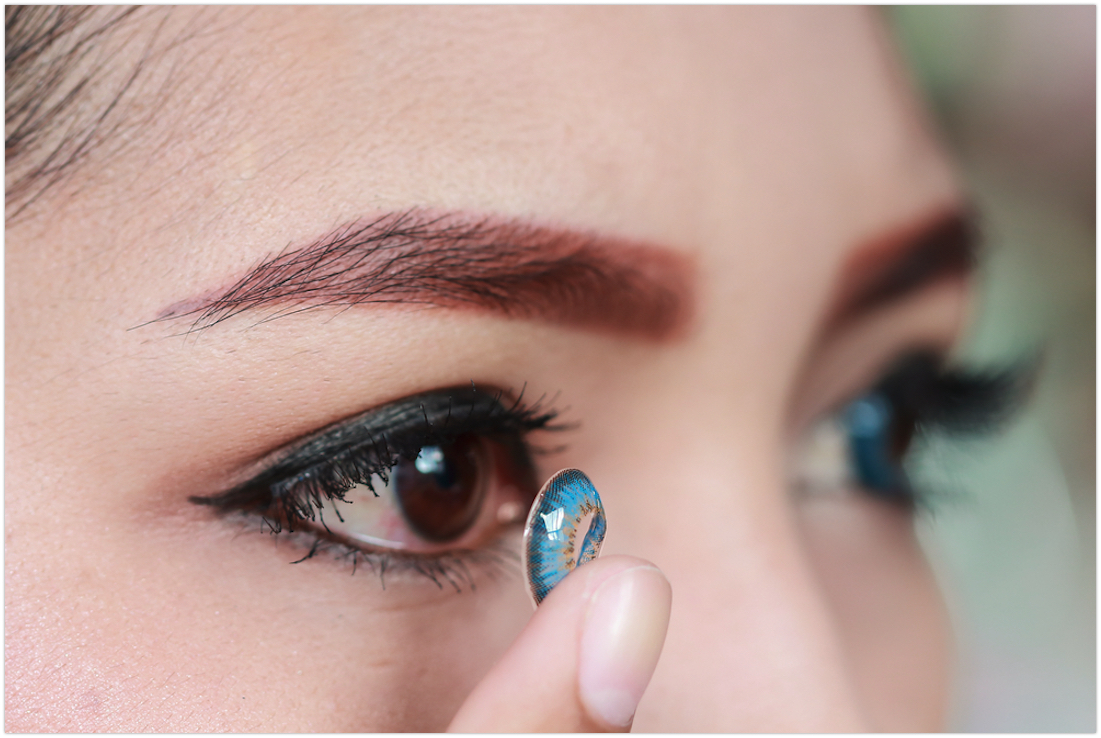
It is not safe to wear contact lenses that were not prescribed especially for you. This includes contact lenses purchased without a prescription and contact lenses prescribed for someone else. Your eyes are at risk of serious harm — and potentially blindness — when you wear contact lenses that were not prescribed specifically for you.

Contact lenses advertised as ‘one size fits all’ or ‘no need to see an eye doctor’ are not safe. The ‘one size fits all’ claim is misleading and dangerous. Contact lenses must be tailored to each individual. Lenses that are not the correct size for your eye may result in serious harm and could destroy your vision.

Poorly fitting contact lenses can scratch your eye — or worse

  • Corneal abrasions,
  • Corneal ulcers, and
  • Bacterial infections like keratitis, which are painful and potentially blinding.

Colored contacts also might let less oxygen through to the eye. This is because the paints and pigments make the lenses thicker and less breathable.

Treating this damage can require eye surgery, like a corneal transplant. And treatment doesn’t always work. People have been blinded by colored contact lenses.

How to Buy Colored Contacts?

  • Get an eye exam from a licensed eye care professional. They will measure each eye and talk to you about proper contact lens care.
  • Get a valid prescription that includes the brand name, lens measurements, and expiration date.
  • Buy the colored contacts from a retailer who asks for a prescription.
  • Follow the contact lens care directions for cleaning, disinfecting, and wearing the lenses.
  • Never share contact lenses with another person.
  • Get follow-up exams as directed by your eye care provider.

For further details visit: https://www.aao.org/eye-health/halloween-cosplay-colorful-contacts-eye-safety

Disclaimer
The Content is not intended to be a substitute for professional medical advice, diagnosis, or treatment. Always seek the advice of your physician or other qualified health provider with any questions you may have regarding a medical condition.

11 Healthy Ways To Curb Salt Cravings

0
11 Healthy Ways To Curb Salt Cravings

Are you always craving for potato chips, pickles, and salty snacks? This may sound okay to many, but health-wise, too much salt is dangerous for the body. The body needs salt for fluid retention and proper functioning.

However, when salt craving begins much, it causes more harm to the body than good and can systematically break down the body system over a long period.

One of the immediate symptoms of excessive salt intake is swollen hands or feet, increased thirst, and headache in some cases. In the long run, it can attack vital organs of your body, causing more severe harm.

Below are some of the damages that salt craving causes to your body.

It can adversely affect the:

  • Brain – it impedes the flow of blood to the brain causing cognitive and thinking problems.
  • Heart – it increases the risk of an enlarged heart by making it work harder than usual to circulate blood to the body.
  • Kidney – It causes the kidney to work harder to purify the system, and this may lead to malfunction and possibly kidney breakdown
  •  Blood vessels – it stiffens the endothelial cells that line the blood vessels, preventing blood from flowing as effectively as it ought to.

With these consequences, you can see that too much salt intake is terrible.

Most people take in at least 1.5 teaspoons of salt per day, which is about 3400 mg of sodium, and also far more than our bodies need. Nonetheless, the body requires just 2300 mg of sodium per day.

However, if you are caught in the web of salt cravings, there are ways you can curb it. Below are the seven healthy ways to curb salt cravings.

7 Health Ways to Curb Salt Cravings

11 Healthy Ways To Curb Salt Cravings

Salt has a very addictive taste, which our brains and bodies love because it’s necessary to humans.

Nevertheless, many people crave salt for different reasons.

Electrolyte imbalance, dehydration, stress, pregnancy, and premenstrual syndrome can cause salt cravings.

Even some diseases like Addison’s diseases and Bartter syndrome can make you crave salt.

Well, if you want to curb the amount of salt you consume, here are some tips to help you.

1. Gradually reduce intake

Gradually reducing your salt intake allows your taste buds to adapt to lower sodium levels without feeling deprived.

This method is effective because it minimizes the shock to your palate, making the transition smoother.

Start by keeping a food diary to understand how much salt you’re currently consuming.

Begin by reducing the salt in your recipes by a small amount, such as 1/4 teaspoon less than usual.

When you cook at home, you have complete control over the amount of salt used. Gradually reduce the salt in your home-cooked meals.

In addition, choose products labeled “low sodium” or “no salt added” and compare the sodium content of different brands.

2. Eat whole meals

Most millennials feed more on processed snacks and foods than whole meals, which is very unhealthy. Processed food consist of 75% of the sodium Americans take.

Eating whole meals is good for weight loss and avoiding excessive salt intake.

It promotes your overall health by providing your body with the necessary nutrients.

Try all possible means to prevent feeding on prepackaged snacks or processed fast food like noodles every time.

3. Make a meal plan and cook at home

Most times, you get caught feeding on processed meals because you don’t have a meal plan. This will make you eat carelessly. 

A meal plan helps to control what you eat, and with a meal plan, you can conveniently put healthy snacks between meals if you are a snack person.

Check out how to create a healthy meal plan. There are many other health benefits of meal planning, especially weight loss.

Cooking at home gives you full control over the ingredients and the amount of salt used in your meals. It’s a practical way to ensure you’re consuming less sodium and more nutritious, whole foods.

4. Know your salt intake limit

The American Heart Association recommends consuming only 2,300 mg of salt daily, which is one teaspoon of salt.

While millennials consume an average of 3,400 and 6,000 milligrams of sodium daily, it is essential to watch the amount of salt in what you eat.

If you love tasty food, you can opt for natural spices and herbs instead of saltier processed food.

5. Exercise regularly

One of the reasons why people carve for processed and prepackaged food is stress.

Stress is linked to causing unhealthy eating habits where you bury yourself up in snacks hoping to regain some energy.

Adequate exercise and rest are effective ways to fight stress.

6. Try herbs and spices 

Herbs and spices are excellent alternatives to salt for adding flavor to your dishes. They can enhance the taste of your food without the need for additional sodium.

Try different herbs and spices like basil, oregano, rosemary, thyme, cumin, paprika, and turmeric. Each has a unique flavor profile that can make your dishes more interesting.

Make your own spice blends to use in place of salt. For example, a mix of garlic powder, onion powder, paprika, and black pepper can be a great seasoning for meats and vegetables.

7. Hydrate regularly 

Proper hydration is crucial for overall health and can play a significant role in reducing salt cravings.

Sometimes, what we perceive as a craving for salty foods is actually our body’s way of signaling that we need more fluids.

Drinking enough water helps maintain the balance of electrolytes in your body and can curb unnecessary cravings.

8. Chew gum

Chewing gum can be a simple and effective way to distract yourself from salt cravings. It keeps your mouth busy and can help reduce the urge to snack on salty foods.

Opt for sugar-free gum to avoid unnecessary calories and sugar intake.

Carry gum with you so you can reach for it whenever a craving hits, whether you’re at work, at home, or on the go.

There are many different flavors of gum available. Experiment with different ones to find those that you enjoy and that effectively curb your cravings.

You can also use the act of chewing gum as a mindfulness exercise. Focus on the sensation and flavor of the gum, which can help take your mind off cravings.

9. Eat healthy salty snacks

Choosing healthier salty snacks can help satisfy your cravings without overloading on sodium or unhealthy ingredients.

These snacks that are naturally lower in sodium and higher in nutrients can provide the satisfaction you seek while supporting your overall health.

Although indulging in a salty snack now and then is generally healthy for most individuals, some people may need to restrict their salt consumption to manage specific medical conditions, such as kidney disease and high blood pressure.

Some healthy salty snacks include macadamia nuts, deviled eggs, Parmesan crisps, roasted salted chickpeas, homemade soups, nut butter stuffed dates, veggie-loaded chicken bites, and homemade popcorn.

10. Get social

Boredom is a leading cause of salt cravings. When you are bored, you tend just to eat anything around, as they are more convenient for you.

Join a health club in your neighborhood, or join a community exercise team. Do something to get social.

Doing this will not just help curb your salt cravings, but also improve your social health.

11. Go for restaurants that serve whole meals

If you love eating outside, it is advised that you go for restaurants that cook whole meals from scratch rather than the ones that just display menus full of pre-made meals.

And these pre-made meals are processed with salt.

Conclusion

If caught in the salt craving web, gradually put the above points into practice. Don’t try stopping yourself all at once; you may harm yourself. Take it easy, slow, and steady. Always maintain a healthy meal feeding schedule as an individual. 

Please follow and like us:

The Future Is Now!

0
The Future Is Now!

/*! elementor – v3.17.0 – 08-11-2023 */
.elementor-widget-text-editor.elementor-drop-cap-view-stacked .elementor-drop-cap{background-color:#69727d;color:#fff}.elementor-widget-text-editor.elementor-drop-cap-view-framed .elementor-drop-cap{color:#69727d;border:3px solid;background-color:transparent}.elementor-widget-text-editor:not(.elementor-drop-cap-view-default) .elementor-drop-cap{margin-top:8px}.elementor-widget-text-editor:not(.elementor-drop-cap-view-default) .elementor-drop-cap-letter{width:1em;height:1em}.elementor-widget-text-editor .elementor-drop-cap{float:left;text-align:center;line-height:1;font-size:50px}.elementor-widget-text-editor .elementor-drop-cap-letter{display:inline-block}

As the clocks tick forward to the coming months of fall – there is one thing on everyone’s mind, it is back-to-school season! While in the last year the world grappled with the bellows of the global pandemic, the acceleration of the use of technology in our lives is now seen as inevitable. Even before the pandemic, technology was a relied upon friend for many however, the pandemic showed us that technology is a strong ally. The current material of study – be it 2D formats, physical books are no longer seen as effective methods of study and engagement. Personalized learning on demand is sought after, especially in the dynamic space of learning.  

That’s why EasyAnatomy makes it Easy for educators around the world to bring their materials to their students in a very engaging manner.  

Myth Busters – what about technology?

 MYTH – Technology will replace me!

Absolutely not! Technology is an additional tool in the professor and educator’s toolkit to help them deliver their vision and meet their goals efficiently. While staying in touch with the students’ learning expectations, technology helps the educators deliver material to their students both in an engaging and effective manner. In the journey of encouraging students to pursue their talents, technology provides a major avenue. Technology will not replace educators; it is a communicative bridge that helps with delivery of an engaging learning experience. EasyAnatomy is an educator’s friend, aid and ally in digitally accelerating educators their teaching experience and their student’s learning experience.   

 MYTH – Technology is stressful

Nope! Technology can help fight stress. It increases your performance, boosts your confidence, and helps with efficient delivery. Keeping in mind the mental health and well-being of our educators, technology helps tackle daily struggles effectively. At EasyAnatomy, our technology is easier to use than you think and there is immense support from our team to help set you up and get you through the entire journey. So, no stress of set-up, no stress of technology use and no stress of adapting – technology makes it easy, and EasyAnatomy makes it even easier for you.  

 MYTH – Social connection barrier

Not at all! If there is one thing, we have all learnt the last year, it is this – the show must go on. No matter where we have been, we have seen the digital expansion from courtrooms to boardrooms. Virtually, connections have been made accessible and easy. We live in the days where we bring our work to our living rooms. Students and educators now have a chance to cut through the virtual window and engage in real time across continents and time zones. In this learning beyond university and classrooms – EasyAnatomy provides a robust way to engage in educational content and bring together the brightest minds to the learning forum.

/*! elementor – v3.17.0 – 08-11-2023 */
.elementor-widget-image{text-align:center}.elementor-widget-image a{display:inline-block}.elementor-widget-image a img[src$=”.svg”]{width:48px}.elementor-widget-image img{vertical-align:middle;display:inline-block} The Future Is Now!

MYTH – Cookie Cutter learning

100% Myth – in today’s highly personalized world, the new forms of teaching with mixes between hybrid learning and online and or in person learning offers a highly personalized experience. There is high demand for personalized results and learning techniques. 67% of teachers agree that learning needs to be personalized (ConnectEd 2021 by Microsoft). While instilling creativity, EasyAnatomy appeals to students from a creative learning and personalized nature perspective.

All we are saying:  

As the world pivots into a more digital space, the last 15 months has accelerated our dependency on technology and primed us for a digital world. With the educational industry taking a larger step within the digital bubble, are you ready to explore with EasyAnatomy?  

EasyAnatomy offers educators with multiple tools within the app to help achieve their teaching goals and deliver the content to their students in the most efficient manner. From bookmarks and annotations to intuitive navigation of built-in tutorials, there is AI that helps ensure that students are learning and understanding their material instead of sliding through the content. Offering a pedagogy component of book knowledge and practical experience we use 3D models based on real MRI and CT scans.  

Transforming into the technological world – EasyAnatomy helps you reimagine the classroom materials like never before. Remember technology is not here to replace you, it is here to stay and help your reimagine learning. 


Want to know more?


Ready to subscribe?

The post The Future Is Now! appeared first on EasyAnatomy.

How To Gain Muscle With Drop Sets Based On Science (11 Studies)

0
How To Gain Muscle With Drop Sets Based On Science (11 Studies)

You’ve probably heard of drop sets before because they’ve been around a long time and drop sets are one of the most popular high intensity muscle building training methods.

Drop sets were invented in 1947 by Henry Atkins. The charismatic Arnold Schwarzenegger helped make drop sets more popular in the 1970s. The terminator famously used drop sets on barbell curls to build some of the best biceps the bodybuilding world has ever seen. Today you see recreational lifters doing drop sets every day in every gym.

Maybe you already do them too. Or maybe you’ve heard experts say that “drop sets are no more effective than regular sets” so you might have your doubts about them. Could drop sets just be bro science? Or perhaps you want to try drop sets but aren’t sure of the ideal way to do them. It’s a fact that most people do drop sets wrong and miss out on the best gains.

How To Gain Muscle With Drop Sets Based On Science (11 Studies)

Well, here’s good news: real modern exercise science has confirmed that drop sets are an effective technique. (List of studies at bottom of page below the videos)

Drop sets are at least as effective for muscle growth as traditional sets. They also have some unique advantages that regular sets don’t have.

I recently spent some time catching up on all the new drop set studies. I nerd out on muscle-building (and fat-burning) research at times, but today I didn’t want to write anything too sciencey. I simply wanted to write a practical blog post showing you step-by-step how to do drop sets to build muscle in a way that’s supported by the science.

I took 11 studies on drop sets, including papers published right up to this year and I extracted from them the steps for how to do drop sets in a clear, simple manner.

I also added in what I know from my own experience. I’ve been doing drop sets for almost 40 years. (Whoops, just revealed my age). But seriously, I love drop sets. I think drop sets, supersets and rest pause sets make up a trifecta of the best specialized muscle building techniques. If you do them right, they can even be easier on the joints than regular heavier sets for us lifters getting a bit older.

It will only take you about 3 or 4 minutes to read my tutorial below about how to do drop sets to gain more muscle. It’s a punch list. I also posted a few short videos that show this muscle building technique in action. Then you’ll be ready to go straight to the gym and try this.

Why should you use drop sets?

One thing the newest science does confirm is that drop sets are not necessarily better than straight sets when the total volume of the workouts is the same. (Volume is also known as tonnage, which is the product of sets X reps X weight).

If that’s the case, why bother with them? The most cited reason is that drop sets can be a great efficiency technique if you want to use them to save time. It’s possibly the number one benefit.

Drop sets are also a superb way to apply progressive overload. I’m surprised at how few people use drop sets for overload. And most experts only explain that drop sets are “a good way to increase volume in a time efficient manner.” If you use drop sets for overload the right way, then this method can help you build a lot more muscle.

In addition, you can use drop sets for priority training to build more muscle right where you want it. Simply add drop sets for any body part you think is lagging behind others.

Need some work on your quads? Finish your leg day with leg extension drop sets (video below). Sun’s out, but you’re embarrassed to let your guns out? Do some bicep curl drop sets down the dumbbell rack. You’ll be proudly going sleeveless in no time (video below).

So without further ado, here’s what you need to know about drop sets and how to do them right:

How To Do Drop Sets To Build More Muscle

1. Drop sets are a specialized training technique designed to build muscle, increase muscular endurance, provide a great pump, save time, and increase volume in an efficient fashion (which counts as progressive overload).

2. Drop sets probably do not build more muscle than traditional (straight) sets if the volume is equalized. However, studies have shown that drop sets can build the same amount of muscle in half the time or less. One drop set with 3 weight drops is the equivalent of 3 traditional sets. Use drop sets this way if you want to save time.

3. This technique can also allow a time efficient increase in volume (progressive overload) by adding drop sets on top of your current workload. For example, add one additional drop set each week for several weeks and you have achieved progressive overload all month long even if you didn’t lift any more weight.

4. Here is the drop set technique: You start your set of weight training or resistance exercise like a normal set with a moderately heavy weight you can lift about 8 to 12 times. Carry out the set as usual to failure or very close to it (within 1 to 2 reps of failure). Instead of stopping and taking a rest period for recovery, at this point you reduce the weight and keep going for even more reps. (Usually 6 to 12 more, but this number of additional reps may vary).

5. When doing drop sets you can reduce the weight only once, or it’s also popular to drop the weight again up to 3 or even 4 more times.

6. The amount of weight reduced is usually 20% to 25%, but could range anywhere from 10% to 30%. For example, if you were doing barbell curls starting with 100 pounds, a 20% reduction would be dropping to 80 pounds. Then dropping to 60 pounds would be a 25% reduction. These are approximate numbers because how much you can reduce the weight may depend on the size of the weight plate. Also, some people occasionally take a larger weight drop and do a burnout set for very high reps.

7. When performing drop sets, you take no rest between weight reductions, or as little rest as possible (sometimes it takes several seconds to remove weight from a bar or machine). Occasionally you might need a few seconds rest for the burn and fatigue to dissipate, but taking long rests between weight drops is cheating and means it’s no longer a drop set.

8. You can perform drop sets on any exercise, but they are more commonly done on isolation exercises or machines. Doing drop sets on large muscle compound exercises like squats and deadlifts is less common because it is so fatiguing and demands increased recovery time.

9. Drop sets can be done with barbells with plates, dumbbells, plate loaded machines, or weight stack machines. Weight stack machines are popular for drop sets because it’s so fast and easy to reduce the weight.

10. Drop sets are almost never performed for every set of every exercise in a workout session. This would cause large amounts of muscle damage, high amounts of fatigue and increased recovery time. Drop sets are usually implemented sparingly, in a similar way as training to failure. Too much can lead to overtraining.

11. Drop sets are most often done only on the last set of each exercise. Doing drop sets on the first set of the workout is too fatiguing and reduces performance in subsequent sets. An even more conservative approach is to do drop sets only on one set, usually the last set of the last exercise for a particular body part (it is a common “finisher” technique).

12. Many body builders do a high rep drop set for their last exercise on a particular muscle as a way to finish with a huge pump. This is sometimes also known as a “burnout set.”

13. Scientific research is mixed but most of it confirms that drop sets are at least as effective for building muscle as traditional sets and are more time efficient. However, some studies suggest drop sets are not as effective for building strength as other specialized techniques like rep pause training.

14. More research is need to confirm whether specific types of drop sets are more effective than others. More study is also need to confirm whether drop sets are as effective for women and for older adults. Anecdotal evidence suggests the answer is yes, but most of the research was performed on men in their twenties. Older adults may not recover as well as younger people so over-using drop sets and failure training might be more likely to lead to overtraining.

That’s it! You are now up to date on this classic muscle building technique and ready to go try it out in the gym. If you want to learn even more, download the Burn the Fat, Feed the Muscle Guide To Building Muscle With Drop Sets. It’s one of the many training and nutrition manuals included with Burn the Fat Inner Circle Membership.

Until next time, train hard and expect success!

-Tom Venuto, Author of, Burn the Fat, Feed the Muscle (BFFM)
Founder, Burn the Fat Inner Circle

Video Demos

Leg Extension Machine Drop Set (Three Weight Drops… Looks like it burns!)

Dumbbell Curls Drop Set Down The Rack (Quadruple Drop!!!)

How Drop Sets Can Even Be Used On Body Weight Exercises (Pull Up Single Drop Set)


tomvenuto-blogAbout Tom Venuto
Tom Venuto is a natural bodybuilding and fat loss coach. He is also a recipe creator specializing in fat-burning, muscle-building cooking. Tom is a former competitive bodybuilder and is today a full-time fitness writer, blogger, and author. His book, Burn The Fat, Feed The Muscle is an international bestseller, first as an ebook and now as a hardcover and audiobook. The Body Fat Solution, Tom’s book about emotional eating and long-term weight maintenance, was an Oprah Magazine and Men’s Fitness Magazine pick. Tom is also the founder of Burn The Fat Inner Circle – a fitness support community with over 52,000 members worldwide since 2006. Click here for membership details


Scientific references:

Anglieri V et al, Crescent pyramid and drop set systems do not promote greater strength gains, muscle hypertrophy and changes on muscle architecture compared with traditional resistance training in well trained men, European Journal of Applied Physiology, 117, 359-369, 2017.

Coleman M et al, Muscular adaptations in drop set vs traditional training, a meta-analysis, International Journal of Strength And Conditioning, 2022.

Enes A et al, Muscular adaptations and psychophysiological responses in resistance training, Research Quarterly For Exercise And Sport, 1-8, 2022

Enes A, et al, Rest pause and drop set training elicit similar strength and hypertrophy adaptations compared with traditional sets in resistance trained males, Applied nutrition, physiology and metabolism. 2021.

Fink J, Schoenfeld B, et al Effects of drop set resistance training on acute stress indicators and long-term muscle hypertrophy and strength. J Sports Med Phys Fitness. 2017.

Goto K et al, Muscular adaptations to combinations of high and low intensity resistance exercise, Journal of Strength and Conditioning Research, 18, 730-737, 2004.

Goto K et al, Effects of drop set and reverse drop set methods on the muscle activity and intramuscular oxygenation of the triceps among trained and untrained individuals, Journal of Sports Medicine, 15, 562-568, 2016.

Keskin K et al, Equated volume load: similar improvements in muscle strength, endurance, and hypertrophy for traditional, pre-exhaustion, and drop sets in resistance training, Research Square, doi.org/10.21203/rs.3.rs-4564565/v1, 2024

Ozaki H et al, Effects of drop sets with resistance training on increases in muscle CSA, strength and endurance, Journal of Sports Science, 1-6, 2017.

Schoenfeld, B, Grgic J, can drop set training enhance muscle growth? Strength And Conditioning Journal, 40: 95-98.

Varovic D, et al, Drop set training elicits differential increases in non-uniform hypertrophy of the quadriceps in leg extension exercise, Sports, 9:119, 2021.

Mr. Olympia 2024 Results: Samson Dauda Wins The Sandow

0
Mr. Olympia 2024 Results: Samson Dauda Wins The Sandow

In Las Vegas on Saturday, the bodybuilding community crowned a first-time Mr. Olympia champion in Samson Dauda, who defeated one of the most surprising fields in recent memory to win the title that would define his career.


The victory followed multiple call-outs from officials who wanted to savor every second to be sure they had determined the correct winner in the end.

Dauda, Lunsford, and Choopan were distinguished by the slightest details. On stage, they essentially switched positions, with Choopan controlling the front poses like the thigh and abs, Lunsford controlling the back, and Dauda winning some side shots.

Mr. Olympia 2024 Results: Samson Dauda Wins The Sandow

The Nigerian Lion, 32, was declared the event’s People’s Champion, an honor given to the competitor who garners the most number of fan votes, in a decision that made it very evident that he was the clear victor.

In addition to the first-place medal, the people’s champion trophy, and the belt, the winner received the biggest payout in the history of the competition—a $600,000 check.

The runner-up for the second consecutive year, Hadi Choopan, took home $250,000.

It was the bodybuilder who was born in Iran’s second poor performance at the competition. Practically speaking, the 2022 winner was only one or two judge rulings away from becoming a three-time champion and making history as the most decorated winner since the conclusion of Phil Heath’s reign of supremacy.

Rather, he carried on with his “not quite there yet” career, which has seen him finish fourth (2020) and third twice (2019, 2021).

This year’s winner from 2023, Derek Lunsford, came in third after failing to successfully defend his crown.

The current depth of the sport and the caliber of deserving competitors for the Mr. Olympia title are demonstrated by the fact that the reigning champion has not repeated for the third consecutive year.

2024 Olympia Men’s Open Top 10 Results & Prize Money

  • Winner — Samson Dauda (600,000)
  • Second Place — Hadi Choopan ($250,000)
  • Third Place — Derek Lunsford ($100,000)
  • Fourth Place — Martin Fitzwater ($40,000)
  • Fifth Place — Andrew Jacked ($35,000)
  • Sixth Place — Hunter Labrada
  • Seventh Place — William Bonac
  • Eighth Place — Rafael Brandao
  • Ninth Place — Brandon Curry
  • Tenth Place — Akim Williams

Healthy Thanksgiving Recipes: UnDiet Your Thanksgiving

0
Healthy Thanksgiving Recipes: UnDiet Your Thanksgiving

It’s a long weekend coming up here in Canada, and a time for people to gather and celebrate the autumn harvest season. There’s nothing more healthful than sitting down with friends and family for a home-cooked meal. Eating should be pleasurable, and I always want to feel good after I eat, too. If you’re the same, I think these healthy Thanksgiving recipes and tips will help.

If you’re hosting, it’s super easy to turn Thanksgiving into a health-promoting delicious holiday without becoming the crunchy granola hippie of the family. They won’t even notice because the options are soooo good!

Even if you’re going to somebody else’s house for dinner this year, you can eat to support your optimal health and inspire others by bringing along a delicious dish with you to share. The key here is to make it awesome. Turkey is optional, and in my opinion – soy products shaped into a turkey and seasoned with chemicals is even less optional.

Whether you’re playing host or guest this year, follow these tips to keep it nourishing as well as tasty.

1. choose your animal protein carefully

If you’re opting for a turkey as the main dish, I recommend choosing a source that is organic and pasture-raised, when possible. Factory farming is detrimental to animals, humans, and the environment. I have a full guide to deciphering meat labels here if you’re confused about what about what all those meat labels mean.

If you don’t have the time or oven space to cook a large turkey, try roasting a chicken!

If you’re rocking it vegan (or not sure if that bird came from an organic, ethical source), load up on vegan options and side dishes instead.

And, if you’re hosting this year’s Thanksgiving shindig and not keen on poultry, pass on the turkey altogether and try one of these:


2. Un-stuff your stuffing

Healthy Thanksgiving Recipes: UnDiet Your ThanksgivingHealthy Thanksgiving Recipes: UnDiet Your Thanksgiving

I don’t know about you, but a bowlful of blood-sugar-spiking, gluten-filled white bread cooked inside the darkest caverns of a turkey just doesn’t whet my appetite. Whip up these gluten-free options (no bird innards required):


3. Mash a variety of veggies

Healthy Sweet Potato Salad - Meghan Telpner Blog PhotoHealthy Sweet Potato Salad - Meghan Telpner Blog Photo

Mashed potatoes are old news. You could always swap white potatoes for yams or sweet potatoes instead, but why not shake things up a little at your healthy Thanksgiving dinner? Cauliflower mashes up just as well as old-fashioned potatoes, plus it’s easier on your blood sugar and vitamin-packed. Your potato-loving family members won’t be able to tell the difference! Or try out one of these other sweet options:


4. Un-roll those rolls

Instead of serving white rolls, there are loads of power packed gluten-free and grain-free options.


5. make Naturally Sweetened Pies and Desserts

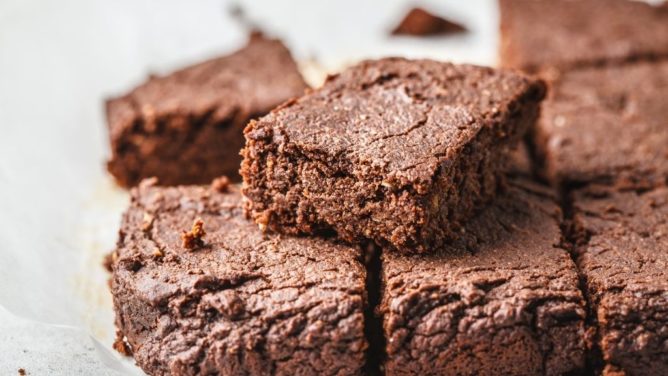
Spicy Sweet Potato BrowniesSpicy Sweet Potato Brownies

Healthy pie? It can be done! Start with my Gluten-Free Vegan Pie Crust and fill it with delicious seasonal fruit. For more lovely and healthy Thanksgiving recipes for dessert, try:


6. Ditch the coffee

Healthy Pumpkin Spice LatteHealthy Pumpkin Spice Latte

Guests expecting coffee along with their dessert? Blow their minds with one of these caffeine-free delectable sippers including:

If you’re not into hot beverages, try kombucha or a mocktail.


7. reduce your food waste

Food ScrapsFood Scraps

A post-holiday tip: aim to reduce your food waste by using up all your leftovers!

Throw leftover meat or rice onto a salad or into a soup, make croutons with day-old bread, or freeze extras using optimal freezing techniques. If you’re not a fan of leftovers, offer food to guests to take home.

What healthy Thanksgiving recipes are you serving this year?