Home Blog Page 46

How to Improve Your Sleep Habits –

0
How to Improve Your Sleep Habits –

Have you ever wondered why your efforts to lose weight seem to plateau despite maintaining a healthy diet and regular exercise? The culprit might not be your routine or diet but rather your sleep patterns. Sleep is often overlooked in weight management, but it plays a pivotal role in your journey toward a healthier body.


Numerous studies have shown that the quality and duration of sleep can significantly impact weight loss efforts. While insufficient sleep can contribute to weight gain, consistently getting enough quality sleep can help you achieve your weight loss goals through better hormonal balance, enhanced metabolism, and improved energy levels.


But how exactly does sleep influence weight loss, and how can you ensure you get the sleep you need? This article dives into the intricate relationship between sleep and weight loss and provides practical tips to optimize your sleep habits for better results.


Understanding the connection between sleep and weight loss can be eye-opening. Here are the key ways sleep impacts your journey:


Hormonal Imbalance


Sleep deprivation disrupts the delicate balance of hormones that regulate hunger and satiety, particularly ghrelin and leptin. Under normal circumstances, ghrelin levels rise to signal hunger, while leptin levels increase to signal fullness after eating. However, when you don’t get enough sleep, ghrelin levels increase, and leptin levels decrease. This hormonal imbalance leads to heightened hunger and food cravings, making it more challenging to maintain a calorie deficit necessary for weight loss.


For example, after a night of poor sleep, you might find yourself reaching for high-calorie snacks or feeling unsatisfied after meals. This pattern can contribute to overeating and, over time, weight gain.


Reduced Physical Activity


A lack of sleep can leave you feeling fatigued and less motivated to engage in physical activities. When you’re tired, you’re less likely to hit the gym or even stay active throughout the day. This reduced physical activity decreases your overall energy expenditure, which can slow down your weight loss progress.


Additionally, sleep deprivation has been linked to decreased exercise performance. You might find that your workouts feel more challenging, and you’re less able to push yourself, leading to fewer calories burned and less muscle engagement. Over time, this can hinder your weight loss efforts and even lead to weight gain if your caloric intake remains the same.


Metabolism Dysregulation


Metabolism is the process by which your body converts the food you consume into energy. Sleep and metabolism are closely linked, as sleep plays a crucial role in regulating glucose metabolism and insulin sensitivity. When you’re sleep-deprived, your body’s ability to process glucose is impaired, leading to insulin resistance. This condition not only elevates your blood sugar levels but also promotes fat storage, making it harder to shed excess pounds.


Moreover, sleep deprivation triggers the release of cortisol, a stress hormone that encourages your body to conserve energy in the form of fat. Over time, this can lead to weight gain and make it more difficult to lose weight, even if you’re eating healthily and exercising regularly.


Increased Appetite and Cravings


A lack of sleep can wreak havoc on your appetite-regulating hormones, leading to an increase in hunger and cravings. As mentioned earlier, sleep deprivation raises ghrelin levels while lowering leptin levels, which can result in an overwhelming urge to eat—especially high-calorie, sugary, and fatty foods.


This can create a vicious cycle where poor sleep leads to poor food choices, which can, in turn, lead to further weight gain. If you’re trying to lose weight, managing your sleep is just as important as managing your diet.


Poor Decision-Making


Sleep deprivation doesn’t just affect your body; it also impacts your brain. When you’re tired, your brain’s ability to make sound decisions is compromised. The frontal lobe, responsible for decision-making and impulse control, becomes less active, making you more prone to making poor food choices. This might manifest as reaching for that extra slice of pizza or indulging in late-night snacks, even when you know it’s not in line with your weight loss goals.


Moreover, sleep-deprived individuals tend to gravitate toward larger portions of calorie-dense foods. The combination of impaired decision-making and increased cravings can significantly derail your weight loss efforts.


Now that you understand how sleep affects weight loss, let’s explore how improving your sleep can help you achieve your goals:

1. Enhanced Metabolic Function

Getting enough sleep is crucial for regulating metabolic processes, such as glucose metabolism and insulin sensitivity. When you sleep well, your body is better equipped to process glucose efficiently, reducing the risk of insulin resistance and promoting better fat metabolism. This not only helps prevent weight gain but also supports your efforts to lose weight.

In contrast, sleep deprivation lowers your resting metabolic rate (RMR), the number of calories you burn at rest. By prioritizing sleep, you can maintain a higher RMR, making it easier to create the calorie deficit needed for weight loss.

2. Increased Physical Activity and Performance

A well-rested body is more likely to be active. When you consistently get enough sleep, you wake up feeling refreshed, energized, and ready to tackle the day. This increased energy translates into better exercise performance, allowing you to push harder, burn more calories, and build more muscle.

Studies have shown that individuals who prioritize sleep are more likely to engage in regular physical activity, which is essential for long-term weight management. Moreover, sleep enhances muscle recovery, helping you build lean muscle mass that can further boost your metabolism.

3. Appetite Regulation

Quality sleep helps regulate your appetite by maintaining a healthy balance of ghrelin and leptin. When these hormones are in balance, you’re less likely to experience intense hunger and cravings, making it easier to stick to your diet plan. By curbing excessive hunger and promoting a sense of fullness, sleep enables you to maintain a calorie deficit without feeling deprived.

4. Prevention of Weight Gain

Chronic sleep deprivation has been linked to weight gain and an increased risk of obesity. By ensuring you get enough sleep, you can prevent the hormonal imbalances that lead to increased appetite, reduced metabolism, and fat storage. Prioritizing sleep creates a favorable environment for weight loss and reduces the likelihood of gaining weight in the first place.

5. Better Food Choices

When you’re well-rested, your cognitive functions, including decision-making and impulse control, are at their best. This means you’re more likely to make healthier food choices, resist temptations, and stick to your diet plan. By improving your sleep, you can enhance your mental clarity and make more mindful decisions that support your weight loss goals.


To harness the benefits of sleep for weight loss, it’s essential to prioritize and improve the quality of your sleep. Here are seven tips to help you get started:


1. Establish a Consistent Sleep Schedule


Aim to go to bed and wake up at the same time every day, even on weekends. This consistency helps regulate your body’s internal clock, making it easier to fall asleep and wake up naturally.


2. Create a Sleep-Friendly Environment


Your bedroom should be a sleep sanctuary. Keep it cool, dark, and quiet to create an environment conducive to rest. Invest in a comfortable mattress and pillows, and consider using blackout curtains, earplugs, or white noise machines to eliminate any disruptions.


3. Limit Screen Time Before Bed


The blue light emitted by smartphones, tablets, and computers can interfere with your body’s production of melatonin, the hormone that regulates sleep. To promote better sleep, try to avoid using electronic devices at least an hour before bedtime, or use blue light filters if you must use them.


4. Develop a Relaxing Bedtime Routine


Incorporating relaxing activities into your evening routine can signal to your body that it’s time to wind down. Consider reading a book, taking a warm bath, practicing deep breathing exercises, or listening to calming music before bed.


5. Be Mindful of Your Diet


Avoid large, heavy meals and excessive fluid intake close to bedtime, as these can disrupt your sleep. Also, limit your intake of caffeine, nicotine, and alcohol in the hours leading up to bedtime, as these substances can interfere with your ability to fall asleep.


6. Incorporate Regular Exercise


Regular physical activity can improve sleep quality, but timing is key. Try to finish any vigorous exercise at least a few hours before bed to give your body time to wind down. Moderate exercise during the day, such as walking or yoga, can help promote better sleep.


7. Manage Stress Effectively


Stress and anxiety are common culprits of poor sleep. To manage stress, consider incorporating relaxation techniques such as meditation, journaling, or spending time in nature into your daily routine. These practices can help calm your mind and prepare your body for restful sleep.


Sleep plays a critical role in weight loss and overall health. By understanding the connection between sleep and weight management, you can make informed changes to your sleep habits that support your weight loss goals. Quality sleep influences your metabolism, appetite, and energy levels, setting the stage for successful weight loss.


By implementing the tips outlined above—such as establishing a consistent sleep schedule, creating a sleep-friendly environment, and practicing a relaxing bedtime routine—you can optimize your sleep and, in turn, your weight loss journey.


Instantized Creatine- Gains In Bulk


The Best Split Routines For Building Muscle

0
The Best Split Routines For Building Muscle

Despite what some training gurus might lead you to believe, there’s no single best split routine for building muscle. You can build a lot of muscle with a variety of different training splits. In fact, it’s possible to build a lot of muscle with no split routine at all. Full body workouts have their place, especially for beginners, for time efficiency and for “back to basics” strength training. But suppose you have a bodybuilding (visual aesthetics) goal.  Is a split routine always the best? Is it better than full body training? What are the pros and cons of each? What are the best split routine options? And how do you choose one? All the answers are in today’s question and answer column below…

The Best Split Routines For Building Muscle

Q: Tom, I see that you now have full body, 2 day, 3 day, 4 day, and 5 day splits on your Inner Circle  site. Do you think a body part split will give greater muscle gains in a shorter time than a full body or upper-lower program? If so, what do you think is the best split routine for building muscle? For example, I’m especially interested in the 3-day options like Day 1: Chest/Shoulders/Triceps, Day 2:  Back/Biceps/Forearms, Day 3:Legs/Abs. But I’m also wondering about breaking it up to a 4 or 5 day split where you basically do one major body part per workout.  What’s more beneficial to someone who wants to add the most muscle and keep bodyfat levels low, in the least time possible?

A: The short answer is you’ll probably get similar muscle gains from either a 3 day (push pull legs) split or a 4 day or a 5 day split (aka one body part a day, aka “bro” split). Your gains will also be similar to what you might get with a 2-day split or a full body routine as well, but under one condition: The weekly volume (number of hard sets per muscle per week) is the same.

On the other hand, if one of those routines allows you to easily accumulate more weekly sets than the other, then that routine might give you an advantage for muscle gains. This is one of the reasons that almost all bodybuilders use body part splits, not full body routines. Body part splits are usually the best choice for physique athletes.

The 3-day push pull legs split is the most traditional schedule and when you have muscle size goals, it’s hard to go wrong with that choice. It typically involves 5 days a week of lifting (sometimes 6 for advanced competitive bodybuilders).

The 5-day split is more unconventional, and some say controversial, because if you train 5 days a week (like Mon to Fri with weekends off), each muscle is trained with a much lower weekly frequency. However, it’s a popular routine and many people do it for the increased recovery between workouts or they choose this split purely out of enjoyment.

You could probably get similar muscle gains with a 4-day split as well. And, you could do a 3-day push-pull-legs split with only 4 workouts a week, which would help people who need more recovery.

The number of days per week you’re willing and able to train is one of the factors involved when deciding what routine to choose.  The decision should also be based on your goals, training age, personal preferences, and your recovery ability. Let me explain in a little more detail.

Pros And Cons Of Body Part Split Routines… And How To Choose The Right One For You.

For a while, body part split routines lost some popularity in the mainstream fitness community. These routines, especially the ones where you only work one major muscle per session, were even criticized by personal trainers and sports conditioning coaches. Sometimes that’s justifiable given the context of sports training and general population fitness, where split routines were deemed “non-functional.”

Despite the “flavor of the day” phenomenon in the fitness and diet industry, where new and different trends come and go, body part split routines actually never went anywhere. Competitive bodybuilders use them as their standard training method and always have. That’s because body part splits are extremely effective for muscle growth (hypertrophy) and visual / cosmetic physique goals.

Bodybuilders are the most muscular athletes in the world, who also happen to carry the lowest body fat of all athletes at contest time. If that’s what you’re looking for – a program to add muscle size in all the right places (visual aesthetics) – then split routines are a terrific option. 3, 4 and 5 day splits can all be effective.

How to set up split routines is a big subject that could fill a chunk of an entire weight training book, but let me give you a quick overview of some of the best schedules.

There are 4 very popular split options among bodybuilders. For achieving bodybuilding goals, my favorites are the 3-day and 4-day splits, but yes we did recently add a 5-day split (aka “bro split”) to the Inner Circle training department recently and some people really enjoy it.

Also, the 2-day split is still used by some bodybuilders and is probably the most popular schedule for the recreational lifter. For the advanced bodybuilder the 3-day split, especially the push-pull-legs split is most popular.

The 2 day Split, upper, lower + abs aka “The New Body” (“TNB”) split

Day 1: Upper body
Day 2: Lower body and abs

The 3 day Split, antagonistic (aka “classic muscle”)

Day 1: Chest, back
Day 2: Shoulders, Biceps, Triceps
Day 3: Quads, Hams

The 3 day Split, push-pull-legs

Day 1: Chest, shoulders, triceps
Day 2: Back, biceps, forearms
Day 3: Quads, hams, calves

The 4 day Split

Day 1: Chest, biceps, abs
Day 2: Quads, hams
Day 3: Shoulders, Triceps
Day 4: Back, calves
*Note: There are many body part grouping variations on this split

The 5 day Split (aka “bro split”)

Day 1: Chest, abs
Day 2: Back, calves
Day 3: Shoulders
Day 4: Arms
Day 5: Legs (quads and hams)

* Possible weekly schedule arrangements for these splits are endless, but a common way to do the 3 or 4 day split is 3 on 1 off or 4 on 1 off then repeat the cycle (rotating schedule). Alternately 5 days a week are designated for training and 2 days off for recovery (fixed schedule).

It’s important to note that 3, 4 and 5 day body part splits are definitely bodybuilding-focused routines. I’m referring to bodybuilding literally, as in the competitor or recreational lifters who have visual / aesthetic goals.

All of your training decisions should be made within the context of your goals, time availability, experience level, and personal preferences. Depending on your goals, there are advantages or disadvantages to body part split routines. Certain individuals might want to stick with full body workouts or the more basic 2 day (upper / lower + abs) split.

Advantages of body part splits:

1. Energy allocation.

If you only have to train one body major part in a session, you can put 100% physical energy into that muscle. If you have to train all your major muscle groups in one session, that is energy-draining. Whatever is done last in the workout will always suffer compared to what is done first. This is a particularly important consideration for “priority training” when one body part is lagging in comparison to others.

2. Mental concentration.

Many bodybuilders say that beyond physical energy allocation, they can mentally focus better with only one or two body parts to train per session. The mind to muscle connection is extremely important in physique training.

3. Time to do more volume.

The beginner doesn’t need a lot of training volume. The advanced bodybuilder on the other hand, can not only handle more volume, but also often finds they need more sets and exercises to maximize their gains. If you’re training your full body or even half your body per session, you can only do so much volume without the workouts dragging on a long time. To train with the desired amount of volume and keep the workouts a reasonable duration, this requires split routines. It’s also worth noting that if a certain split routine allows someone to achieve more weekly volume than another routine, this could produce greater muscle gains.

4. Time to do more exercises/angles.

Split routines not only allow you to do more volume in terms of number of sets, you can also do multiple exercises for each muscle. A football player doesn’t care about rear deltoid development or whether the lateral deltoid has enough width and “cap.” A bodybuilder on the other hand, wants to develop a muscle from every angle for aesthetics. On shoulder day for example, that would include front, side and rear deltoid exercises, plus trapezius. On a mass/ strength program that only works the basic compound exercises, one might only do a military press. That can produce a good amount of size, but does not work every aspect of the muscle and does not allow the bodybuilder to specialize on one part of a muscle that might be lagging (example: rear delt exercise), in order to develop symmetry.

Disadvantages of body part splits:

1. Body part split routines are usually not appropriate for all athletes.

Athletic training usually focuses on movement patterns not individual muscles. For example: horizontal push, vertical pull, rotation, etc. It may also involve plyometric or power training. Strength athletes usually focus on lifts, not individual muscles. For example: bench day, squat day and deadlift day, with assistance work done after the main lifts.

2. Body part split routines are usually not appropriate for beginners.

A rank beginner usually does best with a full body routine and a small number of basic exercises. An intermediate or recreational bodybuilder could choose any type of training schedule, but can’t go wrong with a 2 day split (such as our T.N.B. program). The body part splits are best for bodybuilders or advanced trainees with hypertrophy goals and cosmetic/ visual goals. So consider your training age a when making a decision on your lifting schedule.

3. Body part splits may not be practical for some people’s lifestyle and schedule.

Many people don’t want to train 5 (or 6) days a week because that is a big commitment. A 4 day schedule is most common for experienced recreational lifters. On a program like our T.N.B., which is a 2 day upper – lower schedule (or a typical strength program), you can get excellent muscle development with a 4 days per week frequency. When someone only wants to lift 3 days a week, a full body routine is a good choice.

4 Major Factors in choosing your lifting schedule

As you can see, there are many considerations which might influence your choice of training schedule and split routine. To conclude, let’s review the big 5:

1. Goals (strength or sports or bodybuilding/aesthetics)
2. Training age (beginner or advanced)
3. Time available / schedule considerations
4. Personal preference
5. Your results

It doesn’t hurt to try a wide variety of training schedules. You might find one in particular that you stick to most of the time as your default program because it works well and you enjoy it. Or you might find that the novelty effect of rotating different training schedules and frequencies throughout the year helps stimulate greater muscle gains than doing the same program year round.

Again, I don’t think it’s possible to say there is a best split routine for building muscle. However, if you weigh all the pros and cons and consider these factors above, then one particular type of schedule might leap out at you as the most logical choice given your personal goals and your lifestyle.

While there might not be a best one, I can easily say that for experienced trainees who want to build muscle size, the most popular one has got to be the 3-day push-pull-legs split.  This is a classic, proven program that has been round for years.   In 2024 an all-new version of this classic was released in our Burn the Fat Inner Circle training department. You can learn more about it and why it’s so popular here:

==>Tom Venuto’s New PUSH-PULL-LEGS 2024

Tom Venuto,
Founder and CEO, Burn the Fat Inner Circle

How to Do the Preacher Curl for Building Bigger Biceps

0
How to Do the Preacher Curl for Building Bigger Biceps

Legendary bodybuilders like Jay Cutler and Ronnie Coleman earned plenty of praise and Mr. Olympia hardware by constructing hulking physiques that included sculpted shoulders, killer quads, and bulging biceps. While most people don’t have plans to pose on stage someday, many lifters do have aspirations to walk around with muscular arms that look good in a tank top.

Although the traditional biceps curl will help you inch closer to growing the guns of your dreams, there’s another great biceps exercise that belongs in your training program: the preacher curl. With this no-nonsense biceps builder that makes one muscle group the star of the show, you can look forward to filling out the sleeves of your t-shirt even better.

How to Do the Preacher Curl for Building Bigger Biceps
Credit: nazarovsergey / Shutterstock

Below, you’ll learn everything from the proper form to programming tips to unique variations so you can achieve a fantastic pump and long-term results from the almighty preacher curl.

How to Do the Preacher Curl

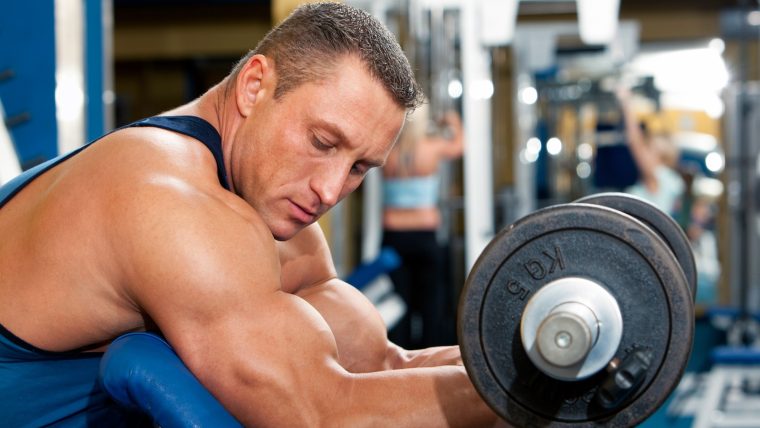
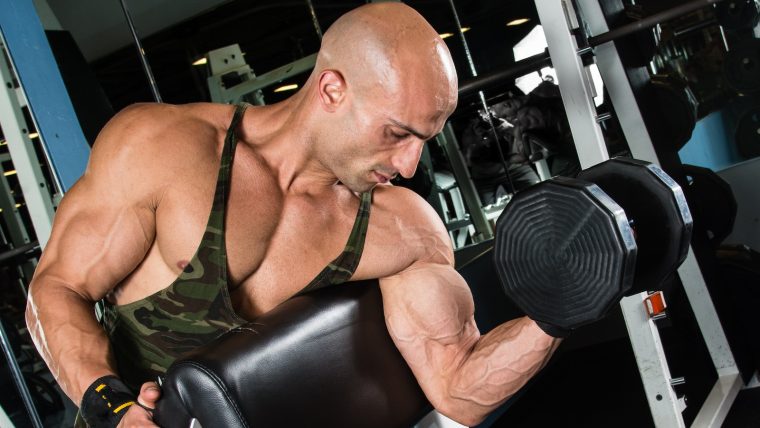
When conducted with proper form, the preacher curl will put your biceps and forearms through a grueling test of muscular strength and endurance. You can perform the movement with various free weights, including dumbbells, a barbell, or an EZ curl bar. Whatever piece of equipment you choose, you will also need a preacher curl bench to support your upper body during this isolation exercise.

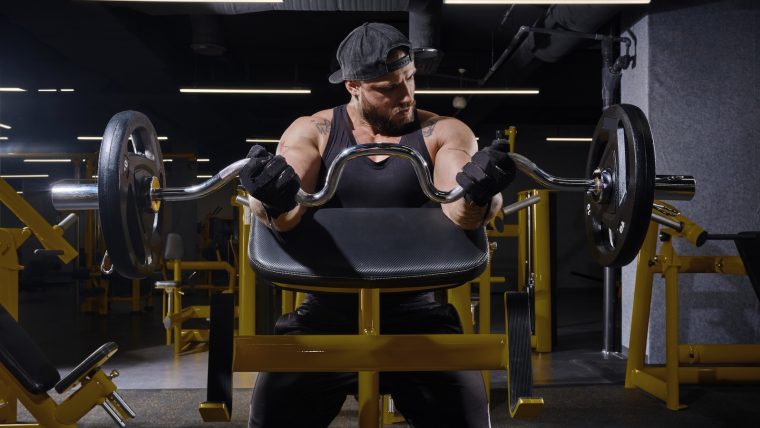
Here’s a step-by-step guide that will put you in the right position to get the most out of this biceps curl variation using an EZ curl bar.

Step 1 — Set Up

Sit down on the preacher curl machine and adjust the seat height so your upper arms and chest rest on the bench pad. Or, if there is no seat, stand behind the preacher curl bench so your arms and chest are in the correct position. You should have a slight forward lean so that the pad touches your armpits. Then, use an underhand grip to grab the curl bar.

Step 2 — Curl the Weight

With your chin tucked, wrists neutral, and elbows extended fully, contract your biceps and curl the bar toward your shoulders. Squeeze at the top of the movement and hold for one to two seconds.

Step 3 — Lower to Starting Position

Execute the eccentric portion of this curl exercise by slowly straightening your elbows. Maintain complete control during the descent, carefully lowering the curl bar back to the starting position before repeating the full sequence for the desired number of reps.

[Related: How to Do the Reverse Biceps Curl for Complete Arm Development]

Preacher Curl Mistakes to Avoid

Want to get the best return on your investment in building bigger biceps? Here are a few common mishaps people make when performing preacher curls that can prevent you from reaping the rewards of your training program.

Taking the Strength Training Approach

Working with intense loads for a limited number of reps will not yield the best results if you’re focused on maximum biceps growth. While that style of training works well for compound movements like the back squat, bench press, and deadlift, you shouldn’t treat the preacher curl like a strength-building exercise.

Instead of going ultra-heavy, use a manageable weight that you can perform for sets of 10-12 repetitions with perfect form. This will provide a better stimulus for hypertrophy than a low-rep, high-intensity protocol more suited to powerlifting.

Incorrect Setup

Woman performs a preacher curl with her elbows on top of the pad.
Credit: Ajan Alen / Shutterstock

Getting in the proper position should be the priority when you’re preparing to perform the preacher curl. That means your chest and upper arms should be in contact with the pad at all times. Having the bench set too low or too high will make it difficult (if not impossible) to execute the movement correctly, causing you to leave gains on the table by shifting the focus away from your biceps.

Failing to Use Full Range of Motion

The goal of the preacher curl is to fully extend and flex your elbows through a full range of motion. However, failing to extend your elbows past 90 degrees means you’re leaving potential gains on the table. While partial reps can be an effective way to finish off a set, focusing on fully stretching and contracting your biceps can maximize your muscle-building efforts.

[Related: Jon Call “Jujimufu” Absolutely Crushes a 161-Pound Preacher Curl PR]

Benefits of the Preacher Curl

What makes the preacher curl such a popular choice for lifters of all shapes and sizes? Let’s take a look at some of the ways it pays off to pencil this biceps exercise into your workout routine.

Direct Biceps Development

A true isolation exercise, the preacher curl provides a direct route to growing your biceps by removing your ability to use your lower half for any assistance. The angle of the bench pad allows you to completely stretch the muscle and maximize time under tension — a key factor in hypertrophy training.

Of course, squeezing at the top of the movement is critical for getting the most muscle-building returns. Overall, the preacher curl challenges your biceps during the concentric and eccentric parts of the exercise to create a fantastic stimulus for sculpting well-developed arms. 

Assists with Pulling Exercises

Man performs a conventional barbell deadlift.
Credit: Vladimir Sukhachev / Shutterstock

If you want to be more successful at chin-ups or other pulling exercises, the preacher curl can assist with those efforts. Having strong biceps will allow you to move the weight more efficiently and avoid overtaxing other muscle groups as you perform pull-based exercises. 

Plus, developing stronger biceps via the preacher curl can help with other compound movements. For example, you should see an improvement in your deadlift as you progress with your biceps training. And whether you choose the chest-supported or bent-over row, you should perform better at these back-day staples with stronger bi’s. 

Eliminates the Cheating Element

Chances are you’ve probably seen at least a few gymgoers contorting their bodies to swing out some poorly executed curls before finally admitting defeat. However, sacrificing form to execute any exercise makes little sense — especially if you’re concerned about maximizing muscle growth. 

Luckily, though, the preacher curl curtails your ability to cheat by keeping you grounded and eliminating the idea of using your legs for a boost. Once you set up properly on the machine and grab your free weight of choice, your biceps will quickly learn what it means to be isolated. More importantly, you’ll understand the value of performing slow, controlled reps using a full range of motion — and zero cheating. 

[Related: Jay Cutler Breaks Down His Workout to Build 20-Inch Arms]

Muscles Worked by the Preacher Curl

Undoubtedly one of the best isolation exercises for growing your biceps, the preacher curl engages a few other arm muscles, too. Here’s what you can expect to hit once you’re set up on the bench.

Biceps Brachii

Close shot of a man flexing his biceps from behind.
Credit: Lordn / Shutterstock

This two-headed muscle is the primary mover for the preacher curl. You can specifically target the long or short head via your hand placement if you’re using an EZ curl bar or a barbell. A narrow grip will lead to better engagement of the long head. Meanwhile, the wider you go, the more you will recruit the short head of your biceps brachii.

Brachialis

A flexor muscle of the forearm, the brachialis helps with elbow flexion and is also heavily involved due to the angle of a preacher curl. Training this muscle consistently will help you develop stronger, thicker forearms.

Brachioradialis

Another flexor muscle located near the elbow, the brachioradialis not only helps with flexion but also with supination or pronation depending on the rotation of the forearm. (1) During the preacher curl, it helps stabilize the elbow joint.

Who Should Do the Preacher Curl

No matter if you’re training for a bodybuilding show, looking to improve your other lifts, or just trying to gain strength and size in your arms, you shouldn’t hesitate to call upon the preacher curl for support.

Strength Athletes

Powerlifters and Olympic weightlifters can take advantage of preacher curls to prepare them to dominate in pulling exercises like deadlifts, cleans, and snatches. Growing bigger, stronger biceps should pay off when it comes time to perform — and the aesthetic benefits don’t hurt, either.

Bodybuilders and Physique-Focused Individuals

Male bodybuilder performs a preacher curl.
Credit: Jiri Miklo / Shutterstock

No bodybuilder wants to disappoint on the back double biceps pose. Isolating this two-headed muscle via the preacher curl will help your arms pop on stage, especially if you pair it with other biceps-centric movements like close-grip lat pulldowns and chin-ups. And even if you’re focused on constructing a physique for non-competitive reasons, you can’t go wrong with a curl exercise that isolates your biceps and forearms.

Recreational Lifters

Beginners and general lifters can use the preacher curl to develop strength and endurance in their biceps without having to worry about cheating reps by going too quickly or not using the full range of motion. This curl variation isn’t overly complicated to master, but it does offer plenty of muscle-building upside.

[Related: Hammer Curls vs. Biceps Curls: The Battle for Bigger Arms]

How to Program the Preacher Curl

Whether you’re new to lifting or looking to add another biceps exercise to your classic bodybuilding split, you shouldn’t hesitate to incorporate the preacher curl into your exercise program. Determining the number of sets and reps (as well as the ideal load) depends on your goals, as there are different methods to achieve each one.

For Beginners: Perform a warm-up set of eight to 12 reps with a light weight to ensure you’re using proper form. Using a moderate weight, complete two to three working sets of eight to 12 reps.

For Muscle Growth: Complete three to four sets of eight to 12 reps with a moderately heavy weight. For even more gains, decrease the weight and perform a drop set until failure.

For Muscular Endurance: Select a light-to-moderate weight that you can curl for 15 to 20 reps. After you finish your first set, rest briefly for 20 to 60 seconds before repeating for two more sets.

[Related: Try These Biceps Workouts Without Weights for Muscle, Strength, and Fat Loss]

Preacher Curl Variations

From changing your grip to swapping out the EZ bar preacher curl for a dumbbell-based version, some simple tweaks can shift this exercise in a different direction. Here are some variations you can consider implementing to keep things fresh in the gym:

Dumbbell Preacher Curl

Man performs single-arm dumbbell preacher curls.
Credit: Dave Kotinsky / Shutterstock

Leaving the barbell behind for a pair of dumbbells will open the door to new bicep-building possibilities. Not only can you work on any imbalances by training unilaterally, but you can also experiment with different grips to change the stimulus. For example, hammer-style preacher curls with a neutral grip will involve your forearm muscles more.

Close-Grip Preacher Curl

Using the same setup as the traditional preacher curl, this version targets the long head of the biceps by having you put your hands closer together.

Wide-Grip Preacher Curl

You can employ the opposite strategy to hit the short head by using a wide grip. For the best results, incorporate both grip variations into your biceps training program.

Reverse Preacher Curl

Whether you use a barbell, EZ curl bar, or dumbbells, a reverse preacher curl will force your brachioradialis to rise to the occasion. Grasping the bar with a pronated (palms-down) grip and keeping your arms in a fixed position to curl the weight makes this biceps exercise particularly useful for developing stronger forearms.

[Related: The Best Arm Workouts for Beginners, With Dumbbells, and More]

Preacher Curl Alternatives

Don’t have access to a preacher curl bench? You can still train your biceps with these muscle-building alternatives.

Incline Dumbbell Biceps Curl

Arguably the most challenging biceps exercise, the incline dumbbell curl swaps out the preacher curl bench for an adjustable weight bench. Sitting on a bench in the incline position provides a larger range of motion by putting your biceps into an even deeper stretch. Plus, stabilizing your body against the bench minimizes your ability to use momentum.

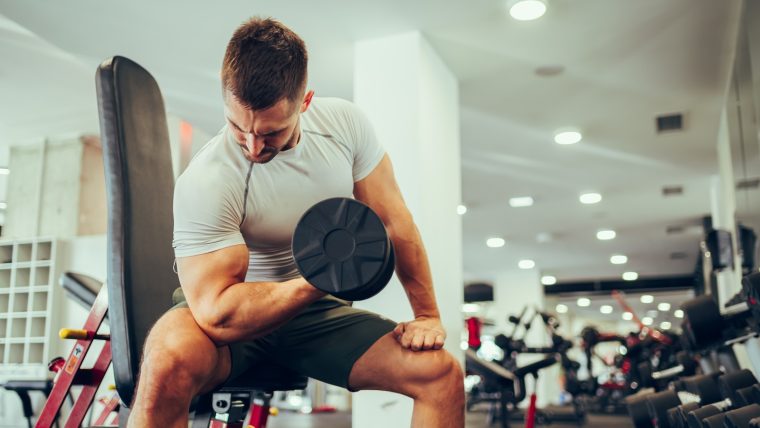
Concentration Curl

Man performs concentration curls in the gym while sitting on a weight bench.
Credit: Zamrznuti Tonovi / Shutterstock

Similar to the preacher curl, the concentration curl keeps your upper arm in a fixed position that stabilizes your shoulder. This isolation exercise is an excellent example of the benefits of unilateral training, as you get to attack each side independently while your triceps remain anchored to the inside of your knee to make your biceps do all the work.

Standing Barbell Curl

An option that doesn’t involve sitting down, the standing barbell curl has withstood the test of time as one of the most basic, yet effective biceps exercises. Unlike some of the other alternatives and variations, this movement forces you to engage your glutes and core as you curl the weight. In addition, it also activates your anterior deltoid when the barbell is in the fully curled position.

Spider Curl

Take advantage of gravity and leverage to enhance your muscle-building experience by incorporating spider curls into your training program. Also referred to as the reverse incline curl, this exercise has a similar set-up as the chest-supported row. But instead of pulling your elbows back to target your lats, rhomboids, traps, and rear delts, you’ll contract your biceps to curl a barbell (or dumbbells) toward you.

Let Your Gains Preach for Themselves

Building bulging biceps requires plenty of high-quality reps that recruit the two-headed muscle to fully stretch and contract. While there are ample curl variations that can help you achieve that rounded look, the preacher curl deserves to be near the top of your biceps exercise list because it makes you stay strict with your form and removes momentum from the equation. Earmark it for pull day or whenever you work on your arms and get ready to show off the fruits of your labor when you flex.

FAQs

What are preacher curls good for?

Preacher curls are great for promoting biceps growth and development. As an isolation exercise, it targets your biceps muscle without letting you use your lower half for assistance with squeezing out extra reps.

How do you do a proper preacher curl?

To perform a preacher curl with proper form, you must set up a preacher curl bench so that your upper arms and chest are in contact with the pad. Using an EZ curl bar, barbell, or dumbbells, contract your biceps and lift the weight toward your shoulders. Squeeze at the top, then slowly lower the weight back to the starting position.

What angle should a preacher curl be?

The ideal angle for a preacher curl bench ranges between 45 to 55 degrees. This gives you ample room to stretch and contract your biceps fully for maximum muscle growth and overall development.

References

  1. Lung BE, Ekblad J, Bisogno M. Anatomy, Shoulder and Upper Limb, Forearm Brachioradialis Muscle. [Updated 2023 Jul 25]. In: StatPearls [Internet]. Treasure Island (FL): StatPearls Publishing; 2023 Jan-. Available from: https://www.ncbi.nlm.nih.gov/books/NBK526110/

Featured Image: lunamarina / Shutterstock

The 13 Best Things I’ve Learned About Feeding Kids

0
The 13 Best Things I’ve Learned About Feeding Kids

Inside: As a dietitian-mom, I’ve learned a lot of important lessons after 20 years of feeding kids. Some of them the hard way.

When I started Real Mom Nutrition, our firstborn was 5.

Then I blinked, and he turned 20. 

There’s something about that kind of milestone–a new, round number decade–that makes you pause and reflect. And dab away a few happy/sad tears.

Like all parents, I’ve learned a lot of lessons along the way. Like no, you will not always be terrified when your kid is behind the wheel of the car. And yes, children will eventually pee on the potty without the promise of an M&M.

I’ve also learned a lot about feeding kids–and learned some of those lessons the hard way.

The 13 Best Things I’ve Learned About Feeding Kids

1. The one-bite rule works…until it doesn’t

Our oldest kid willingly took a bite of every new food, and I thought I had it all figured out. 

Until our second kid came along.

He didn’t want to take “just one bite”, and it would spiral into a battle of wills, leaving us all miserable and exhausted (and that one bite never taken).

The same goes for any kind of feeding strategy or advice–including on this blog: What works swimmingly with one kid may not work with another.

Even two kids raised in the same house with the same meals and routines can have wildly different preferences and habits. Case in point: While I was a picky eater, my brother ate nearly everything without complaint.

Get More: Should You Make Your Child Take Just One Bite?

2. Don’t sweat the small stuff

You know those parenting moments where you wish you had a do-over, the ones that jolt you awake at 2am in a puddle of regret? (No? Just me?)

One of mine occurred at an Ohio State football game, where I had a meltdown over the kids wanting soda. Tempers flared, and I ruined what could’ve been a fun family day. Over sugar. 

Back then, I was worried that every bite or sip was make-or-break, that somehow I was dooming my kids to a life of disease and sugar addiction if we didn’t order water.

Thankfully, I’ve lightened up a lot over the years and found a much healthier mindset around food and balance for my kids. And for myself.

Get More: How Intuitive Eating Can Help You Make Peace With Food

3. Serve salads early and often

I beat myself up over some things, but this is a move I’m happy I made: I started serving green salads early in my kids’ lives, and now both of them happily eat them and order them in restaurants. 

I put a high value on this for a couple reasons:

  • They saw salad nearly every night at dinner and learned that veggies, especially leafy greens, aren’t yucky. 
  • They learned to eat different kinds of foods mixed together when things like shredded carrots or diced peppers were added. Eating mixed dishes is a big deal for some kids, especially picky eaters.

Get More: How to Teach Your Kids to Love Salad

Easy Weeknight Dinner: Buddha BowlsEasy Weeknight Dinner: Buddha Bowls

4. Making just one meal sets you free

As a former extremely picky eater who rarely ate what my dear mom cooked for dinner, I didn’t want to go down the buttered noodles road with my own kids.

So from the start, I just made one meal every night, deconstructing some mixed dishes (like the photo above), and allowing the kids to opt out of certain components of the meal, like a sauce or particular veggie, if they wanted to.

I made sure there was something on the table they liked, even if it was just rice, and decided to be okay if they occasionally ate only that rice for dinner.

In my mind, if I didn’t give my kids a get-out-of-dinner-free card in the form of a PBJ or chicken nuggets, they’d have more incentive to eat what I made. And generally, that was the case.

Get more: The Dinnertime Rule That Will Change Your Life

How to make naturally pink frostingHow to make naturally pink frosting

5. People’s food choices are their own business

I cringe when I read some of my early posts. I was judgmental and up in other people’s business, especially when it came to pee-wee sports sideline snacks.

I learned the hard way that food choices are emotional and personal, especially when it comes to what people feed their kids, and that I have no right telling other people what to do.

Sometimes those food choices impacted my own kids, like when cupcakes were brought to the soccer fields after practice.

But there are better ways to enact change that shaming or snark.

Do I still believe in healthy team snacks? Yes. Do I wish I had gone about it in a different way? Also yes.

Get More: How Parents Can Create A Healthy Team Snacks Plan for Kids Sports

6. The only constant is change

It’s the Murphy’s Law of parenting: Once you feel like you’ve finally mastered a phase or stage, everything changes.

But I’ve found that the opposite is true as well. Just when you’ve accepted that your kid is never going to enjoy piano lessons, remember to say thank you, or like green beans, they can surprise you.

That’s why you should never write off a food forever, even if your kid has refused it for years. Our youngest son didn’t eat cucumbers–until he plucked one from a restaurant salad I had one night and announced that he wanted to try them. Ditto for guacamole. Our older son refused pesto for years before deciding it was good.

To this day, my mom still occasionally looks over at my plate and says, “You eat that now?”

Get more: Your Kid Hates Vegetables. Now What?

7. Hungry kids are easier to feed

When my kids were little, my handbag was full of boxes of raisins and containers of crackers. All it took was one hunger-induced meltdown in Target, and I never left the house without an arsenal of snacks for my kids. Just in case.

But I learned that children who are nibbling all day are never truly hungry for meals, which can make them seem a lot pickier than they really are.

Sure, snacks can be helpful. But it’s okay for kids to get hungry. It’s the natural order of things. So before you label your kid a picky eater, consider how hungry he is when he actually comes to the table.

Get More: 5 Easy Mistakes That Make Picky Eating Worse

8. Comparison is the thief of joy

Just because your friend’s kid loves quinoa doesn’t mean yours has to. And just because that child on Instagram takes sushi and cucumber salad in a bento box to school for lunch doesn’t make your kid’s brown bag PBJ inferior.

Comparing our kid to someone else’s is never helpful–whether it’s how soon they slept through the night to what college they were accepted to. Or what (and how much) they eat.

Get more: The Kind of Eaters I Want My Kids To Be and Why Boring Packed Lunches Might Be Best for Some Kids

9. Those two extra bites don’t matter

They may even make things worse.

How much time did I waste deciding how many more bites each kid needed to take of each food on their plate before they “could be done”? Way too much.

When I stopped micromanaging and started trusting my kids to eat what they needed, they actually did.

Yes, they sometimes jumped down from the table after a couple of bites and announced they were hungry again as soon as the dishes were cleared. But over time, they figured it out–and I could go back to focusing on my plate, not theirs.

Get More: Why Pressuring Kids To Eat Doesn’t Work (And What To Do Instead)

How to Grill Better Steaks & BurgersHow to Grill Better Steaks & Burgers

10. Family dinner gets better 

“Family dinner” has a lovely ring to it, but it’s not always lovely. Family dinner can be especially hard when children are very young. They’re tired. You’re tired. Someone is spilling something. And someone is crying because their pizza slice is cut into pieces but they wanted it whole.

My husband and I slogged through some tough dinners with our kids. But we kept our eyes on the prize: Surely, kids can’t throw tantrums over the color of their cup forever and eventually, they would learn how to pour their own milk and sit in their seat for longer than two and a half minutes.

So we kept at it and made family dinner a priority. Over time, it got a whole lot better. My older kid even named family dinner his favorite family tradition on a college application (*sob!*).

Get More: The Truth About Family Dinner

Kids Cook MondayKids Cook Monday

11. Even cranky kids should learn to cook

I tried and tried to get my kids into the kitchen. I was embarrassed that I had a blog about feeding kids and wrote about the importance of teaching kids to cook–yet my two took no pleasure in helping make a meal.

There were brief periods of enthusiasm and moments they were seized with the desire to cook or bake. But overall, they resisted. And instead of pushing, I turned on good podcasts and savored the alone time in the kitchen.

Yet now my college kid is getting ready to live on his own, and I’m giving him a crash course in how to cook chicken breasts. I wish I had made cooking a non-negotiable. (Luckily, HelloFresh meal kits are helping me get my younger son into the kitchen more often.)

Get More: Easy & Healthy Meal Prep For College Kids

Lentil CookiesLentil Cookies

12. Serve foods you don’t like

Another misstep on our part. My husband and I are both recovering picky eaters and between us, have a handful of foods we still don’t like, like tomatoes and eggplant.

So I didn’t incorporate those foods into our meals. And as a result, our kids don’t eat those foods either. *Cue sad trombone*

I know there’s still time. It’s never too late to learn to like a new food. But it would’ve been easier if we’d done it from the start.

Get More: I Was A Picky Eater. Here’s What I Want You To Know.

13. A happy dinnertime is more important than everything else

It doesn’t matter how many bites of cauliflower they took or who had their elbows on the table (like my kid above!).

It matters whether your kids feel safe and accepted at the dinner table, not nagged and punished for what they eat–or, rather, don’t eat.

So as much as you can, keep dinner pleasant(ish). Ask silly questions. Play little games. Know it will get better.

Because time goes fast. And before you know it, you’ll miss having those little elbows on the table too.

Get more: Conversation Starters for Family Mealtime that Get Kids Talking

6 Top Hack Squat Alternatives For Bigger Legs

0
6 Top Hack Squat Alternatives For Bigger Legs

The hack squat can be a great gym machine for developing your lower body muscles, particularly your quads, with very little engagement from your lower back.  

This makes it a popular alternative to traditional squats using a barbell, which can put a lot of stress on your lumbar spine – especially if you’re not doing them with proper form.  

hack squat6 Top Hack Squat Alternatives For Bigger Legs

But let’s suppose your gym doesn’t have a hack squat machine, what then?  Well, stick around as we’ll be recommending the best hack squat alternatives to develop your legs with less weight load on your lower back. 


Recommended Reading – Hack Squat: The Best Machine To Unleash Your Leg Potential?


What Makes A Good Hack Squat Alternative?

When you perform a hack squat, your upper body is fully supported by the machine. Your shoulders are locked under the pads with your upper body resting against the back pad.

You initiate the movement by descending into a squat and the carriage runs up and down on rails.  This pretty much locks you into position throughout the exercise.  This makes the hack squat ideal if you have any mobility issues or pre-existing injuries to your lower back.  

Any hack squat alternative should focus on leg development with as little load as possible on your lumbar spine.  

Top Hack Squat Alternatives For Lower Body Strength & Muscle Gains

The suggestions below can all take the place of a machine hack squat.  Some will allow you to go heavy and focus on overall leg development while others will be better for isolating certain leg muscles meaning that you’ll want to stick with lighter weights.  

The leg press machine is perfect for adding muscle mass to your entire legs and you’ll probably find that you can load more weight on the carriage when compared to a hack squat machine.

leg press hack squat alternativesleg press hack squat alternatives

This is mainly due to the angle of the machine itself.  The most common type of leg press in a gym is the 45-degree leg press.  Compare this to a hack squat machine, where the angle of the sled is much higher and more like 60 degrees.  

The more vertical angle of the hack squat means that you’ll have to work that much harder to push the weight load against gravity. On the other hand, when doing a leg press exercise you’ll be pushing the weight away from you at a much smaller angle with less gravitational forces meaning that you can load on more plates.  

So, if muscle size is your overriding goal then swap out the hack squat for the leg press and watch your legs grow! 

It’s worth noting that you should be careful of arching your lower back.  If this happens, it probably means you’re bringing your knees too close to your chest.  Keep your lower back in contact with the backrest at all times.  

Leg presses are a compound exercise so you can choose to lift heavier weight loads for fewer reps.  Try different foot placements on the foot plate as this will help encourage more activation of certain muscle groups.  

For example, placing your feet higher up and closer together will work more of your glutes and hamstrings.  

The belt squat is an awesome exercise that most closely mimics the action of a regular barbell squat when compared to any other squat machine.  This is because the weight load is distributed equally on either side of your body at hip height.  

belt squat machinebelt squat machine

Because you don’t have a heavy barbell planted across your upper back, this makes the belt squat a great alternative to the hack squat machine.  

Other advantages of the belt squat are that you can squat with heavy weights without the need for a spotter so it’s great for a bit of solo training and, when compared to a regular squat, the machine helps you to maintain an upright torso so you’re more likely to squat with good technique with no spinal compression.  

If you’d like to know a bit more about the belt squat, we’ve got an entire article dedicated to this exercise which explains more about the benefits, different types of belt squat machines and other exercises you can perform on it: https://kustomkitgymequipment.com/blogs/news/hip-belt-squat-the-ultimate-leg-machine/

The belt squat is another compound exercise meaning it’s great for working all the muscles of your lower body.  You can adopt different stances to focus on certain leg muscles.  

Try repping them out with lower weights for a muscle pump or go heavier to focus on strength gains.  

We know that the leg extension is one of those ‘love it or hate it’ machines.  But, we’ve included it in our list of hack squat alternatives as it can be a great way of developing your quads and, because you’re seated, you shouldn’t feel any strain on your lower back. 

leg extensionleg extension

The key thing to note when performing leg extensions is not to go too heavy.  The focus should be on high volume with a lighter weight so you don’t put too much stress on your knee joints.  

You could try performing them unilaterally, so working each leg in turn – this is ideal for addressing any imbalances.  Alternatively, point your toes inwards to help focus more on that quad sweep.  

Leg extensions are an isolation exercise and will primarily work your quadriceps.  Even though the quads are a powerful and strong muscle, it’s still important to stick with a lighter weight due to the stresses put through your knee joint throughout the exercise.  

We have a detailed guide on the leg extension that you can read here: https://kustomkitgymequipment.com/blogs/news/leg-extension-muscles-worked/

The hamstring curl machine typically comes in two different types; lying or standing.  The lying hamstring curl involves performing the curl in a prone position with your upper body fully supported.  

lying hamstring curllying hamstring curl

On the other hand, the standing variation requires a little more core stability.  So whichever one choose pretty much depends on your preference and your mobility/stability. 

In either case, you’ll be placing little stress on your lower back making the hamstring curl an effective hack squat alternative.   

As with the leg extension, this is an isolation movement.  Instead of the load being placed on your quads, it’s instead going straight to your hamstrings.  

Perform reps slowly and with control as this allows for much better muscle contraction and, even with a lighter weight load, you’ll be sure to feel the burn! 

The trap bar deadlift is a great way of working your entire lower body and because you have to perform it with a very upright torso this reduces strain on your lower back making it an excellent alternative to the hack squat. 

trap bar deadlifttrap bar deadlift

The regular deadlift would typically work your posterior chain, particularly your glutes and lower back, and this really classifies it as a back exercise.  That’s because the barbell is directly in front of you so you have to execute a hip hinge movement in order to lift the barbell from the ground which then passes in front of the knees.  

However, when performing a trap bar deadlift, you stand in the middle of the barbell which keeps the weight load distributed on either side of your body so that the axis of the barbell passes through the middle of the knees.  

This means your chest remains at a lesser angle which reduces lower back recruitment and instead places the load on your quads and hamstrings.  

The trap bar deadlift is a compound exercise involving your hips, knees, and ankles so once you’ve nailed the correct technique, it can be performed with heavier weights and low reps for big muscle gains.  

Front squats are performed with the bar resting across your upper pec muscles. When you compare this to a regular back squat, when the bar is placed across your upper traps, this encourages you to keep your chest in a more upright position.  

front squatfront squat

Because of this, it keeps stress on your lower back to a minimum making it a good substitute for the hack squat machine. 

This type of squat variation focuses more effort on your quads and you should stick with lighter weights which will make it easier to adhere to proper squat form.  This exercise also recruits your glutes, hamstrings and erector spinae so it’s a great way of working multiple muscle groups.  

While it’s a great exercise, one thing to note with front squats is they can put a bit of strain on your wrists so if you lack mobility here, you may find them a little uncomfortable to perform.

Wrapping Up  

Hack squats are certainly a popular lower body exercise, but keeping things varied with your strength training is crucial for proper muscle development.  You’re not just limited to the above suggestions either!  

There are many other hack squat alternatives such as the smith machine squat, Bulgarian split squats, and sissy squats too. All of which can play an important part in your leg training.  

Isolation exercises, like the leg curl and leg extension, can be a great way of getting the blood pumping and warming up your muscles before moving over to heavy-weight compound movements, including the leg press and front squats.  Alternatively, incorporate them into the end of your workout to properly exhaust those leg muscles. 

9 Big Reasons To Do A Testosterone Test

0
9 Big Reasons To Do A Testosterone Test

Low testosterone levels is a surprisingly common condition for men to suffer from. With the number of men growing year on year. It’s been estimated that low testosterone impacts tens of millions of men across the globe. With the vast majority, not even realizing low T is causing issues or realizing that what they are experiencing isn’t normal & can actually be fixed. So you need to know the signs you need to do a testosterone test and know your levels like the back of your hand.

Testosterone is an essential & the primary male hormone (Important for women as well, just at lower levels). For men testosterone impacts essentially every aspect of your health. From sex drive and energy levels. Muscle mass, body fat & body composition. It impacts your moods & characteristics, when levels are healthy you are more confident, assertive & happier. Your testosterone levels also impact things like your bone health, heart health & circulation.

When you have healthy T levels, all the above are healthy. When you are suffering from low T, some or potentially all of these things can suffer, plus more. There are a wide number of symptoms of low testosterone. I’ve listed below the seven most common signs of low testosterone. Which are signs you need to get levels checked. I’ve also listed two scenarios where you will want to do a testosterone test and get to know your levels.

Signs You Should Do a Testosterone Test

  • Lethargy/ fatigue
  • Muscle loss
  • Struggling to gain muscle
  • Poor mood & depression
  • Brain fog
  • High body fat
  • Struggling to lose body fat
  • Loss of libido
  • Erectile dysfunction

1. Lethargy/ Fatigue

9 Big Reasons To Do A Testosterone Test

As healthy testosterone production helps you feel energetic alert & motivated. Low testosterone levels often mean you feel the exact opposite. When T levels are low, it’s common for you to feel fatigued, lethargic & just lacking the energy & motivation to do every day things.

Low T levels are linked to men having increased risk of chronic fatigue. Fatigue is one of the most common signs of low testosterone. If you find you frequently feel overly tired & lethargic. You struggle to wake up every morning. You have to drinks tons of coffee, just to get going. Struggle to be active like other men of your age, there is a good chance that low testosterone levels may be to blame.

2. Muscle Wastage/ Struggling To Gain Muscle

Scrawny man

Testosterone has a major impact on the physical characteristics of your body. It’s a natural steroid hormone. Which means it’s it has a serious impact on your ability to gain muscle mass and improve your strength levels. When you are suffering from low testosterone. it’s not uncommon for you to struggle to gain muscle mass & strength. You may even experience losses in strength & loss of muscle mass.

This becomes a negative feedback loop. As the lower your muscles mass is, the lower your testosterone production tends to be. Which in turn can mean even further muscle loss & this can go on & on. Studies have shown that men being given exogneous testosrerone can increase protein synthesis by as much as 27%!  when administered to men. Simply put, the more testosterone your produce, the easier it becomes for your body to develop muscle.

If you’ve noticed that you are struggling to gain muscle mass & increase strength levels. Even worse if you think you are losing muscle or strength. I would suggest that you investigate further what may be happening and get a testosterone test done to see if that’s the cause.

3. Loss Of Libido

Another major symptom of low T is a low sex drive or noticable loss of libido. When you are suffering from testosterone level. It can be common to lose interest in sexual activity. Potentially no longer be aroused by things that would have once aroused you.

As I’m sure you can imagine. This can be have a massive impact on your relationship and personal life. The good new is that when you fix your low T issues. Your libido is usually one of the first things that returns. If you have noticed a recent loss of libido or if you have had minimal desire in sex for a while. I would say this is a major signal you need to test your testosterone levels.

4. Gaining Body Fat

Sumo wrestler

When it comes to body composition. Testosterone doesn’t just impact muscle mass but levels of body fat as well. Studies have closely correlated higher testosterone production with lower levels of body fat. People with higher testosterone tend to be leaner. Where as people with low testosterone ted to carry higher levels of body fat. Especially around the belly & torso. If you think of a man with a “beer belly”, that is often a tell tale sign of low testosterone.

There was a study looking in to men put on androgen deprivation therapy. This involved lowering testosterone levels to almost zero. In this study it was found that these men saw an increase of 22% in visceral fat around the abdominals. So in short. Low testosterone will give you a more weight around the midsection. Having higher levels of fat increases you risk of ilness. High levels of visceral fat increases risk of multiple serious diseases. Such as an increased risk of heart disease. So it’s not a small issue of low T just meaning a few extra pounds.

5. Erectile Dysfunction

Erectile dysfunction is a reason to test testosterone levels

Struggling to achieve erection or maintain one, can be a sign you are suffering from low testosterone levels. Testosterone triggers the release of nitric oxide.This plays a key part in allowing blood to pass through blood vessels. Making it an essential molecule for blood to flow to the penis & therefore developing & maintaining erections. So when your T levels are low. Nitric oxide levels are lower making it harder for blood to flow to the enis & for you get & maintain an erection.

Erectile dysfunction can occur for a few different reasons. So if ED is something you are suffering from. You shouldn’t just assume that you have low testosterone if you have erection difficulties. If you have ED alongside any of the other issues listed in this article. Low testosterone levels are fairly like. Even if you think you just suffer from erectile dysfunction. I would again recommend a testosterone test so you can rule it in or out as the potential cause.

6. Memory & Focus Problems

Healthy testosterone is about so much more than just body composition &  sexual heath. It impacts a wide range of brain functions, including memory & focus. One of the most common symptoms of low testosterone in men is what is known as “brain fog”. This is where you struggle to focus, have unclear recall & just don’t feel like your brain is “firing on all cylinders” or a general decline in memory and focus.

One study showed that men who suffer from low testosterone had increased likelihood of cognitive decline and developing dementia. This isn’t to say that forgetfulness is a deinitive sign of low testosterone. But if you have noticed a decline in your memory & focus. It could well be down to you suffering from a drop in T levels. I would suggest this combined with other symptoms is a good reason you to get a testosterone test done and find out your levels.

7. Poor Mood/ Depression

Depression is a reason to test testosterone levels

Testosterone levels are also closely correlated with your emotional health & moods. A study from 2012 shows that hypogonadal men (men with low testosterone levels) that did not seek treatment for low T. Showed more severe symptoms of anxiety & depression. In comparison with men of similar men & hypogondism who were assigned testosterone treatment.

Other studies have displayed similar findings. They have shown that healthy testosterone levels improve mood significantly in men. This includes quantifiable decreases in negative emotional responses. Like nervousness, anger and irritability. Now  poor mood, anxiety, irritablity, depression etc. Doesn’t necessarily mean low testosterone levels. It’s still potentially one of the signs you need to be on the look out for.

8. You Are On TRT/ Anabolic Steroids

If you are on TRT (testosterone replacement therapy) or anabolic steroids. You should be reguarly getting your T levels tested. As well as complimentary biomarkers such as your estradiol, free testosterone levels, SHBG & hermatroctrit.As you are synthetically increasing testosterone levels. You need to keep a close eye on T & your hormone profile, to make sure everything is being managed corrrectly.

9. You Are Over 40

birthday cake

One thing I would love to see countries do is soem kind of drive to get men over 40 to test testosterone levels. This is the sort of age where most men start to experience more sevre symptoms. Catching these early means you can take the necessary steps to counter this. So it doesn’t become a major issue!

How To Test Testosterone Levels

This may be something you can arrange through your GP. Sadly in most cases this is something that proves near impossible or at least involved a ton of effort for you. A lot of men will often get a test done privately as this far easier. Then armed with thier blood test results can potentially get their GP to help with a course of action, if there testosterone levels are low.

If You Are Based In The UK I Recommend You Use MedichecksTo Test Testosterone Levels

If You Are Based Outside Of The UK I Recommend You Use Lets GetChecke To Test Testosterone Levels

Final Thoughts On Reasons To Test Testosterone Levels

Hopefylly you have found this article useful & now know the signs that you need to test testosterone levels. If you have any questions, just drop me a comment below. Make sure you share with anyone else you think will find it useful. Yoiu can also follow me on my social media sites. Where I share info about all things related to testosterone production & optimizing health!

5 Exciting Workout Ideas To Enjoy The Nature

0
5 Exciting Workout Ideas To Enjoy The Nature

Have you ever felt your gym getting smaller and smaller? Or perhaps you’re not getting the same vibe? Maybe less motivated to lift weights? Perhaps your fitness routine needs an update – a new environment beyond the four walls. In that case, outdoor exercise can offer the best of both worlds.

Open-air fitness is not just exercise. It’s an opportunity to connect with the nature, people and even yourself. In this post I will share 5 training session you can try to experience that to the fullest.

Outdoor training – easy to start, easy to connect

In most cases, outdoor exercise does not require much equipment. And even those activities that do have alternatives that don’t break the bank. Brands like Quintana Roo X-PR Series understand this and offer triathlon bikes designed for every level, which ensures the experience of open- air fitness is accessible to all.

And that’s the best part – nature is the great connector. It brings cyclists, hikers, and runners together to exercise in the open air, essentially making them workout buddies.

outdoor exercise

5 Outdoor workout ideas

The options for exercises are limitless, each one offering exciting challenges and beautiful views. Here are my 5 favorite ones:

Mountain Rock Climbing

Take on the vertical challenge by scaling a rock with your bare hands. Stride along the rugged terrain and reach for that far and foggy mountaintop.

Begin your adventure with a dynamic warm-up focusing on the arms, legs, and core. Once ready, tackle a series of climbs with increasing difficulty.

Start with a basic climb to get accustomed to the grip and foothold techniques, then progressively challenge yourself with steeper inclines. Aim for three to five climbs, allowing ample rest between each to maintain your energy and focus. Finish with a gentle stretch session to help your muscles recover.

The Resilient Athlete Book

The Resilient Athlete

A Self-Coaching Guide to Next Level Performance in Sports & Life

Are you aiming to become a resilient athlete who is able to withstand any pressure? Be able to jump on any opportunity? Take any challenge life throws at you head on?

Then this book is for you.

Learn more

Road Cycling

Hit the wide road and take advantage of everything a bike ride offers. The monotonous rhythm of pedalling will be transformed into lovely music for everything from century rides to weekend getaways.

To have a nice workout, start off with a 15-minute warm-up at a gentle pace. This will get your legs ready. For the main part, cycle for 60 minutes on rolling terrain; start on flat surfaces, then move to gentle slopes. Sprinkle some intervals: pedal hard for two minutes, then recover at a slower pace for three minutes. Repeat this pattern five times. Conclude with a 15-minute cooldown ride at an easy pace to help your muscles relax.

Open-water Swimming

Escape from the pool’s monotony to the open water. Feel the cool water against your skin and the thrill of swimming in a lake or sea. You may even spot a sea turtle.

Warm up your body for 10 minutes by doing some easy swimming to help adjust to the temperature and water conditions. Proceed to the main part of the workout: swim at a moderate effort for five intervals of 10 minutes each, with a 3-minute easy swim in between for recovery. End with a 10-minute cooldown, focusing on slow and smooth strokes.

outdoor workout ideas

Outdoor Boot Camps

Transform your local park into an outdoor boot camp circuit. Have your friends / fellow athletes perform push-ups, squats, burpees, short sprints, or runs up a hill. As you push your body in each rep with full force, allow the fresh air to enter fully through your nostrils and sink deep into your lungs. The warmth of the sun will give you extra energy (and Vitamin D).

Warm up with a dynamic warmup and a series of bodyweight exercises, such as jumping jacks and high knees, for around 10 minutes. Make a circuit including burpees, push-ups, squats, hill runs, and quick sprints. Complete each exercise for one minute, then take a 30-second break. Repeat the circuit three times.

Encourage full effort during active periods and deep breathing during rest. Wrap up with a cool-down session of stretching and deep breathing for 10 minutes.

Outdoor Yoga

Ask anyone who has practiced yoga outdoors and they will agree that nothing can match the fresh air in a meadow or the divine light of the forest. Feel connected to the land and the universe by taking a deep breath and curling your toes in the crisp grass.

Start off by focusing your mind and body on breathing deeply for a few minutes. After that, warm up with a series of basic positions like downward dog, cat-cow, and slow lunges. Move into a series of sun salutations—try to perform at least five rounds. Use the remaining time to experiment with more advanced stretches and calming positions. Finish your practice with a five- to ten-minute meditation or savasana (corpse posture) to maximize its benefits.

Nature offers an unmatched full-body (and full-spirit) experience that will leave you wanting more, regardless of which outdoor exercise appeals to you.

The true power of outdoor exercise

Exercising in the nature can bring about mental clarity and emotional refreshment. Being outside almost feels like a way to reconnect with your inner self. It seems as though the daily grind simply disappears and you are left to simply exist in a state of tranquillity.

There is nothing more restorative than spending time in the nature. You can take deep breaths, let go of stress, and find peace when walking unevenly on hills or trails, switching between quick walking and jogging. It’s as if Mother Nature herself is whispering, “Breathe deeply, my child, and let your worries dissipate with every step.”

What are you waiting for then? Release yourself from the confines of closed spaces and embrace the outdoors as your play area. Allow the rejuvenating power of nature to revitalize your body, mind, and soul.

Will you answer the call of the vast outdoors?

Fionna Galliard

Fionna is a passionate freelance content writer who enjoys creating engaging and informative content. She also runs a small business specializing in baked goods, delighting customers with her culinary creations. Committed to a healthy lifestyle, Fionna loves jogging and hiking with her dogs whenever possible.

JetsonVR – Virtual Reality Canine Dissection – Now Available on Windows Mixed Reality

0
JetsonVR – Virtual Reality Canine Dissection – Now Available on Windows Mixed Reality


JetsonVR – Virtual Reality Canine Dissection – Now Available on Windows Mixed Reality – EasyAnatomy


JetsonVR – Virtual Reality Canine Dissection – Now Available on Windows Mixed Reality


Skip to main content

Regrets as a Novice Lifter

0
Regrets as a Novice Lifter

Regrets as a Novice Lifter

Consider me your peer. I will not speak to you as an authority on
strength training, but simply as someone who gets it. “It” being
your experience as a novice lifter. This is not a customer
testimonial. I will not talk about how I got great results from
Starting Strength. What I will do, however, is validate for you what
Starting Strength claims to be true – that it is the single best
method for novice lifters to get strong. I only know this from years
of doing anything but Starting Strength Method. I have made all of
the mistakes. I have all of the regrets. I don’t want you to make the
same mistakes. Peer to peer, I want you to be highly successful and
very strong.

If you have read
Starting Strength: Basic Barbell Training, listened to
Starting Strength Radio, train at a Starting Strength Gym, or
attended a seminar, you have heard the that the Starting Strength
Method was born from years of experience in training and coaching.
That it is based on years of study of the phenomenology of strength
training. That it is simply the best way to get strong. Why should we
believe them? Starting Strength sells many products. Everyone says
their product is the best. Certainly Starting Strength has many
competitors. Which one is right for a new and developing lifter? Why
does the advice from Starting Strength work when other approaches do
not?

First, some backstory
on me, laced with regrets.

I started lifting in
2018. I was skinny-fat, 35 years old, the mother of two young
children, with abundant energy and a thirst for a hobby. I enjoyed
being in my local commercial gym, and I wanted to be stronger, but I
didn’t know how I was going to get there. In my naive state, I
somehow latched onto a barbell-based strength program that I found in
a very quick and limited web search. It was only a program that said
it was right for beginners, with no focus on form for lifting. I
struggled for a few months – I had no idea how to squat, bench,
press, or deadlift – failing early and often, and developed searing
hip flexor tendonitis along the way. Despite all this, my desire to
succeed was high and I kept pushing forward. I now know that novices
need far more than a program to follow, that a 5×5 program is too
much volume for a novice, and that accessories are a waste of time
and energy for a novice.

As I struggled with
this cockamamie program to which I had dedicated myself, the head of
personal training at my gym took notice. I had originally met him in
a CrossFit-like exercise group where I was first introduced to
barbell exercises. At this time, he took me under his wing and began
to work with me one-on-one. He coached me through some technique in
person once a week, hand-wrote a program for me, and encouraged me
along the way. I thought this was my way forward. Until I discovered
that it wasn’t. However this discovery only came to me many years
later.

I will give my thanks
to this individual for being the first person to expose me to barbell
training. He is also the first person to expose me to Starting
Strength. One day, while we were lifting, he began to cast a YouTube
video on the TV in the weight room and said, “You gotta see this
guy.” That guy was Mark Rippetoe. That video was dated 2013 and is
no longer on YouTube. It was titled “Starting Strength: Full
Seminar.”

Fast forward to 2024. I
am 41 years old now. I have a better-looking and better-functioning
body at age 41 than I had when I was 31 or 21. I have put on 25
pounds of lean mass and increased my total by more than 500 pounds. I
placed 4th in my first national-level powerlifting meet this year. I
also train Brazilian Jiu-Jitsu and I am able to outwork and submit
women many years younger than myself. I feel amazing and I sleep like
a baby every night.

But how did I get here
from that awful beginning? I would not be where I am without Starting
Strength and my exceptional Starting Strength Coach. I made every
mistake along the way before I invested in the Starting Strength
method. I have many regrets about training before I started working
with my SSC. Please, I beg you, do not make these mistakes. I now
know that these are common pitfalls:

  • Being on the wrong
    program or frequently changing programs

  • Using bad
    technique

  • Caring too much
    about the numbers

  • Going rogue/Not
    doing the program

  • Not eating
    enough/Not gaining weight

  • Taking a
    break/Changing it up

  • Not training with
    intensity

  • Cutting weight

  • Wrong
    Program/Program Hopping

Novices do not need
custom programs. Do not buy one off the Internet. Do not pay a
trainer at your gym to make one for you. Do not download an app and
use a free program. Do not do a program that conveniently fits within
the amount of time you have paid upfront for personal training (no
program worth anything is only 4 weeks long – that’s just the
length of a monthly training package at a commercial gym.) Novices
do not need assistance or accessory work either. Do not
program-hop/abandon one program for another when you are only a few
weeks in. Do not use your friend’s program just because she had
success with it, unless it is the Starting Strength Novice Linear
Progression. Borrow that or hop on to that right now. The NLP has
everything you need, nothing you don’t, and it provides very
dependable gains for many months.

Bad
Technique/Overly Focused on Numbers over Form

How you lift is more
important than how much you lift. Squatting 135lbs to depth with
control is more important than quarter squatting 315 lbs or
divebombing 225 lbs with horrific knee slide. Your form must be
correct for you to continue to make progress for a long time. (Please
note that I did not say your form must be perfect. Correct is
good enough to keep going; perfect is a long-term project.) Do not
let a trainer at your gym teach you how to squat, press, deadlift, or
any other movement. He or she likely does not know how to lift. They
just work at a gym. Anyone can get a job at a gym and get a low-value
training certification. Personal training is a high turnover position
for a reason.

I regret that I had the
worst lifting form ever (I have video evidence) and the trainer I
hired at my gym did not make it much better. He was only slightly
interested in how well I lifted. To him, it probably looked good
enough to keep me entertained and paying the bill. Honestly, I don’t
think he knew much about coaching form. But he had a Nametag and a
Certificate so I believed him. He started me off on high-bar squats.
I did not even know what a low-bar squat was, let alone why it was
preferable for training. It was not until a year into my training
that I “got stuck” at 190 lbs with the high-bar squat and an
overly wide stance. I could not get to full depth on a high-bar squat
with more than 190 lbs on my back because a high-bar squat requires a
vertical back angle and I could not maintain it at that weight.

It was only when I told
my trainer that I had hit a wall on squats at 190 lbs that he showed
me how to low-bar squat.

Why was this
information withheld from me before? I realize now, and I regret,
that I had a trainer who was only willing to show me something that
would fit into a weekly 30-minute session and would keep me paying up
every month. A good coach will invest the time to teach you good
technique from the get-go. A good coach will watch you lift and cue
you as needed. Apparently I was not worth the investment with the
trainer I had. Needless to say I still had much to work on with my
low-bar squat until I began working with my SSC years later.

I can repeat this story
over and over again for each of the lifts. Like when I thought I “got
stuck” on my deadlift at around 285 lbs, so I went to my trainer
for advice, and all he told me was to stop being a pussy and just
lift it. He had no technical advice for my deadlift whatsoever. I can
now watch video of me deadlifting back then and tell you everything
that was wrong with my deadlift – hips too low, high back angle,
shoulders behind the bar, too much slack, yanking the bar up off the
floor rather than pushing the floor away. I wasn’t a pussy – I
was doing it wrong, and I was not being corrected. Once I learned
from my SSC how to really deadlift, everything changed and my
deadlift took off. I added 30 lbs to my deadlift in a few months as
an intermediate lifter. Starting Strength was right.

Going
Rogue/Not Doing The Program

As much as I loved
training from the beginning, I was not highly compliant with the
programs. My intentions were good, but if my trainer told me to do a
working set on bench at 80 lbs, and I thought it was too easy, I
would just do 85 lbs. But then the next bench workout would come and
I would be physically unable to move 90lbs. I had moved the intensity
up too quickly and I paid for it later. If I was programmed to
deadlift, but all the barbells were in use, I would just use the trap
bar. It didn’t make a difference to me at the time; I got the workout
done, didn’t I? Wrong. So wrong.

At that point I had
gone rogue and was no longer training. I was exercising. Training
would entail following the program step-by-step. Doing whatever I
felt like that day was really just exercising for the effect it gave
me that day. I was unable to think about consequences, either
positive or negative. Do the program. Stay in compliance. Whatever
your SSC says, do it. Do not deviate. You do not know more than your
SSC. If you know better than your coach, why are you paying for
coaching? You will only realize your mistake later.

Not
Eating Enough/Not Gaining Weight

I was skinny-fat at 140
lb when I first started lifting. I wanted to build muscle size and
strength but I was unwilling to change my diet and eat more. I will
credit my original trainer for telling me I needed to eat more.
Unfortunately, I did not act on this for 2-3 years. I did not
understand – I wanted to be stronger, not fatter, so why the hell
should I eat more? No one could explain this to me at the time.

I was also scared of
being fat. In America, this is very common among females and not rare
for males either. I now know that I needed to eat more just to fuel
my training and recover. Only after I put on 15 lbs over the period
of 5 months did I realize the benefits. I looked better and I was
making more progress on my lifts.

If you are underweight
or if you are skinny fat, you must eat more. You cannot continue to
make gains in strength or size without eventually being in a caloric
surplus. You will not become fat if you eat more and train with
sufficient intensity. You will have more energy and bigger muscles
and, perhaps, some more bodyfat. I guarantee that you will look and
feel better bigger despite what your bodyfat percentage is. Most
people look better with added muscle mass even if it is accompanied
by an increase in bodyfat. Personally, my bodyfat percentage was the
same at 170 lbs as it was at 140 lbs (25%, a normal and healthy range
for a woman my age). Every extra calorie was worth it.

I was not heavily
invested in my strength training for the first three years or so.
Yes, when I was on a program, I enjoyed it despite my occasional
frustrations. But these programs ended after 6-12 weeks because that
is how templates and personal training agreements work. Quality
coaching, on the other hand, never ends. Many times when a program
came to a close, I would “take a break.” It was an easy out to
“change it up” and do something else at the gym, cut weight (more
on that later), or just go to the beach all summer.

The truth is, every
time I went back to strength training, I was not at the same point
where I had left off. Even after a few weeks I had noticeably
detrained and had to earn back the gains I had forfeited. It took me
years to realize this and I regret every break I ever took. If I had
kept training through all time, I could have been the national
champion this year. But I was #4, and #1 had been training
consistently for many more years.

For some silly reason,
I once thought that I could not strength train and do something else
at the same time. For example, I was into obstacle course racing
years ago. To prepare for a big race, I would stop my barbell
training and do an obstacle-course specific training program. I
mistakenly thought that a sport-specific training program I
downloaded from the Internet was somehow better than barbell-based
strength training. Now I know that there is indeed a two-factor model
of sports performance whereby one can be most successful training for
strength while simultaneously practicing their sport.

In hindsight, if I had
to choose only one way to prepare for obstacle racing (there is no
need to choose, but if you had to), it would be strength training. It
was the long, steep mountain climbs that took most people out of the
races I did. I went up the rocky slopes quickly and easily because I
had been squatting heavy for the past 6 months before I abandoned
that for 9 weeks of obstacle training. It was the strength from
squatting that made me most successful, not the carrying of a sandbag
while walking on a treadmill for 3 miles then doing ball slams on the
floor. How stupid I was.

Not
Training With Intensity

Eventually, training
gets hard for everyone. Sometimes it gets really hard and you will
have the desire to quit. You need to learn to dig deep and find a way
to get every rep and set at the programmed weight. I can remember
many times over the years that I quit on a rep that I should have
ground out. I quit by skipping the last set on a workout because I
thought it was too hard or unachievable. I have allowed myself to
quit on a weight entirely by going lighter than what was programmed.
None of this will make you stronger or more resilient. It only trains
you to be a quitter or to settle for less. If you repeat this often
enough, it becomes a pattern, and you will not be successful.

If you want to get
stronger and move big weights, you have to get your head in the
fucking game. My mental fortitude is all that stands between me and a
10lb PR as an intermediate lifter. Think of where I could be now if I
hadn’t given myself a pass so many times over the years. I never
truly trained with intensity until I started training with my SSC. It
was then that I eeked out every goddamn rep of every blessed set at
weights I had never even imagined.

Cutting
Weight

So, yes, I did
eventually put on weight. But after a long stretch of hard training
and peaking for some powerlifting meets, I wanted to lean out. Even
though I had added muscle mass, I was overly focused on how much fat
I gained along with it. I fell victim to cutting for aesthetics. Both
women and men fall victim to this, especially in America. I regret
this, and I have learned my lesson that losing weight involves loss
of both fat and muscle and thus the associated strength. When a
normal person is in a caloric deficit, all metabolic tissue is on the
chopping block. While there are ways to maximize fat loss and
minimize muscle loss, there will be some muscle loss in a caloric
deficit. Muscle is strength. Loss of muscle is loss of strength. Loss
of muscle can be a loss of aesthetic characteristics, too.

I used to “cut”
(lose weight) every summer after being on a long slow “bulk”
(gaining weight/mass/strength) from fall through spring. But when I
got to my goal weight in the summer, I would feel weak. My training
numbers were down. Come fall, I would try to get back to the weight I
had been before in the spring. All of this cycling up and down in
body weight was highly unproductive, and it sacrificed my training
progress. I did this for 4 years before I finally came to my senses.
After competing at a national competition this year, I committed to
staying at or near my “walking around weight” for the summer and
I continued to lift heavy. I have no regrets about staying at this
higher body weight. My training is going so well and I looked great
in my swimsuit all summer.

I have been training
for six years now. I am fortunate to be where I am now with my
strength, health, and physique. I sometimes think about where I could
be today if I had gotten it all right from the beginning. If I could
go back again, I would do it all differently. In an ideal situation,
I would start with Starting Strength and my SSC and be highly
compliant from the beginning. I would put on the good weight and not
try to lose it. I would never have taken a break or looked for other
types of training. I cannot change the past, but I can be an advocate
for what I now know is right. Many friends and acquaintances ask me
for advice on how to start lifting, or how to get to the next level
from where they started. I always tell them to read the blue book and
give them my coach’s contact info. The most effective method is
right there – you just have to follow it.


Discuss in Forums

Powerful Core: Essential Abdominal Workouts for All Levels

0
Powerful Core: Essential Abdominal Workouts for All Levels


In the world of fitness, a strong core is undeniably the foundation of everything we do. Whether you’re participating in sports, lifting weights, or going about daily activities, a well-developed core enhances stability, balance, and overall strength. For those inspired by the powerlifter physique, understanding how to effectively train your abdominal muscles is key to achieving that powerful core and functionality.

In this blog post, we will explore the anatomy of the core, the importance of core strength for your overall fitness and performance, and provide you with a range of abdominal exercises suitable for all levels. We will also discuss how the powerlifter physique and a strong core are interconnected. Let’s get started!

Powerful Core: Essential Abdominal Workouts for All Levels


The Importance of Core Strength

The core muscles include not just the abdominal muscles but also the muscles in your back, hips, and pelvis. This interconnected web of muscles provides stability and support to the entire body. Here are a few key reasons why building a strong core is essential:

  1. Improved Performance: A strong core is crucial for boosting your overall athletic performance. This is especially relevant for those aiming for a powerlifter physique, where stability and strength are paramount for executing lifts efficiently.
  2. Injury Prevention: A well-conditioned core helps protect your spine and reduces the risk of injuries. When the core is strong, it stabilizes your body during movements, thus preventing undue stress on other muscles and joints.
  3. Better Posture: Strengthening your core can lead to improved posture, reducing the potential for back pain and discomfort during daily activities.
  4. Enhanced Functional Fitness: Daily activities such as lifting, bending, or twisting become easier and safer when your core is strong.
  5. Aesthetic Appeal: For many, a strong core is synonymous with a toned and defined appearance. Achieving apowerlifter physique often involves some degree of abdominal development.

Understanding Your Core Muscles

To build a more effective core workout routine, it’s important to know the main muscle groups involved:

  1. Rectus Abdominis: Commonly referred to as the “abs,” this muscle plays a key role in flexing the spine and is visually prominent in a well-developed powerlifter physique.
  2. Obliques: Located on the sides of your abdomen, these muscles assist in rotation and lateral movements and help sculpt the waist.
  3. Transverse Abdominis: Often called the body’s natural weight belt, this deep muscle stabilizes the pelvis and spine.
  4. Erector Spinae: This group of muscles runs along your spine and is vital for back extension and posture.
  5. Hip Flexors: These muscles play a crucial role in pelvic stability and movement, supporting the core during lifts and other activities.

By understanding these muscles, you can focus your workouts on exercises that effectively target them all, enhancing your overall strength and contributing to a powerlifter physique.


Essential Core Exercises for All Levels

No matter what level you are in your fitness journey, incorporating a variety of core exercises will lead to the best results. Below are some recommended exercises, including variations for different stages of fitness.

  1. Plank Variations

Planks are one of the most effective core exercises, engaging multiple core muscles at once.

  • Basic Plank:
    • Get into a push-up position, resting on your forearms instead of your hands.
    • Keep your body straight from head to heels and hold for 20-60 seconds.
  • Side Plank:
    • Lie on your side and prop yourself up on one forearm.
    • Keep your body straight and hold for 20-40 seconds on each side.
  • Plank with Shoulder Taps:
    • In a basic plank position, alternate tapping each shoulder with the opposite hand while keeping your hips stable. This adds a level of difficulty and engages the stabilizing muscles.
  1. Dead Bug

The dead bug is an excellent exercise for core stability and coordination.

  • How to Perform:
    • Lie on your back with your arms extended towards the ceiling and your knees bent at a 90-degree angle.
    • Slowly lower one arm and the opposite leg towards the floor while keeping your lower back pressed against the floor. Return to starting position and switch sides.
  1. Bicycle Crunches

Bicycle crunches effectively engage both the rectus abdominis and the obliques.

  • How to Perform:
    • Lie on your back and bring your knees up to a 90-degree angle.
    • Place your hands behind your head and lift your shoulder blades off the ground.
    • Alternate bringing one knee to your chest while extending the opposite leg, rotating your torso to touch your elbow to the opposite knee.
  1. Russian Twists

Russian twists are fantastic for targeting the obliques and improving rotational

  • How to Perform:
    • Sit on the ground with your knees bent and feet flat. Lean back slightly while keeping your back straight.
    • Hold your hands together or use a weight (like a medicine ball) for added resistance.
    • Rotate your torso to one side, then back to center, and twist to the other side. Keep your core engaged throughout the movement.
  1. Hanging Leg Raises

For those looking to significantly challenge their core, hanging leg raises are a fantastic option that engages the lower abs.

  • How to Perform:
    • Hang from a pull-up bar with an overhand grip.
    • Keeping your legs straight, raise them towards your chest until your hips flex.
    • Lower your legs back down gradually and repeat. For an easier variation, you can bend your knees as you raise your legs.
  1. Ab Wheel Rollouts

This exercise is commonly implemented by those aiming for a powerlifter physique, as it builds incredible core strength and stability.

  • How to Perform:
    • Kneel on the ground and hold an ab roller with both hands.
    • Roll the wheel forward, extending your body until your chest is close to the ground, while keeping your core tight.
    • Using your core, roll back to the starting position. Start with small rolls and increase your range of motion as you become stronger.
  1. Mountain Climbers

Mountain climbers not only engage the core but also provide a cardiovascular challenge.

  • How to Perform:
    • Start in a plank position. Quickly draw one knee towards your chest, then switch legs rapidly, mimicking a running motion.
    • Keep your hips down and core engaged throughout the exercise.
  1. Cable Woodchoppers

Cable woodchoppers integrate resistance training into your core routine, targeting the obliques and improving rotational strength.

  • How to Perform:
    • Attach a handle to a high pulley on a cable machine.
    • Stand sideways to the machine and grasp the handle with both hands.
    • Pivoting on your back foot, pull the cable down and across your body to your hip and return to the starting position.
  1. Stability Ball Rollouts

Similar to the ab wheel rollout but utilizing a stability ball, this exercise is another great choice for enhancing a powerlifter physique.

  • How to Perform:
    • Kneel in front of a stability ball, placing your forearms on top.
    • Roll the ball forward, extending your body while keeping your core engaged, and roll back to the starting position.
  1. Medicine Ball Slams

Medicine ball slams are not only a great core workout but also an explosive movement for those aspiring to a strong powerlifter physique.

  • How to Perform:
    • Stand with your feet shoulder-width apart, holding the medicine ball overhead.
    • Slam the ball down to the ground in front of you as hard as you can, bending your knees slightly with the movement.
    • Pick the ball back up and repeat


Structure Your Core Workout Routine

To enhance your core strength effectively, consistency and a structured approach are key. According to your fitness level, here is a sample core workout that incorporates the exercises outlined above.

Sample Core Workout Routine

  1. Warm-Up (5-10 minutes)
    • Dynamic stretches (arm circles, torso twists) and light cardio (jump rope, jogging).
  2. Core Circuit (Repeat 2-3 times)
    • Basic Plank: 30-60 seconds
    • Bicycle Crunches: 15-20 reps
    • Russian Twists: 15-20 reps per side
    • Dead Bug: 10-15 reps
  3. Strength Segments
    • Hanging Leg Raises: 3 sets of 8-12 reps
    • Cable Woodchoppers: 3 sets of 10-15 reps per side
  4. Finisher
    • Mountain Climbers: 30-45 seconds
    • Medicine Ball Slams: 3 sets of 10-15 reps
  5. Cool Down (5-10 minutes)
    • Stretch your abdominal muscles and incorporate deep breathing exercises to relax the core after your workout.

Additional Tips for Building a Powerlifter Physique

Focus on Nutrition

Achieving a powerlifter physique involves more than just working out; nutrition plays a critical role in muscle recovery and growth. Prioritize a diet rich in whole foods, with an emphasis on:

  • Protein: Essential for muscle repair. Include lean meats, fish, eggs, dairy, legumes, and protein shakes when necessary.
  • Healthy Fats: Sources like avocados, nuts, seeds, and olive oil help with hormone production and overall health.
  • Complex Carbohydrates: Foods like whole grains, fruits, and vegetables provide essential energy for intense workouts.


Conclusion

strong core is foundational not just for powerlifters but for anyone looking to improve their overall fitness. By incorporating the right exercises and following a structured routine, you’ll enhance your performance, reduce injury risk, and build the stability needed to achieve your powerlifting goals.

Start building your core today, and watch how it transforms both your physique and your performance in the gym!

-Terry Asher

Terry Asher

After changing his best friend’s life by helping him lose over 70lbs, dropping him down to an amazing 7% body fat, Terry was inspired to be a full-time internet trainer knowing he could do the same for many more. In 2010, Terry published his own diet and fitness e-book that can be purchased on this website. Let Terry help you change your body for the better!

Latest posts by Terry Asher (see all)