And we have a great way to celebrate: our 2021 Workout Challenge.
Like we’ve done in years past (see here and here), we’ve put together a 2021-themed workout using only bodyweight that you can do at home.
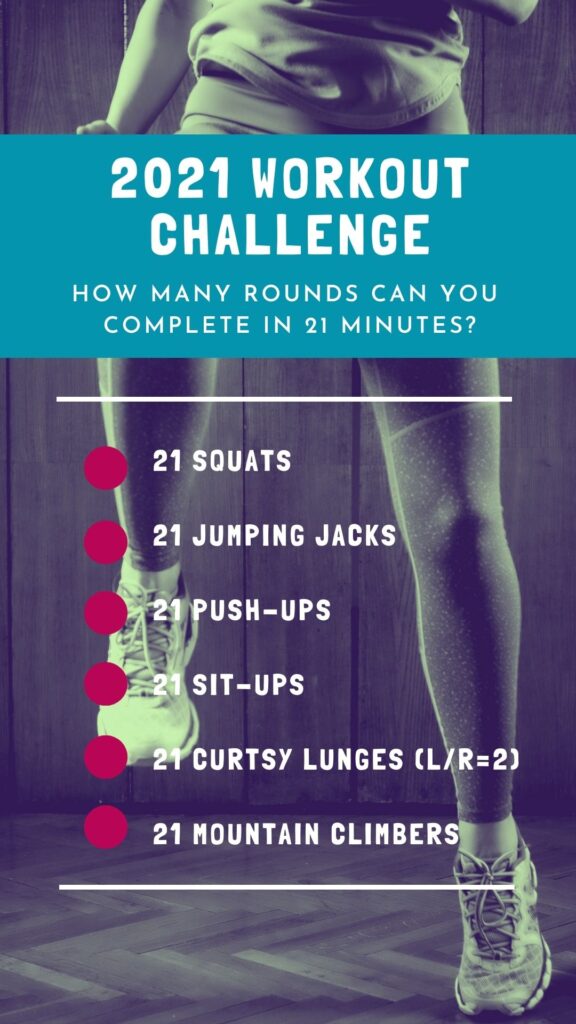
This year’s workout has a bit of a challenge aspect to it as well: Set a timer for 21 minutes (because, 2021, of course) and see how many rounds you can get through!
As always, modify as needed (wall push-ups or push-ups on knees or toes, marching in place or side-stepping for high-impact moves, etc.) and listen to your body (and your doctor). For the curtsy lunges, because each lunge counts as one rep, be sure to switch what leg you start on each time you go through the circuit (otherwise, you won’t work them evenly).
This 2021 Workout Challenge is a fun one, so let’s get to it!
2021 Workout Challenge
Feel free to share this graphic and tag @FitBottomedGirl so that we can give you a virtual high-five for completing it! Remember: Fit bottoms come in ALL shapes and sizes! –Jenn
Beginner Difficulty with Intermediate Modifications provided
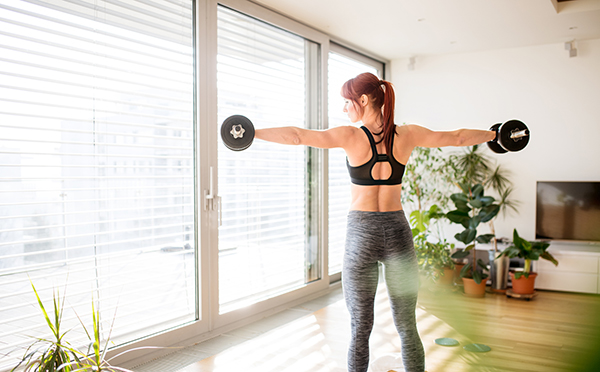
If you’re looking to elevate your heart rate without jumping, then this low impact routine is just what you’re looking for. There’s no equipment required, but you may add light dumbbells or water bottles to increase the intensity. You won’t find any repeats in this HIIT workout for beginners so it’s great for those who get bored easily 🙂 Now let’s get started.
Warm up Shoulder Box Good Morning Side Step and Sit Back
HIIT for Beginners
Cross Body Knee ¼ Squat + High Punch Opposite Side Toe Touch Butt Kick + Pullback Side Shoulder Raise + Run in Place Sumo Deadlift + Oblique Reach Seesaw Row Reverse Lunge + Rotation / Step Back High Knee March + Curl Ballistic Wall Pushup Side Lunge + High Pull / Adjust Depth Opposite Leg Raise and Jack Slams
Cool Down Wide Stance Floor Touch Standing Quad Stretch / with Wall Wall Angel
The humble pasta salad is here to stay! We love a budget-friendly, easy to prepare meal brimming with micronutrients, vibrant colours and diverse textures. We’ve opted for chickpea pasta as a nourishing choice with an extra boost of protein, but the pasta salad base serves as a flexible option for any protein of choice. Have fun experimenting with different flavor combinations (ie. sun dried instead of cherry tomatoes) and generously mix through the zesty dressing. Enjoy meal-prepping a batch of this for lunch, or as a dinner side throughout the week!
Time to cook: 20, Serves: 4
Ingredients
250g (8.8oz) chickpea pasta
4 baby cucumbers, finely diced
20 (60g) green olives, sliced
200g (7oz) cherry tomatoes, swap to sundried tomatoes for meal prep
1 red capsicum, diced
3 radishes, finely sliced
2 tbsp finely chopped red onion
⅛ bunch parsley, finely chopped
180g (6.3oz) feta, crumbled, we used Danish
Dressing:
3 tbsp extra virgin olive oil
1 tbsp maple syrup
1 tbsp wholegrain mustard
2 tbsp lemon juice
1 garlic clove, crushed
Method:
Cook the pasta as per the packet instructions.
Whilst the pasta is cooking, prep the remaining salad ingredients. Whisk together the salad dressing and season to taste with sea salt and black pepper.
Combine all of the ingredients in a large mixing bowl. Keep stored in an air-tight container for up to 4 days.
Looking for the best free-standing pull-up bars to boost your workouts?
Picture this: It’s a fresh morning, and you stroll into your home gym, excited to start your day with a strong workout. As you head to your pull-up bar, you feel pumped knowing it can help you get toned arms, a strong core, and better overall health. But with so many options out there, how do you pick the right one?
Don’t worry! In this guide, we’ll explore everything about free-standing pull-up bars, from why they’re great to how to get the most out of them. Whether you’re new to fitness or a pro, we’ve got you covered.
So, grab your gear, and let’s dive into the world of pull-up bars!
Before you dive into our article on ‘Best Free-Standing Pull-Up Bars to Buy In 2024,’ check out this quick and easy DIY tutorial from Na’Jee Umbra of Umbra Visions Network. Learn how to build your own outdoor pull-up bar in less than 15 minutes! Watch now to get inspired, then explore our article for more options to enhance your fitness routine at home!
Courtesy of Na’Jee Umbra of Umbra Visions Network
Types of Free-Standing Pull-Up Bars:
Portable Pull-Up Bars:
Portable pull-up bars are easy to carry around and set up wherever you want to work out. They’re great for outdoor workouts or when you’re traveling.
One example is the ProSource Multi-Grip Chin-Up/Pull-Up Bar, which you can attach to doorframes without any drilling. Portable pull-up bars let you do more than just pull-ups; you can also do chin-ups, leg raises, and other exercises.
Adjustable Pull-Up Bars:
Adjustable pull-up bars can be changed to fit people of different heights and fitness levels. They have different grip positions and can be adjusted to make your workouts easier or harder.
For example, the Iron Gym Total Upper Body Workout Bar can fit different door sizes and has many grip options. Adjustable pull-up bars work for anyone, whether you’re a beginner or advanced, and you can use them for lots of different exercises.
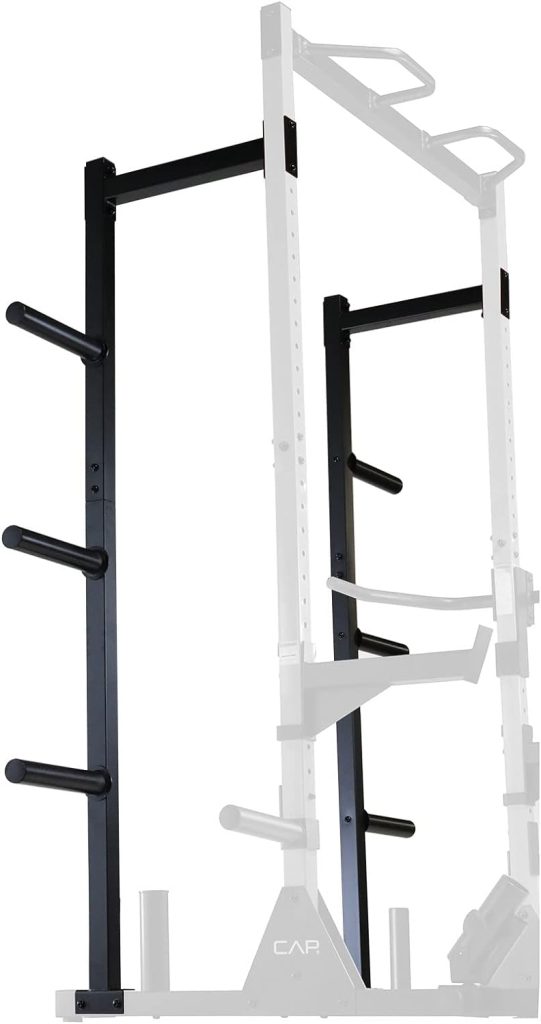
Heavy-Duty Pull-Up Bars:
Heavy-duty pull-up bars are strong and sturdy, so they won’t break when you use them for tough workouts. They’re made from tough materials like steel or aluminum and have strong mounts to keep them in place.
The CAP Barbell Power Rack Exercise Stand is an example of a heavy-duty pull-up bar that can handle heavy weights and intense workouts. These bars are good for people who do advanced exercises like weighted pull-ups or muscle-ups and need something tough to work out on.
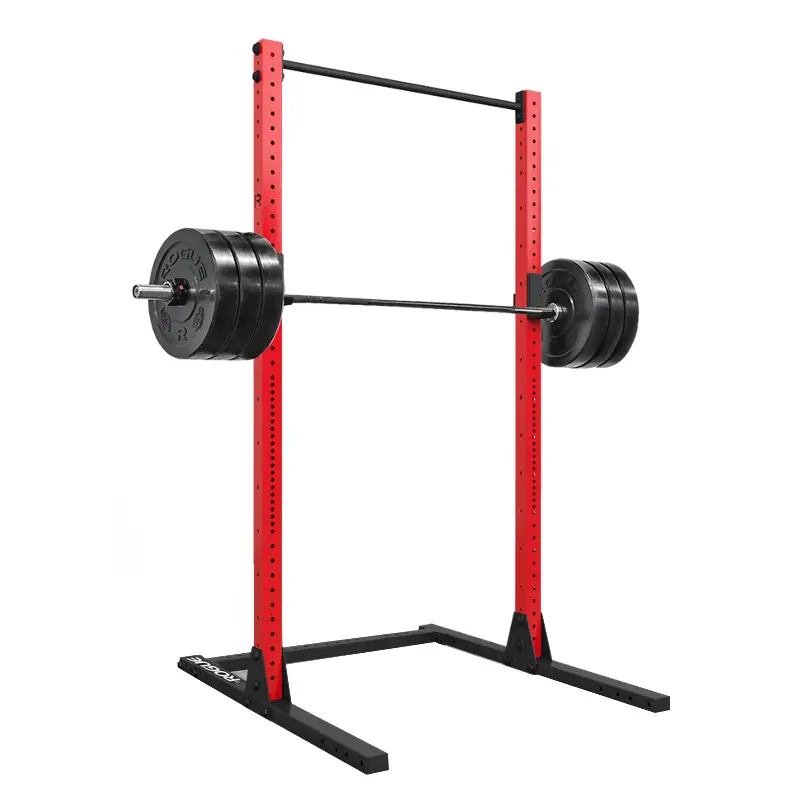
Specialty Squat Stand Pull-Up Bars:
Specialty squat stand pull-up bars do more than just let you do pull-ups. They’re part of squat stands or power racks, so you can also do squats and other exercises.
For example, the S-3 Squat Stand 2.0 has a pull-up bar that you can adjust to different heights and grips. The Rogue S-2 Squat Stand 2.0/SML-2C Squat Stand is another option with different colors and extras you can add.
These bars are perfect for anyone who wants a compact setup for lots of different exercises in one place.
Rogue S-2 Squat Stand 2.0/SML-2C Squat StandS-3 Squat Stand 2.0
Considerations Before Purchasing:
Assess Available Space:
Before buying a free-standing pull-up bar, take a look at the space where you plan to use it. Measure the area to make sure the pull-up bar will fit comfortably without being too cramped. Consider factors like ceiling height and any obstructions that might get in the way.
For example, if you’re planning to install a pull-up bar in a doorway, make sure there’s enough clearance above the doorframe for you to perform your exercises comfortably.
Check Weight Capacity:
Safety is paramount when it comes to using a pull-up bar, so it’s crucial to check the weight capacity before making a purchase. The weight capacity refers to the maximum amount of weight the pull-up bar can support safely. Make sure to choose a pull-up bar that can accommodate your body weight plus any additional weight you may be lifting during exercises.
For example, if you weigh 200 pounds and plan to use a weight vest during workouts, make sure the pull-up bar can support at least 250 pounds to ensure safety and stability.
Easy Assembly and Installation:
Nobody wants to spend hours struggling to assemble and install a pull-up bar, so opt for a model that offers easy assembly and installation for a hassle-free setup process. Look for pull-up bars that come with clear instructions and minimal parts that can be easily put together without the need for special tools or skills.
Some pull-up bars, like the Iron Gym Total Upper Body Workout Bar, require no drilling or permanent installation and can be set up in minutes. Choosing a pull-up bar with easy assembly and installation will save you time and frustration, allowing you to focus on your workouts instead of struggling with setup.
Benefits of Free-Standing Pull-Up Bars:
Versatile for Targeting Multiple Muscle Groups and Improving Strength:
Free-standing pull-up bars offer a wide range of exercises that target various muscle groups, making them versatile tools for improving overall strength and fitness. Pull-ups primarily work the muscles in the back, arms, and shoulders, including the latissimus dorsi, biceps, and deltoids.
However, pull-up bars can also be used for chin-ups, which target the biceps and upper back, as well as leg raises, which engage the core muscles.
Additionally, variations such as wide grip, close grip, and neutral grip pull-ups allow you to target different muscle groups within the same exercise.
By incorporating free-standing pull-up bars into your workout routine, you can effectively strengthen and tone multiple muscle groups simultaneously, leading to better overall fitness and functional strength.
Convenient for Home Workouts, Eliminating the Need for Gym Memberships:
One of the greatest advantages of free-standing pull-up bars is their convenience for home workouts, eliminating the need for expensive gym memberships or trips to the gym. With a free-standing pull-up bar, you can perform a full-body workout in the comfort of your own home, saving time and money on commuting to and from the gym.
Additionally, free-standing pull-up bars are available in a variety of styles and sizes to suit different spaces and preferences, whether you have a dedicated home gym or limited space in a small apartment.
For example, the Stamina 1690 Power Tower is a compact and affordable option that provides a complete upper body workout, including pull-ups, dips, push-ups, and more.
By investing in a free-standing pull-up bar for your home, you can enjoy the convenience of anytime, anywhere workouts while achieving your fitness goals at your own pace.
Popular Free-Standing Pull-Up Bars:
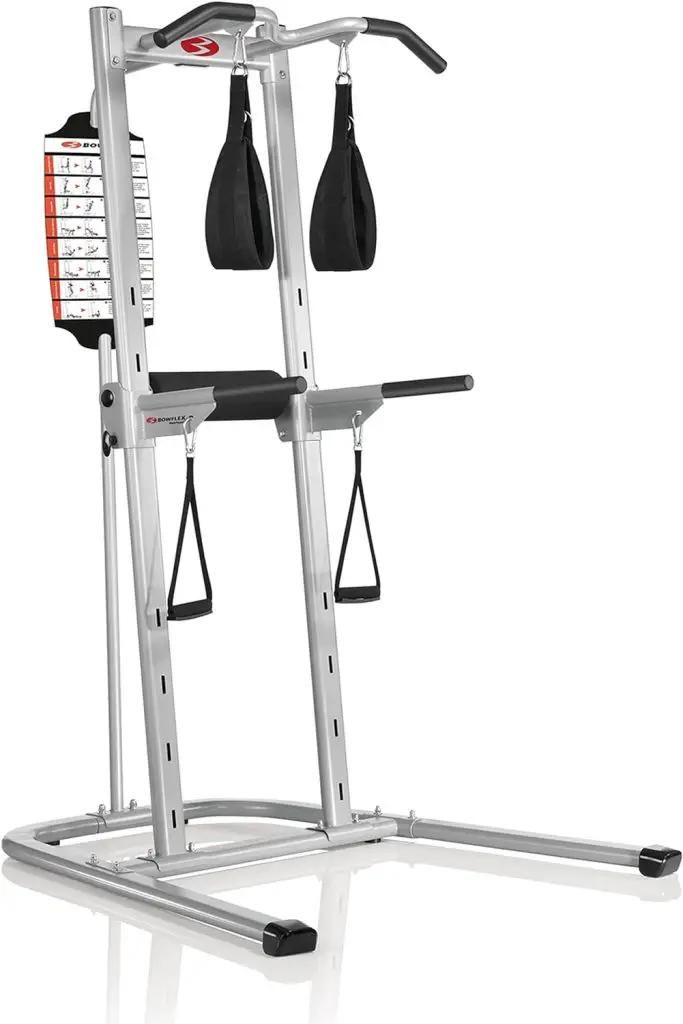
Bowflex Body Tower:
The Bowflex Body Tower is a versatile and durable free-standing pull-up bar that offers a wide range of exercises for a full-body workout. With its sturdy steel frame and ergonomic design, the Body Tower provides stability and support for users of all fitness levels. It features multiple grip positions for pull-ups, chin-ups, and leg raises, allowing you to target different muscle groups effectively.
Additionally, the Body Tower includes built-in straps and handles for performing dips, push-ups, and other bodyweight exercises, making it a versatile addition to any home gym. Its compact footprint makes it suitable for smaller spaces, while its adjustable height settings accommodate users of various sizes.
Overall, the Bowflex Body Tower is a reliable and versatile option for anyone looking to build strength and improve fitness from the comfort of their own home.
Stamina 1690 Power Tower:
The Stamina 1690 Power Tower is a popular choice for individuals seeking stability and comfort during their workouts. This free-standing pull-up bar features a durable steel frame with foam-padded handles and armrests for added comfort during exercises.
The Power Tower offers multiple grip positions for pull-ups, chin-ups, and leg raises, allowing for a customizable workout experience. It also includes a padded backrest and arm supports for performing vertical knee raises and dips with proper form and support.
With its compact design and easy assembly, the Stamina 1690 Power Tower is an excellent option for home gyms with limited space. Its sturdy construction and user-friendly design make it suitable for beginners and advanced users alike, providing a safe and effective platform for achieving fitness goals.
Weider Power Tower:
The Weider Power Tower is renowned for its sturdy construction and user-friendly design, making it a popular choice among fitness enthusiasts. This free-standing pull-up bar features a heavy-duty steel frame with reinforced welds for maximum stability and durability.
It offers multiple grip positions for pull-ups, chin-ups, and leg raises, allowing users to target different muscle groups effectively.
The Power Tower also includes padded handles and armrests for added comfort during workouts, as well as a padded backrest for lumbar support during vertical knee raises and dips. With its compact footprint and easy assembly, the Weider Power Tower is a versatile option for home gyms of all sizes.
Its sturdy construction and user-friendly design make it suitable for individuals of all fitness levels, from beginners to advanced athletes, seeking a reliable platform for achieving their fitness goals.
Tips for Effective Workouts:
Maintain Proper Form and Technique:
Maintaining proper form and technique is essential when using free-standing pull-up bars to prevent injury and maximize results.
Proper form ensures that you’re targeting the intended muscles effectively and reduces the risk of strain or overuse injuries. When performing pull-ups, focus on keeping your shoulders down and back, engaging your core muscles, and avoiding swinging or kipping movements.
For chin-ups, keep your elbows close to your body and aim to bring your chest to the bar with each repetition.
Additionally, use a controlled and deliberate motion throughout the exercise, avoiding jerky movements or using momentum to cheat the movement.
If you’re unsure about proper form, consider seeking guidance from a certified personal trainer or fitness professional to ensure you’re performing exercises correctly and safely.
Progress Gradually:
Progressing gradually is key to achieving long-term success with free-standing pull-up bars. Instead of trying to do too much too soon, focus on gradually increasing the number of repetitions or trying advanced variations over time.
Start with a manageable number of repetitions and aim to increase gradually as your strength improves. You can also challenge yourself by incorporating different grip variations, such as wide grip, close grip, or neutral grip pull-ups, to target different muscle groups and keep your workouts interesting.
Additionally, consider adding weight to your pull-ups using a weight belt or weighted vest once you’ve mastered bodyweight exercises to further increase the intensity of your workouts.
By progressing gradually and challenging yourself safely, you’ll continue to see improvements in strength, endurance, and overall fitness over time.
Maintenance and Care:
Regular Cleaning:
To keep your free-standing pull-up bar in top condition, it’s essential to clean it regularly to remove dust, sweat, and debris that can accumulate over time. Use a mild detergent and water solution to wipe down the surface of the bar, handles, and any other exposed parts, ensuring thorough cleaning to remove any buildup.
For stubborn stains or residue, you can use a gentle abrasive cleaner or a mixture of baking soda and water to scrub the surface gently. Be sure to rinse the pull-up bar thoroughly with clean water and dry it with a soft cloth to prevent rust and corrosion.
Inspection and Lubrication:
In addition to regular cleaning, it’s important to inspect your free-standing pull-up bar for any signs of wear and tear, such as loose bolts, cracked welds, or damaged padding.
Check all moving parts, including hinges, joints, and adjustment mechanisms, to ensure they are functioning properly and securely. If you notice any issues, address them promptly to prevent further damage and ensure the safety and longevity of your equipment.
Additionally, lubricate moving parts as needed using a silicone-based lubricant to reduce friction and prevent squeaking or sticking. Apply the lubricant sparingly to avoid buildup and wipe away any excess with a clean cloth.
By regularly inspecting and maintaining your free-standing pull-up bar, you can prolong its lifespan and enjoy safe and effective workouts for years to come.
DIY Free-Standing Pull-Up Bar Options:
Utilize Common Household Items:
Creating a DIY free-standing pull-up bar can be a cost-effective alternative to purchasing a commercial one. Common household items like pipes, wood, or metal bars can be repurposed to construct a sturdy pull-up bar at home.
For example, you can use galvanized steel pipes as the main frame and attach them securely to a wooden base for stability.
Alternatively, you can use a sturdy wooden beam or metal bar as the pull-up bar itself and anchor it to the wall or ceiling using brackets or mounts.
By repurposing materials you already have at home, you can save money on purchasing a commercial pull-up bar while still enjoying the benefits of an effective workout station.
Ensure Stability and Safety:
When constructing a DIY free-standing pull-up bar, it’s crucial to prioritize stability and safety to prevent accidents or injuries during use.
Start by selecting materials that are strong and durable enough to support your body weight and withstand the force of your workouts. Ensure that the base of the pull-up bar is wide and sturdy enough to prevent tipping or wobbling during exercises.
Additionally, follow proper construction techniques and guidelines, such as securely anchoring the pull-up bar to the ground or wall and using strong fasteners and reinforcements to hold the structure together.
Consider consulting with a knowledgeable handyman or contractor for guidance on proper construction techniques and ensuring the structural integrity of your DIY pull-up bar.
By taking the necessary precautions and ensuring stability and safety, you can create a reliable and effective DIY free-standing pull-up bar for your home gym.
Conclusion:
In summary, free-standing pull-up bars provide a practical and efficient means to enhance upper body strength and overall fitness from the comfort of your home.
By selecting the appropriate type and considering essential factors before purchasing, such as space, weight capacity, and ease of assembly, you can ensure a rewarding and effective workout experience.
Moreover, following tips for maintaining proper form, progressing gradually, and caring for your equipment can further optimize your results and ensure longevity. With the versatility and convenience offered by free-standing pull-up bars, there’s no better time to incorporate pull-up exercises into your fitness routine.
Take action today and start on a journey to a stronger, healthier you!
Do you ever feel like your day just isn’t going well? I know we all have good days and bad ones, but I’m talking about something different. It’s those days when everything feels a little off, or when every decision you make seems to be the wrong one. These situations are tricky because things could certainly be worse (as we remind ourselves), but that also doesn’t solve the confusing problem at hand. Unfortunately, anxiety can exacerbate some of these more challenging days, taking situations that are challenging and turning them into overwhelming messes (I know where of I speak). But I’m here today with a possible solution, and it’s relatively simple – drink some water.
Okay, okay; this isn’t my entire bit of advice. But it is the lead-in to an important question that, in my opinion, we don’t ask ourselves enough when considering our mental health. And that question is, what am I doing to take care of myself?
Look, I get it; there’s enough going on in our day-to-day lives, it’s easy to understand how some things can fall through the cracks. But taking care of ourselves does not have to seem as difficult, time-consuming or labor intensive as we think. One of the reasons I used to find this topic so daunting is because I thought about this in the context of ‘self-care,’ which to me meant something else entirely. I don’t have time to take care of myself in the ways I need, I’d think.
But here’s the thing: I was wrong. I thought that self-care revolved around a lot of the buzz words and activities we hear about today. Maybe I needed to take more mental health days, or visit a spa. I could do more yoga, or exercise in a way that made me feel good. And while all those things do contribute to self-care, I’ve learned that there are basic things that, when missed, make my day-to-day life more difficult. One of which is just…drinking water.
I remember when I wrote about how our health is more than just physical, and all the research I did into figuring out the different aspects of our health. Even though it made perfect sense at the time, putting it into practice was more difficult than I anticipated. It’s not that I needed to be actively thinking about this; I just needed to be more intentional.
There have been times where I’ve had a headache, or I’ve felt sad, and now I think to myself: do I just need to drink some water? Do I need a snack? A nap? I’m not saying those things solve all my problems (believe me), but there are times where my anxiety or depression can deter the other ways I need to take care of myself. I would guess that over the years, some bouts of depression were made more difficult due to my lack of taking care of myself in other areas in life.
Now before you get ahead of yourself, I want to say that this advice isn’t recommended as a singular fix, or for someone mental health crisis or facing recurring challenges. I didn’t come here to say that your depression will be solved with a drink of water and a little treat (unfortunately for us both). However, figuring out the best ways to take care of ourselves from one day to the next is how we can build a strong foundation for when times are difficult. With patience and practice, our self-knowledge can grow, and make us better equipped to face the next challenge when it comes to our mental health and wellness.
You might know kickboxing as a bouncy bodyweight aerobics offering at your local YMCA, an intimidating studio class that involves boxing gloves and heavy bags, or even as the competitive full-contact combat sport of Muay Thai—the sport has range.
“There are many different styles of kickboxing,” explains Chris Gagliardi, CPT, CSCS, an ACE-certified personal trainer and NSCA-certified strength and conditioning specialist. “One style, the combat sport, is designed for fighting, while cardio kickboxing removes the fight aspect and mainly focuses on enhancing your health by improving your fitness.”
Whether you climb into a real or hypothetical ring, the practice can be a fantastic addition to your workout routine. “During a kickboxing class—either at martial arts or combat sports school or cardio kickboxing group exercise class—you’ll be using your entire body to generate force, avoid strikes, and establish positioning for offensive and defensive maneuvers,” Gagliardi says. As a result, all this effort means the sport can boost both muscular and cardiorespiratory fitness, he says.
Does that mean kickboxing counts as both strength and cardio? Not so fast. We’re digging into that question below with the help of Gagliardi and Grace Bellman, DPT, CSCS, a doctor of physical therapy and studio manager at Hit House, a Muay Thai-inspired kickboxing studio in New York City.
Related Stories
Does kickboxing count as strength training?
Kickboxing can help you get stronger, but it’s hard to say definitively that it can count as strength work.
Let’s start with the upsides. “While kickboxing isn’t structured like a typical strength training session, participants can expect to improve both upper-body and lower-body muscular fitness—aka muscular strength and endurance,” Gagliardi says. “During the work portions of the workout, you’ll be squatting, lunging, rotating, punching, kicking, jumping, flexing, extending, abducting, adducting, and using your muscles in various combinations that will no doubt build muscular fitness.”
This is especially true if your class involves calisthenics work, like holding planks for active recovery, doing push-ups between combinations, or adding squat jumps between punches.
If your kickboxing training doesn’t include much strength and conditioning work and focuses primarily on technique, you could reach the max muscle-building benefits once you hit a certain proficiency level. “Our bodies learn to adapt to new stimuli through cardiovascular, musculoskeletal, and neuromuscular adaptations to meet the demands of the physical activity we’re performing,” Bellman explains.
Translation: When you challenge your body through exercise, you prompt it to adapt and become stronger. If you’re a beginner, things like punching and kicking will challenge your strength, but for someone more experienced, those won’t be demanding enough to provoke adaptations. “For those new to the kickboxing world or new to exercise in general, muscular changes in strength and power may be more notable than those of an experienced athlete or Muay Thai fighter,” Bellman explains.
When evaluating kickboxing as a means of building strength, you also need to look at which muscles it works. It’s generally considered a full-body workout, but there are specific muscles you’re most likely to strengthen with the sport, including your shoulders, upper back, and core, Bellman says. You’ll work your legs and hips, too, but to a lesser degree.
One small 2014 study1, for example, showed that people who participated in kickboxing three times a week for five weeks experienced significant improvements in upper-body muscle power, aerobic power, anaerobic fitness, flexibility, speed, and agility, Gagliardi says. However, the participants didn’t show an increase in lower-body power.
For a comprehensive and well-rounded full-body strength routine, you’d want to ensure you’re also sufficiently challenging the large, powerful muscle groups in your lower body, like your quads, hamstrings, and glutes. A kickboxing session that includes moves like lunges and squats can help check off that box, though without adding external resistance (like weights), you may also hit the ceiling of strength adaptations in this situation.
The TL;DR? “Kickboxing does promote positive changes in your musculoskeletal health, including increases in muscular strength. However, I would not consider kickboxing strength training exclusively,” Bellman says.
“Ultimately, the goal of physical exercise is to improve your health and fitness while doing something you enjoy. If you enjoy kickboxing exercise, you’re more likely to do it, and that’s most important.” —Grace Bellman, DPT, CSCS
Does kickboxing count as cardio?
In many cases, yes. “Kickboxing does count as cardio by the simple definition that it elevates your heart rate and breathing,” Bellman says.
That’s right: Cardio exercise is any activity that makes you breathe harder and elevates your heart rate, per the Centers for Disease Control and Prevention (CDC). The CDC recommends adults log at least 150 minutes of moderate-intensity cardio activity per week—meaning you need to hit that moderate-intensity threshold for a workout to count toward your cardio quota. To gauge your intensity, you can use a simple talk test (moderate is when you’re exercising hard enough to talk but not sing) or monitor your heart rate while you work out (moderate would be considered 50 to 70 percent of your maximum heart rate).
“During a kickboxing workout, your heart rate will be elevated above your resting rate for the entire workout, including times of active recovery,” Gagliardi says. As a result, you can expect to see improvements in the cardiorespiratory system, he says—and that’s the main benefit of cardio exercise. In the 2014 study mentioned above, for example, researchers found that kickboxing training sessions put participants between about 71 and 77 percent of their max heart rate and were sufficient for eliciting cardio benefits.
That said, a kickboxing workout’s actual cardio level can depend on the class’s structure, style, and intensity, Bellman says. The research on the sport’s fitness benefits is limited, but studies on the cardio effect of other martial arts like Taekwondo have reported mixed results; some research says Taekwondo has no impact2 on cardio fitness, while others consider it a viable and efficient method3 of cardiovascular conditioning. Researchers propose that variations in workout intensity may be behind the difference.
Think of it this way: If you’re drilling punches slowly, focusing on form and your feet planted, you likely won’t lose your breath and end up in that moderate-intensity state. Quicker, more complex combinations, including footwork, kicks, defensive moves, or incorporating intervals of cardio moves (jump roping, fast feet, jumping jacks), could all turn up the intensity of a kickboxing workout, ensuring your cardiorespiratory system is working hard.
Other significant benefits of kickboxing
Adopting a kickboxing routine may not get you off the hook for strength or cardio, depending on exactly how you train—but there are so many other benefits that make this practice worth your time.
For starters, kickboxing can boost balance, coordination, mobility, and agility, Bellman says. The practice often requires learning, practicing, and executing combinations of punches and kicks. “This motor learning process not only tests your mental acuity but also requires your body to coordinate new movement patterns before performing them with high force production,” she says. The practice can also build mental toughness and humility, encourage camaraderie with fellow participants, and help you learn self-defense skills, Gagliardi adds.
Though these perks may not get as much hype as cardio fitness or strength-building, they’re not consolation prizes. “These benefits outside of building strength and improving cardio are just as important for injury prevention and long-term health,” Bellman says. “As we age, our balance, coordination, and reaction time often decreases, leaving us more at risk for falls or injury. Kickboxing challenges the body’s balance, coordination, and agility systems to improve our ability to react and cope with perturbations, changes to our base of support, and loss of balance.”
Finally, kickboxing comes with an emotional health benefit that not all other forms of exercise can claim: an incredible sense of empowerment. “After working at Hit House for two years, I’ve heard from many regular class attendees that they feel an increase in confidence and often surprise themselves with what they’re able to do during class,” Bellman says. This boost in self-confidence, ability to have fun, and desire to consistently advance keeps them coming back. “Ultimately, the goal of physical exercise is to improve your health and fitness while doing something you enjoy,” she continues. “If you enjoy kickboxing exercise, you’re more likely to do it, and that’s most important.”
The bottom line
Kickboxing can build up your muscular strength and endurance as well as your cardiorespiratory fitness—but that doesn’t mean it counts as both cardio and strength work. It’ll depend on exactly what your training is like, but the practice is generally more likely to meet the qualifications of a cardio workout rather than a strength one.
If you go to kickboxing classes a few times a week, consider complementing that routine with two days of dedicated strength training to keep your muscles sharp and meet the CDC’s exercise recommendations for adults. If you want to ensure it’s ticking off your cardio checkbox, keep an eye on your effort level during a session with a heart-rate monitor, smartwatch, or the talk test.
Regardless of all the above, if you like kickboxing, it’s worth keeping it in your routine. “For many people, kickboxing becomes a way of life that includes attending and participating in classes as a regular part of your healthy lifestyle,” Gagliardi says. Even if it doesn’t color perfectly within the lines of a strength or cardio workout, any exercise you enjoy is worth sticking to.
Well+Good articles reference scientific, reliable, recent, robust studies to back up the information we share. You can trust us along your wellness journey.
Ouergui I, Hssin N, Haddad M, Padulo J, Franchini E, Gmada N, Bouhlel E. The effects of five weeks of kickboxing training on physical fitness. Muscles Ligaments Tendons J. 2014 Jul 14;4(2):106-13. PMID: 25332919; PMCID: PMC4187584.
Melhim AF. Aerobic and anaerobic power responses to the practice of taekwon-do. Br J Sports Med. 2001 Aug;35(4):231-4. doi: 10.1136/bjsm.35.4.231. PMID: 11477015; PMCID: PMC1724351.
Toskovic NN, Blessing D, Williford HN. The effect of experience and gender on cardiovascular and metabolic responses with dynamic Tae Kwon Do exercise. J Strength Cond Res. 2002 May;16(2):278-85. PMID: 11991782.
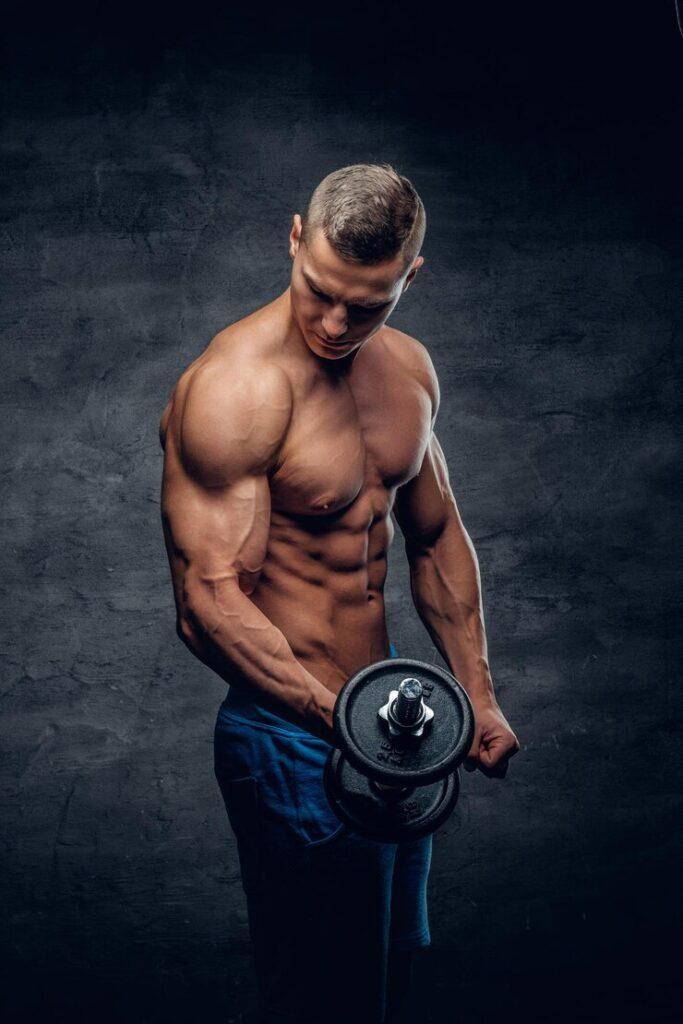
Whether you’re a fitness enthusiast or just starting out, this guide will help you understand how to build stronger, more muscular arms.
Big, muscular arms are more than just aesthetically pleasing; they’re essential for functional strength, improved posture, and enhanced performance in other exercises. In addition, strong arms can boost your confidence, support your overall fitness goals, and reduce the risk of injury. By focusing on both training and nutrition, you can increase muscle size and strength while achieving a lean, defined appearance.
Let’s break down the essential components of your arms and the best exercises to grow them, along with key nutritional strategies that support muscle growth.
Before diving into the exercises, it’s crucial to understand the muscles that make up the upper arm: the biceps and the triceps. Both play a significant role in arm development, and each requires specific exercises to maximize growth.
Biceps Muscles
The biceps are located at the front of your upper arm and consist of two heads:
The long head (outer) and the short head (inner). These heads originate from the shoulder blade and attach to the forearm, playing a key role in elbow flexion (bending the elbow), forearm rotation, and lifting movements.
Focusing on both heads of the biceps is essential for full muscle development. Whether you’re curling weights or pulling objects, the biceps are involved in most upper-body pulling movements.
Triceps Muscles
The triceps are located at the back of the upper arm and have three heads:
The long head, medial head, and lateral head. The triceps are responsible for extending the elbow (straightening the arm) and make up about two-thirds of your upper arm’s muscle mass. To develop a balanced and powerful look, it’s vital to work all three heads of the triceps.
Now that we’ve covered the arm’s anatomy, let’s look at some of the most effective exercises to grow your biceps and triceps.
To effectively target your biceps, focus on movements that involve curling or pulling, where your elbows bend, and your biceps contract. Here are some tried-and-tested exercises for building your biceps:
1. Concentration Curls
Concentration curls are excellent for isolating the biceps, especially the short head, which is key for developing the muscle’s peak.
How to perform: Sit on a bench, hold a dumbbell in one hand, and rest your elbow on the inside of your thigh. Slowly curl the weight toward your shoulder, focusing on squeezing the biceps at the top of the movement. Lower the dumbbell under control and repeat for 12–15 reps.
2. Barbell Curls
A classic biceps exercise, barbell curls target both the long and short heads, allowing you to lift heavier weights and stimulate more muscle growth.
How to perform: Stand with your feet shoulder-width apart, holding a barbell with an underhand grip. Keep your elbows close to your body, curl the barbell toward your chest, and squeeze your biceps at the top. Lower the weight back down in a controlled manner and repeat for 12–15 reps.
3. Chin-ups
Chin-ups are a compound exercise that targets the biceps and works the back and shoulders, making it a great addition to your arm workout.
How to perform: Grip a pull-up bar with your palms facing you (underhand grip). Pull your body up until your chin is above the bar, squeezing your biceps at the top. Lower yourself back down with control and repeat for as many reps as possible.
4. Standing Dumbbell Curls
This exercise allows you to target each arm individually and helps build symmetry in your biceps.
How to perform: Stand with a dumbbell in each hand, palms facing forward. Curl the weights up toward your shoulders, keeping your elbows close to your body. Lower the dumbbells back down and repeat for 12–15 reps.
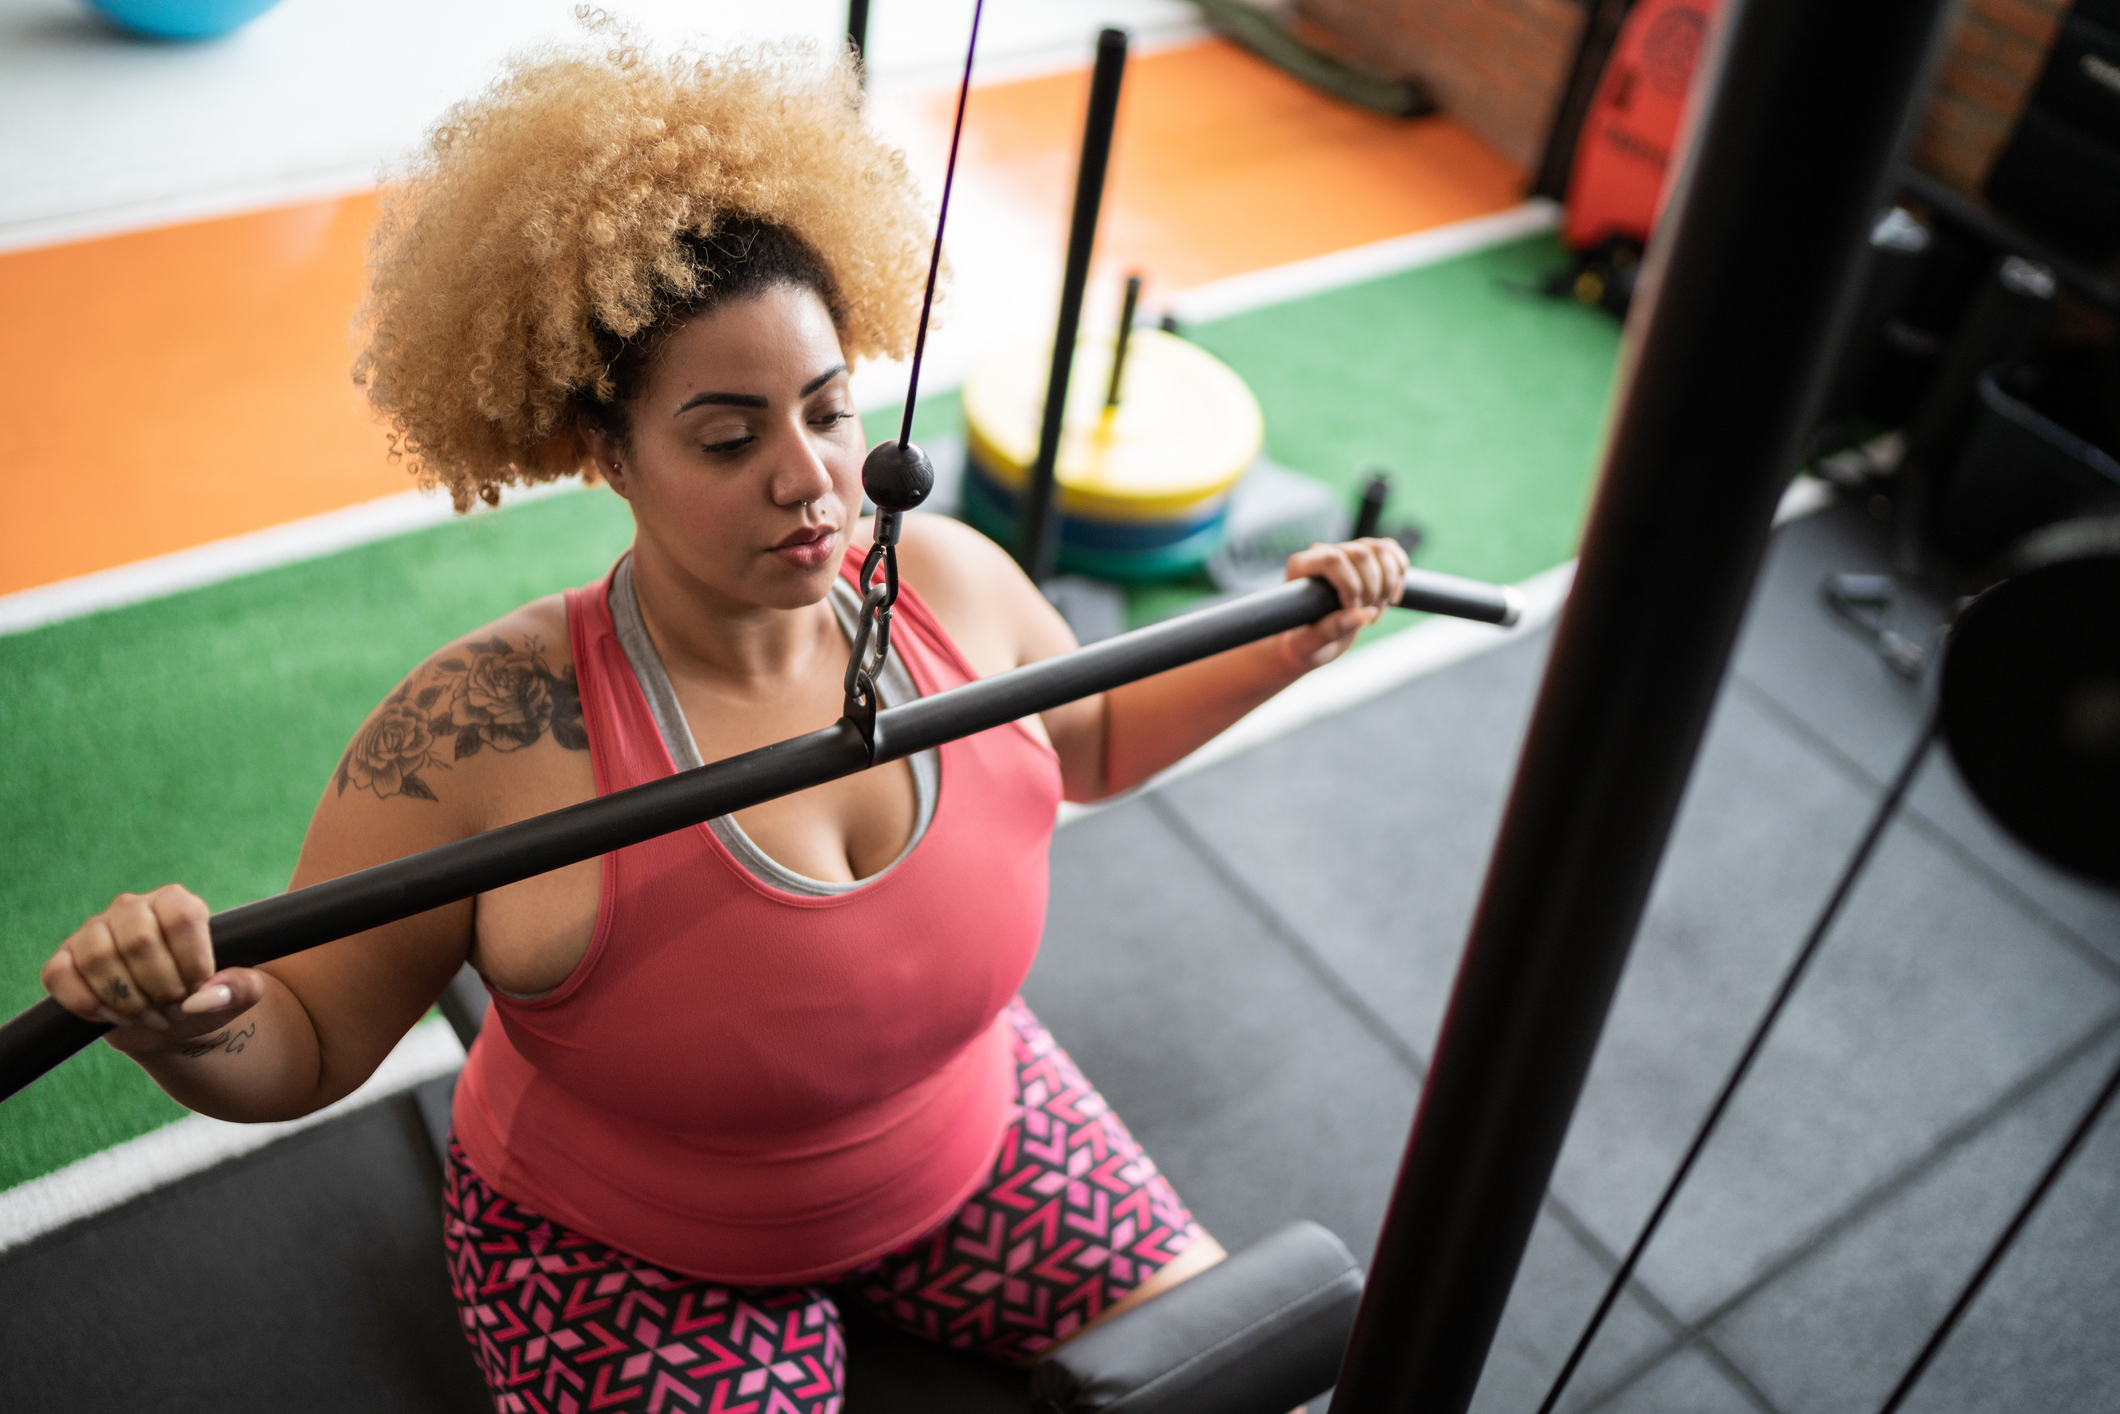
Triceps make up the majority of your upper arm size, so targeting them is crucial for overall arm development. These exercises will help you build size and strength in your triceps:
1. Triceps Dips
Triceps dips are one of the most effective exercises for developing all three heads of the triceps.
How to perform: Sit on a bench or chair, place your hands behind you on the edge, and extend your legs in front of you. Lower your body by bending your elbows until your upper arms are parallel to the ground. Push yourself back up to the starting position and repeat for 12–15 reps.
2. Diamond Push-ups
This bodyweight exercise targets the triceps and also engages the chest and shoulders.
How to perform: Get into a push-up position, but place your hands close together to form a diamond shape with your thumbs and index fingers. Lower your chest toward the ground while keeping your elbows close to your sides. Push back up and repeat for 10–12 reps.
3. Overhead Triceps Extension
This exercise is great for targeting the long head of the triceps, which is essential for adding mass.
How to perform: Stand with your feet shoulder-width apart, holding a dumbbell with both hands. Lift the dumbbell overhead and lower it behind your head by bending your elbows. Extend your arms back to the starting position and repeat for 12–15 reps.
4. Triceps Kickbacks
Kickbacks are effective for isolating the triceps and building definition.
How to perform: Hold a dumbbell in each hand, bend at the hips, and keep your back flat. Extend your arms straight behind you by straightening your elbows, then return to the starting position. Repeat for 12–15 reps.
To build bigger arms, proper nutrition is just as important as exercise. Without the right fuel, your muscles won’t grow. Here are some nutritional guidelines to follow:
1. Increase Protein Intake
Protein is crucial for muscle growth and repair. Aim to consume 1.2 to 2.0 grams of protein per pound of body weight daily, depending on your activity level. Include lean protein sources like chicken, fish, eggs, and plant-based options like beans and lentils.
2. Prioritize Complex Carbohydrates
Complex carbs provide the energy needed for intense workouts and recovery. Foods like brown rice, quinoa, oats, and sweet potatoes are excellent sources of sustained energy for muscle growth.
3. Incorporate Healthy Fats
Healthy fats support hormone production, including testosterone, which is vital for muscle growth. Include sources like avocados, nuts, seeds, and fatty fish in your diet.
4. Stay Hydrated
Dehydration can hinder muscle growth and performance. Drinking enough water ensures your muscles stay hydrated, aiding recovery and nutrient absorption. Aim for at least 8–10 glasses of water per day.
5. Don’t Skip Calories
Building muscle requires a calorie surplus, meaning you need to consume more calories than you burn. Use a calorie calculator to determine your maintenance level and increase your intake by 300–500 calories per day, focusing on whole, nutrient-dense foods.
Building bigger arms takes a combination of consistent exercise, proper nutrition, and smart recovery. Focus on compound movements like chin-ups and dips, along with isolation exercises such as curls and extensions, to target both the biceps and triceps. Complement your workouts with a balanced diet rich in protein, complex carbs, and healthy fats to fuel muscle growth. Remember to rest and allow your muscles to recover between sessions.
With dedication and the right approach, you’ll be on your way to bigger, stronger arms in no time. Ready to get started? Grab your weights and begin your journey to impressive arm gains today!
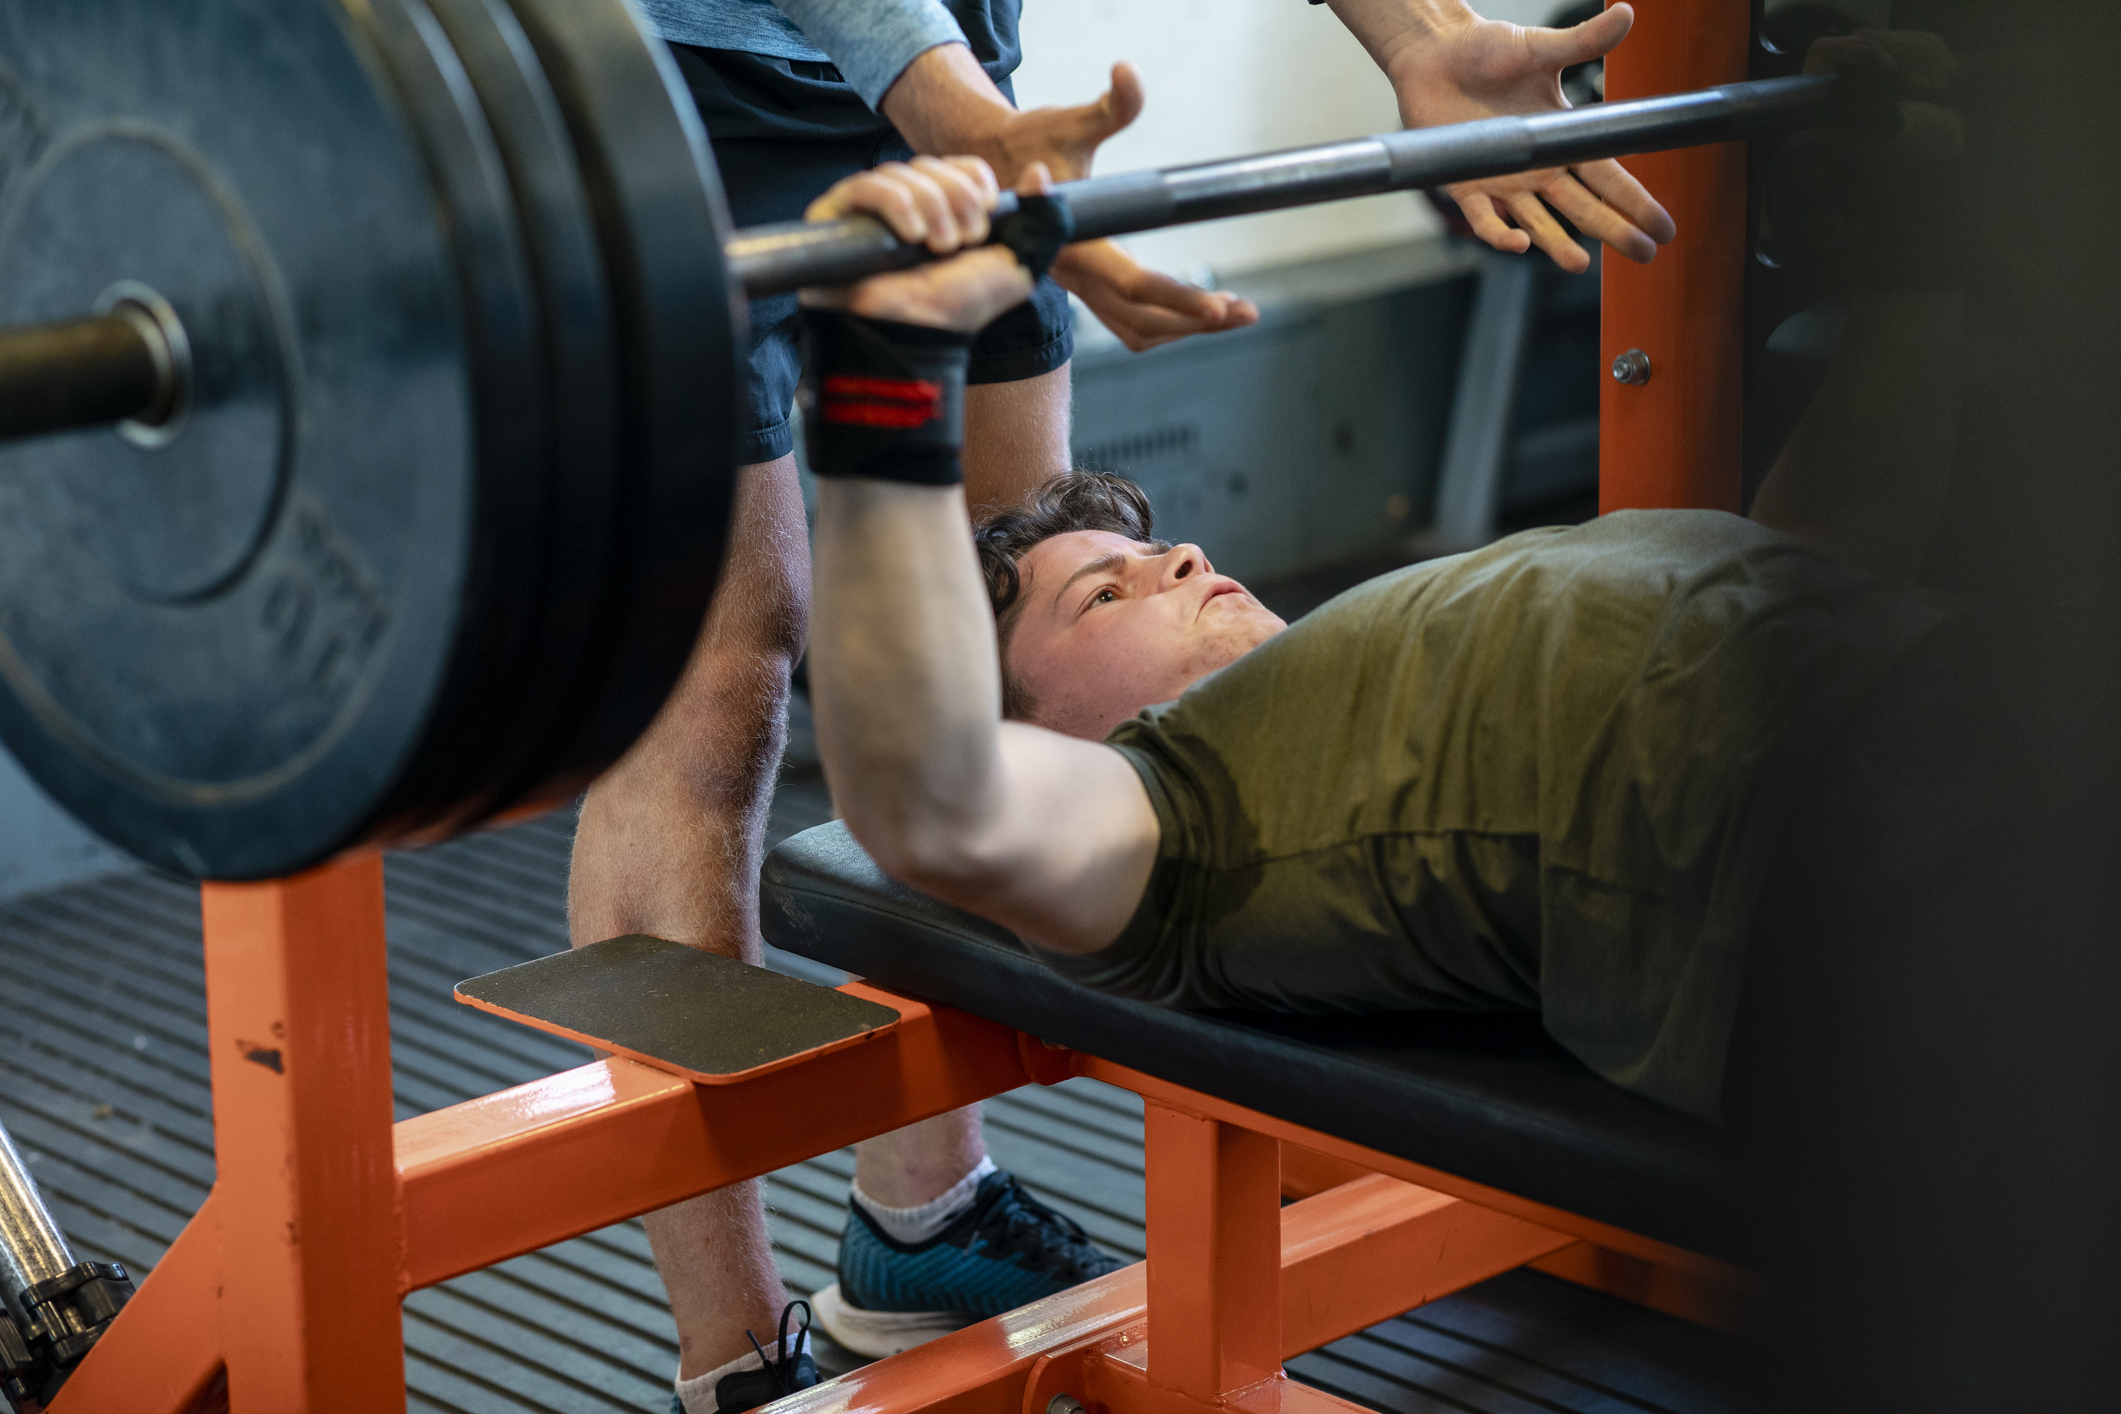
Many factors go into creating the best workout for your fitness goals. You probably know it’s important to pick the right amount of weight to lift and follow a certain rep and set scheme. But you should also know how long to rest between sets when you’re strength training.
“Rest is what allows you to recover between bouts of exercise so you can maintain a high level of performance and thereby optimize your results,” explains Trevor Thieme, C.S.C.S. “It’s important to tailor your rest to your goals.”
Follow the recommendations below for how long to rest between sets to get the most out of your resistance training.
How Long to Rest Between Sets to Build Muscle
Weight: 70–80 percent of your 1 rep max (1RM) Reps: 6–12 Sets: 3–6 Rest between sets: 30–90 seconds
The ideal rest time between sets for hypertrophy (muscle growth) is between 30 and 90 seconds.
“It allows you to sustain a high level of performance while also maintaining high enough levels of mechanical and metabolic stress to optimize muscle growth,” Thieme explains.
How Long to Rest Between Sets to Increase Strength
Weight: 80–90 percent of your 1RM Reps: 6 or fewer Sets: 2–6 Rest between sets: 3–5 minutes
The heavier weights you lift, the longer you need to rest to allow your muscles to recover. But listen to your body.
“Beginner exercisers probably don’t need to rest five minutes,” says ACE-certified personal trainer Chris Gagliardi, C.S.C.S. “That might be better for a competitive weightlifter who will expend so much energy during the sets that they have to make sure they are fully recovered and ready for the next one.”
How Long to Rest Between Sets to Boost Muscular Endurance
Weight: 60–70 percent of your 1RM Reps: 12 or more Sets: 2–3 Rest between sets: 30 seconds or less
You can have relatively short rest periods when training muscular endurance because you’ll likely be lifting relatively light weights, Gagliardi explains. And since you’re training your muscles to work longer durations when you’re targeting endurance, moving quickly between sets will help with that.
How Long to Rest Between Sets to Lose Weight
Weight: 70–80 percent of your 1RM Reps: 6–12 Sets: 3–6 Rest between sets: 30–90 seconds
How long to rest between sets for weight loss is the same as how long to rest for muscle growth, Thieme says. The reps and sets are also the same, for two reasons:
“You’ll build more muscle, and you’ll maximize the after-burn effect, which is the sustained increase in your metabolism post-workout as your body recovers,” Thieme explains. Read: You burn more calories, helping spur weight loss.
How Long to Rest Between Sets to Learn Perfect Form for a New Move
Weight: Body weight Reps: 10 or more Sets: 2 or more Rest between sets: 30–90 seconds
If you are new to weightlifting and simply want to focus on perfecting your form to build a solid fitness foundation, skip the iron and begin with just your body weight.
“You want to learn do to the movements properly before adding weight,” Gagliardi says. Although you can rest up to 90 seconds between sets, you may find you’ll need less downtime to recover before the next set, since bodyweight exercises are less intense than weighted ones.
Tips and Suggestions for Resting Between Workout Sets
Here are a few things to keep in mind and some pitfalls to avoid during your workouts.
1. Time yourself
To be sure your rest time between sets is accurate, time yourself using whatever works best for you, Thieme says. That could be your watch, a timer on your phone, or the clock on the wall.
2. Avoid resting too long
Never make your rest intervals so long that your heart rate and body temperature return to your normal resting levels. If you’re adhering to the above rest times and find that this is happening, it’s probably a sign you need to up the intensity of your reps.
3. Make sure you choose the right weight
Speaking of intensity, pay attention to the weight you choose. If you want to build muscle, make sure you can only lift that weight for a maximum of 12 reps. Don’t pick a weight you could lift for 15 reps, but only do 12 reps, Gagliardi says.
Otherwise you won’t be pushing yourself as hard as you can go, making the road to your goals much longer.
4. Recover adequately
“This is hard for some people, because they want to be intense all the time,” Gagliardi says. “But you don’t want your exercise to suffer because you’re not recovered between [workouts].” Keep in mind that muscle and strength gains happen between workouts, not during them.
5. Consider active rest
“If your goal is muscular endurance or weight loss, remaining active between sets can help you build more endurance and burn more calories,” Thieme says. Do this by performing an exercise that targets “noncompeting” muscles during the rest period of your primary exercise (e.g., by jumping rope between sets of bench press).
In terms of muscle building, Jay Cutler is not a big fan of deadlifts. Though they are fantastic exercise for strength, deadlifts are not a good way to build back muscle, according to Jay. The four-time Mr. Olympia champion would rather tweak the deadlift to better suit his objective of building back muscle instead of building strength.
Why Jay doesn’t do Deadlifts
“I’ve done both deadlifts and rack pulls throughout my career,” Cutler says. He says that he dislikes classic deadlifts because of the following reasons:
“When you’re doing a deadlift, you’re trying to work your back and your core.” says Jay. “Deadlifts are essential for powerlifters, but for bodybuilders, rack pulls take your glutes, hamstrings, and lower back out of the equation.”
Cutler is always a proponent of the fundamental lifts, but like he says, each well seasoned bodybuilder learns how to tweak staple movements to fit their own goals.
When training the back, Jay likes to switch classic deadlifts with rack pulls to better target the back.
The rack pull removes the bottom part of the deadlift because it requires you to hold your body upright while grabbing the bar rather than lowering yourself into a deep hip hinge position. This makes the tension transfer to your middle and upper back instead your lower back and legs.
Rack pulls apply significant mechanical tension to the trapezius muscles when they are fully stretched according to studies. You can also lift more weight, which is an added plus.
Here’s how to get started with rack pulls to increase upper back thickness:
1. Set the barbell in a power rack just above knee height. 2. Load it with heavy weight, around what you can deadlift for 3-4 reps. 3. Stand with a flat back and shoulders over the bar, using lifting straps for grip. 4. Keep your shoulders relaxed and stand up with the bar. 5. Lower the bar slowly back to the rack without slamming it. 6. Reset and repeat for additional reps.
After a few sets of rack pulls, your upper back traps will be incredibly pumped and sore the following day.
Jay also likes doing dumbbell rows and pull ups for his upper back, and stiff leg deadlifts for his hamstrings and glutes, and has put them in his top exercises for these muscles.
Certainly! Here’s a delicious and nutritious poached egg and salmon recipe:
Ingredients:
– 2 eggs
– 2 slices of smoked salmon
– 2 slices of whole grain bread, toasted
– 1 tablespoon white vinegar (for poaching)
– Fresh dill or chives, chopped (for garnish)
Instructions:
1. Fill a large saucepan with water and bring it to a gentle simmer over medium heat. Add the white vinegar to the water. Poach the eggs for about 3-4 minutes, or until the whites are set but the yolks are still runny. Use a slotted spoon to carefully remove the poached eggs from the water and place them on a paper towel to drain any excess water.
2. While the eggs are poaching, toast the slices of whole grain bread until golden brown.
3. To assemble, place one slice of toasted bread on each plate. Top each slice with a slice of smoked salmon.
4. Carefully place a poached egg on top of the smoked salmon on each slice of bread.
Conclusion
Incorporating a protein-rich breakfast into your daily routine is not only essential for overall well-being but can also be instrumental in supporting weight loss efforts. By starting your day with a meal that is high in protein, you provide your body with the necessary nutrients to fuel energy levels, support muscle health, and promote satiety.
Protein-rich breakfasts help to regulate appetite throughout the day, reducing the likelihood of overeating and unhealthy snacking. Additionally, protein plays a crucial role in maintaining and repairing muscles, making it particularly beneficial for individuals engaging in regular physical activity or weight training.
By making protein a cornerstone of your morning meal, you can optimize your health, support your weight loss goals, and set yourself up for success throughout the day.


")
")


