As you might have figured out by now, I love nothing more than escaping into the wilderness and exploring the great outdoors. And if you’ve read any of my other blog posts you’ll know how much I absolutely adore the adidas Terrex range of womens walking boots and hiking shoes. Never have I ever come across a pair of walking shoes that fit like a glove (or should I say sock!) from the very first moment you step into them and they have never once given me blisters. They are the literal dream.
Which is why I wanted my husband to get a pair of good walking shoes too. Let me explain more…
Why My Husband Needs A New Pair Of Walking Shoes
My husband has been wearing the same old, cheap, crappy walking shoes for longer than I can remember. I make him keep them out in our boot room, because aside from anything else they absolutely reek. They have zero support, the insole has shifted around, and he doesn’t even bother to tie them up properly, preferring instead to slip them on and off like slippers. And I’m sure they’re probably just as comfy as a pair of slippers, but they cannot be good for his feet and they certainly aren’t good for my nose!
If he had his way I’m almost certain he’d hang onto them until they reached a point where they were covered in holes and falling off his feet, but something happened on one of our dog walks that made him assess his life decisions, or at least his footwear decisions anyway.
I noticed that he kept stopping and fiddling with his shoes. Not gonna lie, I found it incredibly annoying as I wanted to get a bit of a pace on and crack on with the walk. I asked him what he was doing and he said he kept getting stones in his shoes. I then mentioned, rather smugly, that I didn’t have that problem as I wore decent walking shoes that supported my feet and could be tied up correctly. And that right there was his light bulb moment. Such a simple, simple thing, but he found it so irritating and uncomfortable getting those little stones in his shoes that he decided there and then that he needed a new pair of walking shoes. Which is when I recommended adidas Terrex to him.
Now, fortunately for him, I’m an adidas blogger, which means I pretty much have my pick of the bunch. And having had experience of Terrex myself (in fact I have 2 pairs now, I love them so much) I knew this was the range for him. I sent him a few different choices and this is the one he picked…
Adidas Terrex Free Hiker 2 Hiking Shoe
The thing that stood out the most for my husband when he was looking at the selection of mens walking shoes I’d put together for him, was that the adidas Terrex Free Hiker 2 has an integrated sock like cuff. It makes the shoe look like a high rise boot, but because the cuff is stretchy it hugs snugly to the upper ankle and reduces the risk of rubbing, plus allows for more supportive movement in that area. What this snug fit also means is that the sock basically acts a gaiter, preventing any small stones and grit etc. from getting into the shoe. BINGO!
Terrex shoes include Continental™ rubber grip, that’s the same Continental™ that makes car tyres, so super, super grippy. If it can keep your car on the road in all conditions, it’s certainly going to look after you when you’re walking. Which is great news, as my husband often takes the dog for a walk in the forest at the back of our garden, and the walks involve a lot of trekking up and down hills, all of which are muddy, and slippy and conceal many a hidden tree root, so grip is a necessary feature.
What makes the shoe so comfortable then? Well, aside from the sock-like cuff that I have already mentioned, the shoe has BOOST midsole cushioning, which is adidas’s trademarked magic ingredient – a form of pellets which are compressed and molded for the specific fit of the shoe. This gives 20% more energy return with every step, but what you basically need to know is that it’s like walking on lovely soft, bouncy cushions. And what it means for my husband is that he gets to wear a pair of shoes that do indeed feel as comfortable as his slippers, but he can be safe in the knowledge that they are supporting his feet correctly too.
My husband chose to go for classic black (goes with everything, needs less cleaning!), but of course adidas don’t do ‘just black’, they call it Core Black/Core Black/Grey Six. There are also two other colourways available in the adidas Terrex Freehiker 2; Pulse Olive/Linen Green/Impact Orange and Bliss Lilac/Beam Orange/Pulse Magenta.
So What Does The Husband Actually Think Of His New Shoes?
Well obviously, he loves them! If only he’d listened to me sooner, eh? Like me, he was so impressed with how immediately comfortable they were. Whenever we’ve bought walking shoes or trail running trainers in the past, we’ve always had a spell of having to wear them in. But with adidas Terrex it simply isn’t necessary. They are comfortable from the get go.
But enough from me, here’s what he has to say about them…
“For ages I have suffered from getting bits caught in my shoes when walking in the woods, forever having to stop and try and get them out. So the concept of walking trainers with a snug sock style lip was very appealing! I chose a black pair and sized up by a half, on advice from the adidas website. They were a bit tricky to get on, which is to be expected with this style – especially when new, but the fit was really good and straight away they felt very comfortable. Out on a 5 mile walk which included a lot of woodland paths, not a single bit of twig or grit got near my feet and the comfort level for a brand new pair of shoes was seriously unlike anything I have experienced before. I’m really happy with them and they will now be my footwear of choice for many walks.”
So, I think the lessons we’ve learnt here is to always make sure you have a comfortable pair of walking shoes, that are up to the job, and that feel comfortable and support your feet in the best possible way, but most importantly that you should always listen to what your wife suggests!
*products gifted by adidas
Author Bio
Becky Stafferton is a full-time content creator, web publisher, and blogging coach. She continually strives to promote a realistic, sustainable and positive image of how to lead a healthy life. When she’s not writing she can be found running through muddy puddles, making lists of lists, having a good old moan, talking in funny voices to her dog, renovating her house in the country, and teaching others how to make money from their blogs.
This week saw Mark Cavendish, the all time best ever sprinter in the Tour de France crash out of the race. This denies him the opportunity of setting the record for most ever stage wins in the race, upping his current total of 34 to 35 and topping the great Eddy Merckx.
What Cav damaged was his collar bone or clavicle.
This is a small slightly s shaped bone that acts as a brace between the top of the sternum and the shoulder blade, holding the arm out from the body and allowing it to function as a useful appendage. It may be visible depending on the percentage of body fat
The name clavicle derives from the Latin for a small key and may be suggestive the bones ability to rotate around its axis in the same way as a key turn in a lock.
The clavicle is the most often broken bone in the body. As people fall they reach out a hand out to safe themselves and the shock transmits up the arm with the resulting stress shattering the bone.
The clavicle is an unusual bone. It is the first to start to form in a foetus but it is also the last bone to completely ossify – where the cartilage that forms the developing structure is replaced with bone.
The end closest to the sternum has a plug of cartilage which begins to ossify around age 14. As this plug continues to ossify it eventually fuses with the main shaft of the bone, a process that starts around 16 but continues into the late twenties.
This makes the clavicle a very useful bone for forensics. Due to its location the bone is often protected from the elements by the rib cage and upper limb. Its state of ossification can age some one to under 14, between 15 and mid twenties or older.
Lets hope the tour continues uneventfully and does not fuel anymore anatomically based posts.
Author: Anatomy Fundamentals
Janet Philp has spent a lifetime exploring fitness and wellbeing. Starting in group exercise, travelling through rugby to representing the UK at martial arts before including Yoga, meditation, Budokon and personal instruction. Her passion is anatomical function and educating people to use their bodies to their full potential.
View all posts by Anatomy Fundamentals
The squat is the most technically demanding lift to coach and
execute, and I suspect that’s why most personal trainers skip out
on learning how to do it. As a large, compound, multi-joint exercise,
it recruits a whole bunch of muscle mass, over a long range of
motion, creating numerous opportunities for things to go wrong. As
the weight increases, the margin for error shrinks, meaning even the
slightest deviation from correct technique will result in a missed
rep.
A common error that we
see involves a misunderstanding of how to establish our desired, more
horizontal back angle. When training for strength, this back angle
utilizes more effectively the muscles of the posterior chain, namely,
the lower back, glutes, hamstrings, and adductors, which adds to the
muscle mass involved in the movement and makes it our preferred way
to teach the squat. This allows us to lift heavier weights and become
stronger, which is the reason we’re training for strength in the
first place.
This back angle is
achieved by reaching the hips back and pushing the knees out and
forward at the same time. When executed correctly, this angle is set
almost immediately and prepares the lifter for the rebound at the
bottom of the squat. When people have difficulty understanding how to
do this – often due to an incorrect mental image of the squat –
we’ll often use cues like “bend over” or “point your nipples
to the floor.” However, this can lead to them to mistakenly
rounding or flexing their thoracic spine in attempt to point their
chest down.
It’s important to
remember that the back serves to transmit the force generated by the
hips and legs up to the barbell sitting on the back, and any flexion
in either the lumbar or thoracic spine during the squat will cause
problems. More specifically for this article, when the chest
collapses forward while trying to lean over, the muscles of the upper
back and shoulders (where the barbell rests) flatten and the elbows
flare back causing the bar to roll upward toward the neck. Not only
is this position potentially dangerous, it also kills the mechanics
of the lift by having the bar drift forward of mid-foot and will,
eventually, piss off the elbows something fierce. It also deforms and
softens a segment which is meant to remain rigid at all times during
the movement pattern.
Mental images of the
squat (think the Master Cue) are extremely useful and in this
case, a great way to fix this issue is to think about freezing the
torso throughout the movement. The thoracic spine should stay tight,
and the lumbar spine should remain in rigid extension at all times
and both should not move. While the torso will lean forward naturally
as the hips move back and the knees drive outward, the key is that
the torso itself is not actively bending. It it frozen in
position while the hips reach back and the knees are shoved out and
forward.
Thinking about
everything from the waist up, including the arms and hands being
frozen in place during the squat will solve a lot of problems and
make for a more efficient movement pattern. You squat by moving your
hips and knees together, not by relaxing your back.
Take note of the images above. In the first squat (center photo), the lifter attempts to
establish the back angle by rounding his thoracic spine, which
naturally flares the elbows back and deforms the back segment. In
contrast, in the bottom photo, the lifter maintains the same torso
and elbow position at the bottom as he had at the top, with the
only change being the position established by moving hips and knees
simultaneously. While in both bottom-position photos, the chest has effectively been
“pointed down,” this has been accomplished in two very different
ways.
Remember, the forearms
help anchor the barbell in place just below the spine of the scapula,
and the back must remain rigid to successfully do its job as a force
transmitter. As long as these elements stay stable throughout the
squat, the lifter will be well-positioned for success.
Leg day is often viewed as one of the most challenging yet rewarding workout sessions in any fitness regimen. When executed correctly, leg workouts can significantly enhance your strength, power, and overall physique. Whether you’re a beginner or an experienced lifter, understanding the best exercises and how to incorporate techniques like the leg accessories workout, as well as exploring the debate of leg press vs squat press, can set you on the path to building impressive legs.
In this blog post, we will discuss the anatomy of your leg muscles, outline effective leg workouts targeting the quads, hamstrings, and glutes, and provide insights into the benefits of both leg press and squat press exercises. Let’s dive in!
Understanding the Anatomy of the Legs
Before we jump into specific workouts, it’s important to understand the muscle groups we’ll be focusing on during leg day:
Quadriceps: Located at the front of your thigh, these muscles extend your knee and are critical in movements such as running, jumping, and squatting.
Hamstrings: Comprised of three muscles at the back of your thigh, the hamstrings are responsible for bending your knee and extending your hip.
Glutes: This group of muscles includes the gluteus maximus, gluteus medius, and gluteus minimus. The glutes are essential for hip extension, stabilization, and overall power in movements.
Benefits of a Leg Accessories Workout
Incorporating leg accessories workouts into your routine is necessary for several reasons:
Targeted Muscle Development: Accessory exercises help target specific muscle groups that may not be sufficiently activated during primary lifts.
Balanced Strength: By focusing on muscle groups individually, you can improve overall balance and stability in your lower body.
Injury Prevention: Strengthening smaller, stabilizing muscles through accessory work can reduce the risk of injuries during heavy lifting.
Improved Aesthetics: Accessory workouts can enhance muscle definition and shape, leading to well-rounded leg development.
Top 5 Leg Day Workouts for Quads, Hamstrings, and Glutes
Here are five effective leg workouts that target the quads, hamstrings, and glutes, along with accessory exercises to enhance your overall leg strength:
Barbell Squats
Muscle Targeted: Quads, Hamstrings, Glutes
How to Perform:
Start with a barbell resting on your traps or upper back, feet shoulder-width apart.
Lower your body by bending your knees and hips while keeping your chest up and back straight.
Go down until your thighs are at least parallel to the ground.
Push through your heels to return to the starting position.
Benefits: Squats are a compound movement that engages multiple muscle groups and joints, making them a staple for building strength and mass, perfect for a leg accessories workout.
Romanian Deadlifts
Muscle Targeted: Hamstrings, Glutes
How to Perform:
Stand with your feet hip-width apart, holding a barbell or dumbbell in front of your thighs.
Keeping a slight bend in your knees, hinge at your hips and lower the weights toward the floor while maintaining a straight back.
Once you feel a stretch in your hamstrings, return to the starting position by thrusting your hips forward.
Benefits: This exercise primarily targets the hamstrings while also activating the glutes, promoting strength and muscle growth in these areas.
Leg Press
Muscle Targeted: Quads, Hamstrings, Glutes
How to Perform:
Sit on the leg press machine and place your feet on the platform shoulder-width apart.
Lower the weight by bending your knees until your thighs are at least parallel to the platform.
Press through your heels to extend your legs back to the starting position.
Leg Press vs Squat Press: In the debate of leg press vs squat press, the leg press allows for a guided motion, which can be beneficial for isolating the leg muscles without straining the lower back. However, squats not only work the legs but also engage core muscles, offering a total-body workout experience.
Lunges
Muscle Targeted: Quads, Hamstrings, Glutes
How to Perform:
Stand with your feet shoulder-width apart.
Step forward with one leg, lowering your hips until both knees are bent to about 90 degrees.
Ensure your front knee is above your ankle, then push back to the starting position.
Alternate legs.
Benefits: Lunges enhance lower body strength while promoting balance and coordination. They effectively target the quads, hamstrings, and glutes, making them a versatile addition to any leg accessories workout.
Glute Bridges
Muscle Targeted: Glutes, Hamstrings
How to Perform:
Lie on your back with your knees bent and feet flat on the ground, hip-width apart.
Press through your heels and lift your hips toward the ceiling, squeezing your glutes at the top.
Lower your hips back down without resting on the ground, then repeat.
Benefits: Glute bridges are specifically designed to engage and activate the glute muscles, which can enhance your overall strength and aesthetics, especially when aiming for a powerlifter physique.
Additional Accessory Leg Exercises
In addition to the primary movements outlined above, incorporating accessory exercises can help improve specific muscles and promote balanced leg development. Here are some effective accessory exercises to consider:
Calf Raises
Muscle Targeted: Calves
How to Perform:
Stand with the balls of your feet on the edge of a step or raised platform.
Raise your heels as high as possible, squeezing your calves at the top.
Lower your heels below the step level and repeat.
Benefits: Strong calves complete your leg development and can enhance your overall stability during lifts, including squats and other compound movements.
Lateral Band Walks
Muscle Targeted: Glutes, Hip Abductors
How to Perform:
Place a resistance band around your legs, just above your knees.
With your feet hip-width apart, squat slightly and step sideways in one direction for several steps.
Return to the starting position and repeat in the opposite direction.
Benefits: Lateral band walks effectively target the glute medius and are excellent for preparing your gluteus musculature for heavier lifts, particularly beneficial in achieving that powerlifter physique.
Step-Ups
Muscle Targeted: Quads, Hamstrings, Glutes
How to Perform:
Stand in front of a sturdy bench or platform.
Press down through one foot, stepping up onto the bench while lifting your opposite knee toward your chest.
Step back down and alternate legs.
Benefits: Step-ups enhance leg strength and stability, emphasizing unilateral strength, which is crucial to avoid muscular imbalances and improve overall performance.
Bulgarian Split Squats
Muscle Targeted: Quads, Hamstrings, Glutes
How to Perform:
Stand a few feet in front of a bench, facing away, and place one foot on the bench behind you.
Lower your body into a lunge, ensuring your front knee stays above your ankle.
Push through the front heel to return to the starting position.
Benefits: This is a highly effective exercise for leg development, particularly for balancing strength between your quads and hamstrings. It’s also a great test of your stability and core strength.
Structuring Your Leg Workout Routine
To maximize your leg day effectively, could you consider structuring your workout routine around the above exercises? Here is a sample workout plan that includes both primary exercises and accessory work:
Sample Leg Workout Routine
Warm-Up (10 Minutes)
5-10 minutes of dynamic stretching (leg swings, high knees, lunges with overhead reach)
Light cardio such as jogging or cycling for anaerobic activation
Main Leg Exercises (3-4 Sets Each)
Barbell Squats: 6-10 reps
Leg Press: 8-12 reps
Romanian Deadlifts: 8-12 reps
Bulgarian Split Squats: 8-10 reps per leg
Lunges: 10-12 reps per leg
Accessory Leg Exercises (3 Sets Each)
Glute Bridges: 15-20 reps
Calf Raises: 12-15 reps
Lateral Band Walks: 10 steps each direction
Cool Down (5-10 Minutes)
Static stretches focusing on hamstrings, quads, calves, and glutes
Incorporate foam rolling to promote recovery
Leg Accessories Workout Considerations
Mind Your Form
When performing any of these exercises, especially with weights, focusing on proper form is crucial to minimize the risk of injury. Bad habits can often lead to injuries later, particularly with complex movements like squats or deadlifts.
Vary Your Routine
Your Routine
To keep your leg workouts effective and engaging, consider incorporating variety into your routine. This could mean alternating between different variations of exercises, changing the order of your workouts, or even switching from machines to free weights occasionally. For example:
Squat Variations: Try front squats, sumo squats, or goblet squats for different muscle activation.
Deadlift Variations: Incorporate conventional deadlifts, sumo deadlifts, or single-leg deadlifts.
Include Different Set and Rep Schemes: Consider changing rep schemes (low reps for strength, higher reps for endurance) or incorporating supersets and drop sets.
Progressive Overload
To continually build strength and muscle mass, apply the principle of progressive overload. This means gradually increasing the weights, sets, or repetitions of your exercises over time. In the context of leg accessories workouts, you can:
Increase Weights: As exercises become more manageable, increase the load to continue challenging your muscles.
Add Reps: Increasing the number of reps slightly can help build muscular endurance.
Intensify with Tempo Changes: Slow down the eccentric (lowering) phase to increase time under tension, thereby stimulating muscle growth.
Listen to Your Body
While pushing yourself is important, listening to your body is equally vital. If you experience unusual pain or discomfort, especially in your joints or lower back, it may be a sign that you need to adjust your form or reduce the weight. Ensure you incorporate rest days into your routine, allowing your muscles to recover fully between leg workouts.
Combining Leg Workouts with Other Fitness Components
Balancing your leg training with other fitness elements can yield comprehensive results. Here’s how to integrate leg workouts with other aspects of fitness:
Cardio
Incorporating cardio is a great way to enhance your overall fitness. Whether it’s running, cycling, or using a rowing machine, integrating cardio can enhance your stamina and encourage fat loss while you’re building muscle during your leg accessories workouts. However, try to avoid excessive cardio on leg day, as this could hinder muscle recovery.
Flexibility and Mobility Training
Don’t neglect the importance of flexibility and mobility work, particularly around the hips and legs. Incorporate dynamic stretches before your workouts and static stretching afterward. Yoga or targeted stretching sessions can help improve flexibility, which is crucial for maintaining form and preventing injury during leg workouts.
Combine with Upper Body Workouts
Many people focus on hitting legs once or twice a week, pairing leg day with upper body workouts on alternate days. For a balanced routine, consider pairing leg accessories workouts with upper body lifting. This may be structured as a push-pull system:
Push Day: Focus on exercises targeting the chest, shoulders, and triceps.
Pull Day: Focus on exercises for the back and biceps.
This ensures each muscle group gets attention while allowing ample recovery time.
Conclusion
A dedicated leg day is an essential component of any balanced fitness program. By utilizing effective exercises that target the quads, hamstrings, and glutes, combined with a strategic approach to leg accessories workouts, you can make significant gains in strength and aesthetics.
Additionally, understanding the distinction between leg press vs squat press can help you choose the best exercises for your goals, whether you aim for the mass and power typical of a powerlifter physique or the toned look of a well-balanced athlete.
Key Takeaways
Incorporate a variety of leg exercises including squats, deadlifts, lunges, and accessory work to target all areas of the legs effectively.
Understand the importance of fitness principles like progressive overload and proper form to ensure long-term success and prevent injuries.
Don’t forget to pair leg training with cardio and flexibility work for optimal performance and recovery.
Make sure your workouts are structured, varied, and progressive to continuously challenge yourself and stimulate growth.
By following these guidelines and consistently putting effort into your leg day workouts, you will develop powerful legs that not only improve your overall performance but also contribute to a well-defined and appealing powerlifter physique. Remember that consistency is key—stay focused, and you’ll see impressive results!
-Terry Asher
Terry Asher
After changing his best friend’s life by helping him lose over 70lbs, dropping him down to an amazing 7% body fat, Terry was inspired to be a full-time internet trainer knowing he could do the same for many more. In 2010, Terry published his own diet and fitness e-book that can be purchased on this website. Let Terry help you change your body for the better!
Where I live, autumn inevitably brings cooler temperatures, fuzzy sweaters, an abundance of root vegetables and a frenzy for pumpkin-spiced everything – especially the pumpkin spice latte.
Pumpkin spice, if you make it at home with actual spices, is an incredible mix of nutrient-dense aromatics like cinnamon, ginger, cloves, and nutmeg. Problem is, many of us aren’t actually using real spices for our pumpkin spice lattes, pumpkin pies or pumpkin baked goodies – or real pumpkin, either. Instead, we’re grabbing pumpkin-flavoured processed foods and cruising by coffee shops to grab a $7 pumpkin spice latte. (I also just learned the horrifying fact that pumpkin spice hair colouring is a thing. Make it stop!)
Let’s take a look at a couple of coffee shop pumpkin spice latte menu items and see what we find.
Exhibit A:
Milk, Pumpkin Spice Sauce (Sugar, Condensed Skim Milk, Pumpkin Puree, Contains 2% or Less of Fruit and Vegetable Juice for Color, Natural Flavors, Annatto, Salt, Potassium Sorbate), Brewed Espresso, Whipped Cream (Cream {Cream, Milk, Mono and Diglycerides, Carrageenan}, Vanilla Syrup (Sugar, Water, Natural Flavors, Potassium Sorbate, Citric Acid), Pumpkin Spice Topping (Cinnamon, Ginger, Nutmeg, Clove, Sulfiting Agents).
This is a concoction of sugar, preservatives, imitation flavours, and dairy – all of which we know are detrimental to our health. Processed white sugar is a highly addictive substance linked to weight gain, dental caries, blood sugar imbalance, diabetes, and cancer. Dairy, in all its conventional forms, can cause allergies, digestive issues, antibiotic resistance, and deplete our bone health. Carrageenan is inflammatory, particularly in the digestive tract, while those other ‘natural flavours’ and food additives are anything but natural.
With the first example, at least there was some pumpkin puree and spices in the topping. Here, there isn’t any pumpkin puree or pumpkin spice at all – just a pumpkin-flavoured syrup loaded with fructose, artificial flavours and colours, and artificial sweeteners that are way, way worse for us than white sugar (you can read this post about artificial sweeteners for more info).
We can definitely do better.
Ultimate Pumpkin Spice Latte: The Spices
Spices are an important part of any dairy-free pumpkin spice latte. I like to buy my spices in small amounts to ensure freshness, and purchase them whole and grind them myself wherever I can. Even though spices are dried, they will still contain volatile, potent compounds that can dissipate with age (or if you aren’t buying decent spices, they won’t be there in the first place).
Another thing to watch out for in your spices is irradiation. Food irradiation is a growing problem as it damages the nutrients found in our foods, destroys helpful bacteria, and hasn’t been proven safe for human consumption. Ask your local grocer or health food store for non-irradiated spices, or purchase them online.
If you love adding pumpkin spice to everything you make from October through December, try making your own batch of pumpkin spice mix and use it throughout the fall.
Print
Description
DIY your own pumpkin-spiced creations with this simple spice mix
2 Tbsp ground cinnamon
1 Tbsp ground ginger
1 tsp allspice
1 tsp ground cloves
1 tsp ground nutmeg
1 tsp ground anise
1 tsp turmeric (super optional and not traditional but I love it!)
Measure out all ingredients.
Add to a small mason jar and shake shake shake.
Prep Time:5 mins
Category:Condiment
Ultimate Pumpkin Spice Latte: The Pumpkin
A good pumpkin spice latte has to include actual pumpkin! So many pumpkin recipes call for pumpkin puree and most of us hop over to the store and buy a can of pumpkin. But pumpkin doesn’t grow in cans. It grows from the ground and grows a-plenty locally. You’ll be surprised how easy it is to make your own pumpkin puree from scratch.
Fresh pumpkin has an abundance of outstanding nutritional benefits. Pumpkin is:
Abundant in beta-carotene, an antioxidant that helps maintain our skin and vision and prevents oxidative damage.
Rich in carotenoids that help regulate blood sugar.
Rich in dietary fibre to keep us pooping regularly.
High in lutein and zeaxanthin. These funny-sounding guys are potent antioxidants that prevent free radical damage in the lenses of our eyes.
Rich in Vitamin C, which keeps our skin, hair, and nails glowing throughout the winter.
High in potassium – this is helpful for those concerned about blood pressure.
About 90% water, making pumpkin very hydrating.
You can even eat the flowers. If you grow your own pumpkin, make squash blossoms!
Try roasting or cooking your own pumpkin – it doesn’t need to be a gigantic one, you can find smaller versions – and then save the puree in the fridge or freezer to use in pumpkin spice lattes, smoothies, soups, and even chili or hummus. One can of pumpkin is equivalent to about 2 cups of fresh pumpkin puree if you’re using a recipe that calls for the canned version.
Here is one of my favourite dairy-free pumpkin spice latte recipes. With fresh pumpkin and spices, Dandy blend (a herbal coffee alternative), and natural sweeteners, this is a wonderful elixir that will fuel your day, rather than detract from your health.
Print
Description
A delicious pumpkin spice latte using whole and unprocessed ingredients.
1 1/2 cups hot water (for a more decadent option, try almond milk or coconut milk)
1/4 cup fresh pumpkin puree
2 Tbsp Dandy Blend
1 Tbsp raw honey or maple syrup
1 Tbsp coconut oil or ghee
2 tsp Pumpkin Spice Mix
Pinch of salt
For a chocolate version: add 1 Tbsp cacao powder
For extra decadence: add coconut whipped cream on top (recipe below)
Add all ingredients into a blender and blend until smooth.
Prep Time:5 mins
Category:Beverage
Need more Elixir magic inspirations?
Download my Ultimate Elixir Recipes Infographic, by simply entering your info below
Free Resource Library
Enjoy more than 40 downloadable guides, recipes, and resources.
Print
Description
You won’t miss cow’s milk at all when you dollop your elixirs with this dairy-free coconut whipped cream.
Coconut Cream (this is the thick solidified top layer from a chilled can of full-fat coconut milk).
2 tsp honey or maple syrup
1 tsp vanilla extract
Chill your can of coconut milk for about 8 hours in the fridge, and then remove the thick cream from the top and place in a large mixing bowl.
Add your sweetener and vanilla extract.
Use an electric hand mixer or some serious muscle and a whisk until soft peaks start to form. If it’s too thick, you can add back some of the remaining liquid from your coconut tin, 1 Tbsp at a time.
And, if you’re looking for more pumpkin inspiration:
Images: iStock/nata_vkusidey , VeselovaElena
Free Resource Library
Enjoy more than 40 downloadable guides, recipes, and resources.
Earning an accredited personal training certification is essential when pursuing a career in health and fitness. The right certification program will give you the necessary knowledge and expertise needed for numerous career opportunities, client attraction and retention, and credibility within the fitness industry. However, in a field of hundreds of personal training courses and certifications, it can be a daunting task to select the best one for you based on your budget, personal goals, and time available to study and take the exam.
Below are our top choices of personal training certifications, paired with some TRX certifications that will help you maintain your CECs, stand out in a crowded industry, and allow you to put your education to work.
1. TRX Suspension Training Course (STC)
Key Features: The TRX Suspension Training Course (otherwise known as the STC) is a 7-8 hour certification that takes the participant through the following:
An overview of suspension training
Proper set-up of the TRX
Anatomy of the straps and basic use
Science of adjusting stability, resistance, and program design for all fitness levels
35+ exercises coached and cued based on foundational movement standards
Above and beyond the use of the TRX Suspension Trainer, the STC takes a deep dive into the understanding of foundational movements (plank, pull, push, squat, hinge, lunge and rotate) by setting standards, addressing common faults, and creating user-friendly cues that are appropriate not only for the TRX Suspension Trainer, but for all fitness modalities.
Eligibility: There are no prerequisites for this course.
Credibility: STC Graduates will receive CECs from the following organizations: NASM 0.7, ACE 0.7, AFAA 7.0, AFLCA (CAN) 7.0, Can Fit Pro 4.0, NESTA 0.8, PTA Global 7.0, ISSA 7.0, IYCA 3.5, BCRPA 7.0, Fitness Australia 7.0, PA Australia 2.0, SkillsActive REPS 8.0, and REPS 9.0.(ACSM accepts ACE CECs).
Cost: $295
2. American Council on Exercise (ACE)
Key Features:
One of the most respected and recognized certifications in the industry, The American Council on Exercise Certified Personal Trainer Program (ACE-CPT) takes the most up-to-date exercise and behavior change science and makes it understandable and usable, giving trainers the skills needed to design programs and instruct exercise technique starting on day one. The ACE Integrated Fitness Training Model (ACE-IFT) is a straightforward framework for program design that is based on science yet understandable enough to use with clients at 5 am. ACE is also well known for its systematic behavior change coaching model known as the ACE Mover Method. ACE offers a complete online study platform and the 16-chapter book is available in digital format or print. The 3-hour exam consists of 150 multiple-choice questions covering the following topics: client onboarding and assessments, program design and implementation, program modification and progression, risk management, professional conduct, and ethical business practices.
Eligibility: According to their website, “Enrollees must be at least 18 years old, have a high school diploma (or equivalent education), have a current government-issued photo ID with a signature and earn an adult CPR and AED certification to be eligible to sit for the ACE certification exam. Those enrolled must pass the exam in order to become an ACE-CPT. The certification is valid for two years, and a trainer can recertify by meeting ACE’s continuing education credit requirement of 20 hours, maintaining their CPR certification and paying the organization’s recertification fee.”
Cost: Study packages begin at $675, including the exam’s cost.
Other Certifications Offered:
Group Fitness Instructor:
Health Coach
Medical Exercise Specialist
3. YBell Coaching Course (YBCC)
Key Features:
YBell Training is based on a tool that was created out of necessity by Aaron Lawrence on Bondi Beach in Australia. The YBell replicates multiple pieces of equipment, a dumbbell, kettlebell, double-sided med ball, and push-up stands by having multiple handles that form a Y shape. The YBell Coaches course is designed to give all users, from the fitness professional to the fitness enthusiast, a deeper understanding of the makeup of the YBell, the tools it emulates, the coaching skills needed to coach YBell exercises, as well as specific programming centered around the Bell. This course involves a mix of hands-on training as well as theoretical lecture-style learning.
Eligibility: There are no prerequisites for this course.
Credibility: YBell Graduates will receive CECs from the following organizations: NASM 1.1, ACE 1.0, REPS 10-hrs, AUSactive 10.0.
Cost: $295
4. National Academy of Sports Medicine (NASM)
Key Features:
Another highly recognized and accredited personal training certification is the National Academy of Sports Medicine Certified Personal Training Program (NASM-CPT). A highlight of the NASM-CPT is the NASM OPT Model or the Optimum Performance Training Model. The OPT Model is a fitness training system based on scientific evidence and principles that progresses individuals through five distinct yet complementary training phases. With a strong focus on corrective exercise, the NASM-CPT is an excellent choice for trainers looking to work with the general population and deconditioned individuals. The 2-hour exam contains 120 questions and is considered one of the more difficult and rigorous personal training certification exams.
Eligibility: According to their website, “Enrollees of this program must have a high school diploma (or equivalent education) and earn an adult CPR and AED certification to be eligible to sit for the NASM certification exam. They must pass the exam with a scaled score of 70% or better to become a NASM-CPT. The certification is valid for two years, and a trainer can recertify by earning 1.9 continuing education units, maintaining their CPR certification, and paying the organization’s recertification fee.”
Cost: Starts at $799, which includes the price of the exam.
Other Certification Options:
Certified Nutrition Coach
Certified Sports Nutrition Coach
Certified Wellness Coach
5. TRX Yoga Foundations Course (YFC)
Key Features:
The TRX Yoga Foundations Course is a 7-8 hour certification that takes the participant through the following:
Experience why we use the TRX® Suspension Trainer for Yoga.
Learn the TRX methods to teach TRX Yoga poses and movements.
Learn proper alignment and cueing techniques.
Explore ways to release and move through tension.
TRX YOGA is a style of vinyasa yoga that uses the TRX Suspension Trainer as a helping hand to make you feel safe to explore a deeper stretch, try new poses, and advance your practice.
This fitness-based take on yoga fuses the science of Suspension Training with the amazing mind-body integration of breathwork, alignment, and dynamic balance of movement and flexibility that comes from a Power Yoga practice.
This course will show you why the straps matter in your yoga practice while you learn everything you need to know to build a yoga pose using the TRX Suspension Trainer
Eligibility: no prerequisites
Credibility: TRX Yoga Foundations Graduates will receive CECs from the following organizations: Ace (0.7), AFAA (7.0), Canfitpro (3.0), CIMSPA (4.5), NASM (0.7), Yoga Alliance Credit Eligible
Cost: $295
6. National Strength and Conditioning Association (NSCA)
The National Strength and Conditioning Association Certified Personal Trainer Program (NSCA-CPT) is the most in-depth certification on our list with regard to details on science-backed strength and fitness coaching protocols. The NSCA is most well-known for their Certified Strength and Conditioning Specialist (CSCS) certification and their CPT certification is also written under the lens of performance improvement. Although one of the best personal training certifications on the market, the NSCA-CPT is missing a strong framework model for program design as seen with ACE (the IFT Model) and NASM (the NASM OPT). This certification is recommended for those working with a fairly athletic population. The exam contains 150 questions that test a candidate’s knowledge, skill, and ability in the following four domains: client consultation/fitness assessment, program planning, techniques of exercise, and safety, emergency procedures, and legal issues.
Eligibility:
Candidates must be at least 18 years old, have a high school diploma or an equivalent, and have a current CPR/AED certification.
Cost: Essential study materials begin at a cost of $225, which do not include the exam fee of $435.
Other Certifications Offered:
Certified Strength and Conditioning Specialist
Certified Performance & Sport Scientist
Certified Special Population Specialist
Tactical Strength & Conditioning Facilitator
7. International Sports Science Association (ISSA)
Key Points:
The International Sports Science Association Certified Personal Training Program (ISSA-CPT) is an accredited certification with some of the highest earning potential for certified trainers. This is due to a stronger focus on business skills and their guarantee of a training job within six months of certification. This certification is also known for its strong coverage of aerobic training and information on working with special populations. The ISSA-CPT is also popular due to having a less challenging exam than some of the other top certifications. The open-book exam consists of 200 multiple-choice questions covering the following 6 domains of the textbook: anatomy and physiology, kinesiology and biomechanics, health and physical fitness, program development, nutrition, and fitness for all. It is also important to point out that there is an additional fee for the NCCA-accredited exam. The standard ISSA-CPT exam is accredited by the Distance Education Accrediting Commission (DEAC).
Eligibility: To be eligible for certification enrollees must be at least 18 years old, have a high school diploma, provide government identification, submit and pass all course quizzes, pass the exam with a score of 75% or higher, and have a valid CPR/AED certification.
Cost: Packages start at $999 which includes the CPT exam.
Other Certifications and Specializations:
Certified Strength and Conditioning Specialist
Certified Yoga Instructor
Certified Nutritionist
Bodybuilding Specialist
Certified Health Coach
Corrective exercise specialist
Glute Specialist
8. TRX Yoga Flow (YFlow)
Key Features:
The TRX Yoga Flow Course is a 7-8 hour certification that takes the participant through the following:
Experience and Learn the TRX Yoga Signature Vinyasa Flow
Understand the theme and main focus of each TRX Yoga Flow Series
Learn the cueing techniques to teach an impactful and safe TRX Yoga Flow
Explore ways to roll out TRX Yoga in your Studio successfully
The TRX Yoga Signature flow is a 60-minute vinyasa practice that leverages the suspension trainer throughout the entire class. With the perfect blend of intensity and restoration, you have to experience this all-level practice for yourself. Fusing the TRX methodology with the best practices of teaching a vinyasa yoga class you will gather everything you need to roll this class out to your community.
Eligibility: Completion of the TRX Yoga Flow Course qualifies you for the Tier One TRX Yoga Certification Exam. TRX Yoga Foundations Course is recommended to be a prerequisite to the TRX Yoga Flow Course. Many of the exam questions are predicated on the content you learn from the TRX Yoga Foundations Course.
Credibility: TRX Yoga Foundations Graduates will receive CECs from the following organizations: Ace (0.7), AFAA (7.0), Canfitpro (3.0), CIMSPA (4.5), NASM (0.7), Yoga Alliance Credit Eligible.
Cost: $295
9. National Council on Strength & Fitness (NCSF)
Key Points:
The National Council on Strength and Fitness Certified Personal Training Program (NCSF-CPT) is not as well known as others on our list, but this certification proves that mainstream isn’t always necessary. The NCSF-CPT doesn’t provide as much information on behavior change, corrective exercise, and business as its competitors, however, with a strong focus on exercise science and strength training, this certification provides a substantial amount of quality information for its affordable price. The 3-hour exam consists of 150 multiple-choice questions covering the following topics: functional anatomy, exercise physiology, health and physical fitness, screening and evaluation, nutrition, weight management, exercise programming, training instruction, considerations for special populations, and professionalism and risk management.
Eligibility:
The NCSF requires you to be 18 years old, have a high school diploma or equivalent, and successfully pass the NCSF Certification Exam. CPR-AED is required for the recertifications which happen every 2 years.
Cost: Certification packages begin at $399, including the exam’s cost.
Other Certifications and Specializations:
Certified Strength Coach
Sports Nutrition Specialist
10. National Federation of Professional Trainers (NFPT)
Key Points:
With the best price of NCCA-accredited fitness certifications, many opt for the National Federation of Professional Trainers (NFPT) personal training certification. With a short textbook (only 343 pages) and 400+ testing sites around the US, this is one of the easiest and quickest certifications to complete. That being said, the text lacks a significant amount of important detail that the other leading certifications provide. However the pros still outweigh the cons, as the NFPT exam is NCCA accredited, NFPT trainers get free continuing education credits annually, and there are an abundance of easy-to-understand study materials available in print and online. The exam contains 120 multiple-choice questions and covers the following topics: principles of human anatomy, principles of human physiology, fitness components, training program development, implementation and modification, and professionalism and communication skills.
Eligibility:
The NFPT requires you to be 18 years old, have a high school diploma or equivalent, and successfully pass the NFPT Certification Exam with a score of 75% or higher.
Cost: Certification options start at $246, which includes the cost of the exam.
Other Specializations:
Cancer Recovery Specialist
Endurance Training Specialist
Fitness Nutrition Coach
Functional Training Specialist
MS Fitness Training Specialist
Sleep Coach
Do your next workout with our TRX equipment:
Conclusion
When choosing a certification, it’s essential to consider your career goals, the content covered in the program, the cost of the study materials and exam, the credibility of the certifying organization, and any specific areas of specialization you are interested in. It is also important to note that exercise science and the fitness industry are ever-evolving. Staying current with continuing education is essential not only for professional development but to keep your original passion for health, fitness, and helping others shining bright
Large-scale research projects are underway worldwide in an effort to discover and measure the effectiveness of therapies long-used by non-Western cultures to combat illness and promote health. One of these research projects, taking place in California, is the screening of Chinese herbs and compounds to measure their ability to fight breast cancer cells. By analyzing the active chemicals in more than 70 different herbs, scientists have found some considerable potency in a few of them. Some examples are:
Ban Zhi Lian (Chinese)– Scutellaria barbatae (Latin) – This herb inhibited breast cancer cells in the lab, and will be tested in a group of women with metastatic breast cancer who are taking no other cancer drugs. Tea made from the herb has been used for a variety of purposes – including treatment of liver, lung, and rectal cancer. The herb is brewed into a dark tea. It’s very potent, and only a small cupful provides a full dose. Avoid drinking lots of the tea in an effort to prevent cancer.
Zhi Mu – Anamarrhena asphodeloides – Lab tests showed it to be “highly active” against breast cancer cells. Future clinical trials are being considered.
Wang Bu Liu Xing – Vaccaria sigetalis – Also “highly active” against breast cancer cells in the lab, and being considered for future trials.
Not only found in herbal lore, health experts are discovering a new and healthy way for all of us to maximize their use of herbs. One of the best ways to introduce and sustain the use of healthy herbs andvitamins in our daily lives is to cook with them. These phytochemicals (phyto = plant) are present in fruits, vegetables, whole grains, and culinary herbs, and number in the thousands. Scientists have found they go beyond protecting against many chronic diseases and actively fight cancer as well.
Coriander, rich in coriandrol, helps combat breast and liver cancers. In animal studies, coriandrol stops aflatoxin (a liver toxin) from binding with DNA. Aflatoxin causes liver cancer in humans. Coriander is sold in seed form or fresh. Fresh coriander is known as cilantro.
One herb that helps guard against breast cancer is rosemary. Rosemary contains high levels of carnosol, a chemical that breaks down other chemicals that can start a cancer process.
The common garden mint plant contains limonene, a powerful anti-cancer agent that studies suggest blocks the development of breast tumors and may actually shrink them. We also encounter limonene in citrus peels, such as oranges, grapefruits, and lemons, though few of us eat much of the peel. But mint can be used in many foods and drinks as a flavor enhancer.
Many of us know about garlic and onions, each of which contains allyl sulfides, powerful and helpful antioxidants, and substances shown to lower cholesterol and thin the blood. The same group of compounds has anticancer properties. Other herbs and vegetables with strong phytochemical characteristics are:
Cabbage family of vegetables and green tea – Indoles – effective in reducing levels of naturally occurring estrogen in women
Soy and soybeans – Genistein and diadzein – phyto-flavonoids effective against some forms of breast cancer and lowering LDL cholesterol
Citrus fruits, some vegetables, teas and wine contain flavonoids and indoles, powerfulantioxidants that protect tissues, blood vessels, and the heart
Several Herbs To Help Lower Breast-Cancer Risk
Recommendation
Rationale
Notes
Astragalus (Astragalus spp); 2-6 grams of dried root/day; 1/2 teaspoon of fluid extract 3x/day.
Boosts the immune system; if taken regularly, may help prevent cancer.
Use cautiously if you’re a transplant patient or have an autoimmune disease.
Dandelion (Taraxacum officinale) root; 10-15 drops tincture 3x/day, or drink tea mornings and evenings.
Improves liver function, which helps detoxify estrogen.
No known health hazards.
Green tea (Camellia sinensis); 300-400 mg of polyphenols/day; three cups of green tea contain roughly 240-320 mg.
Antioxidant properties help prevent cancer.
Contains tannin and may cause discomfort to those with sensitive stomachs; also contains caffeine.
Psyllium (Plantago ovata); 12-40 grams/day; mix powder with fruit juice or cool water and stir.
Aids in ridding body of excess estrogen.
Not recommended for those who have gastrointestinal problems, obstruction of the bowels, or difficulties regulating diabetes.
Can cause stomach distress if used for extended period of time; do not use during pregnancy or if you have obstructed biliary ducts; those with gallstones should take only under supervision of a physician.
Note: Larger doses may be necessary for disease management and prevention. Check with your health care practitioner for individualized recommendations.
Sources: Laurel Vukovic, an Ashland, Oregon-based herbalist and author of Herbal Healing Secrets for Women (Prentice Hall Press, 2000); PDR for Herbal Medicines (Medical Economics Co., 2000).
Herbal Formulas
Basic breast cancer formula (Hsu, 85):
pu gong ying 15g
solanum lyratum thunb 15g
zi cao / lithospermum 15g
chuan shan jia / anteater scales 15g
xia ju cao / prunella 30g
gua lou / trichosanthes 12g
wang bu liu xing / vaccaria 12g
orange leaves 9g
aurantium 9g
pleione 9g
bei mu / fritillaria 9g
Another formula from 1970:
Dang gui 30
Gua lou / trichosanthes 60
Huang qi 15
bai zhi 15
jie geng / platycodon 15
bakeri 15
pu gong ying 9
zi hua di ding 9
gui zhi 9
yuan zhi / polygala 9
zhen zhu 6
bai shao 6
gan cao 6
For pus, fistula, new tissue growth, and recovery, hua yen tang:
Ren shen 30
Huang qi 30
Jin yin hua 30
Bai zhu 60
Qian cao gen / madder 6
brassica 6
fu ling / hoelen 9
More useful herbs
Andrographis Other names: Chuan Xin Liang, Fah Tolai, Kalmegh, King Of Bitters, Kiryat Andrographis is a branched, erect annual plant that grows in forests and wastelands in China, India, Pakistan, and Thailand. Its leaves and stems are harvested in late summer for medicinal use. It is cultivated extensively in China and Thailand, and in the East and West Indies.
USES
Andrographis is an ancient medicinal herb with an extensive history in Asia. It has been used for centuries to treat upper respiratory infections, fever, herpes, sore throat, and a variety of other chronic and infectious diseases. In Scandinavian countries, it is commonly used to prevent and treat the common cold. There have been conclusive studies of its use against cancer, AIDS, and a variety of bacterial and viral diseases.
Benefits of andrographis for specific health conditions include the following:
Atherosclerosis and heart attack. Clinical studies in China have found that andrographis prevents the formation of blood clots and that use of the herb prevents restenosis, or “reclogging,” of arteries after angioplasty. The herb changes the way the linings of blood vessels respond to calcium, helping them to stay open.
Cancer. It has been shown that if a cancer cell can be made to mature (or differentiate), it will not have the ability to grow out of control. Results of a study have demonstrated that andrographis has potent cell-differentiation-inducing activity on leukemia cells. Moreover, extracts from andrographis leaves are cytotoxic (cell-killing) against cancer cells. Japanese researchers have reported that andrographis stops stomach cancer cells from multiplying. Other studies have found positive results with skin cancer, prostate and breast cancer cells, and non-Hodgkin’s lymphomas.
Cold, fever, and flu. Andrographis prevents infections with rhinoviruses, the type of viruses most often responsible for the common cold. Taking 200 milligrams a day of an andrographis preparation (marketed as Kan Jang) throughout the cold season reduces the risk of catching a cold by over 50 percent. Andrographis also relieves runny nose, headache, sore muscles, sore throat, swollen lymph nodes, and fatigue, although a dose of 1,200 milligrams or more a day may be needed for this effect. Andrographis has also been used to reduce fever and pain, and for disorders of the intestinal tract.
Diarrhea and other intestinal disorders. Extracts of andrographis have been shown to have significant effects against the diarrhea associated with E. coli bacterial infections. In one study, chronic inflammation of the colon was treated with a combination of 60 grams of andrographis and 30 grams of rehmannia (Rehmannia glutinosa), with a cure rate of 72 percent. Twenty-six percent experienced symptomatic relief.
Hepatitis; liver and gallbladder problems. The primary active ingredient in andrographis, andrographolide, increases bile flow and the levels of bile salts and bile acids. It was found to be more potent than silymarin (an active ingredient in milk thistle), which is used clinically as a hepatoprotective agent. Also, the andrographolides present in andrographis are potent stimulators of gallbladder function, therefore reducing the probability of gallstone formation.
HIV/AIDS. Andrographis counteracts the human immunodeficiency virus (HIV) in at least four different ways. Studies at the University of California have shown that a combination of chemicals in the herb keeps the virus from attaching to healthy T cells. This keeps the celIs from becoming infected. Manufacturer-reported studies found the herb also fights HIV in cells once they have become infected. Also a natural protease inhibitor, andrographis is currently being studied for this property. Compounds in the herb make it more difficult for HIV to take over a “control enzyme” in certain T celIs that force the cells to make copies of the virus. This action is the same as the action of the AIDS drug zidovudine (Retrovir, better known as AZT), and taking andrographis makes it possible for doctors to treat AIDS with lower doses of AZT and fewer side effects. Finally, andrographis keeps HIV from activating an “off-switch” that causes uninfected T cells to die. The use of this herb reduces viral load while helping maintain T-cell counts
Pacific Yew– Taxus brevifolia Known by Native Americans as “Chief of the Forest,” medical literature shows that the powerful Pacific Yew tree has been intensively used and analyzed for its remarkable benefits for cellular health, and has also been historically utilized in its natural form as an immune booster, as a salve for cuts, scrapes and skin irritations and more.
PARTS USED Bark, leaf.
USES
Druids saw the yew as the tree of immortality and held it sacred. Later, Christians planted it in their churchyards. The reason is not clear. Some say it was to keep cattle from eating its poisonous berries; others say it was because a steady supply of the wood was needed for making bows. The Latin name taxa comes from the Greek toxon, the root word for “poison” and “bow”. Legend has it that the famous archer and outlaw Robin Hood was married under a yew tree. Ancient British law protected the yew tree and prescribed penalties for disfiguring yew wood furniture, carvings, or doors. Native Americans also held the yew in high regard. Some tribes saw it as the chief of trees. Although it had a variety of uses, Native Americans, like Europeans, associated it with war and bows.
The compound paclitaxel, from the bark of this plant, stabilizes microtubules, the part of the cell that maintains shape and aids in cell division. It combats certain cancers, most notably ovarian and breast. In the early 1960s the Pacific yew was part of a wide-spread search for cancer-fighting plants. More than 20 years later, clinical trials began. In 1994 scientists succeeded in synthesizing paclitaxel from yew needles and bark after concerns that a severe depletion in the numbers of yews could occur. Needles from a related species, T. baccata, have been used for many ailments, such as tapeworms, epilepsy, and tonsillitis. Medical experts do not recommend self prescribing, however, because yew needles and seeds are known to be toxic
Shiitake Japenese Mushroom – Lentinus Edodes
The Shiitake mushroom is the most widely cultivated specialty mushroom in the world and is both a prized medicine as well as a culinary delight. Because of its traditional use in folk medicine and its availability, it has been the subject of intense research. Shiitake has adequate nutritional qualities to serve as a main dish. It adapts well to recipes as a meat substitute. Lentinan is not only useful for cancer treatment, but may also prevent the increase of chromosomal damage induced by anti-cancer drugs. Shiitake contains all eight essential amino acids in better proportions than soy beans, meat, milk, or eggs as well as a good blend of vitamins and minerals including vitamins A, B, B12, C, D and Niacin. Shiitake produces a fat-absorbing compound which aids in weight reduction. Delicious to eat and good for health.
USES Shiitake is good for preventing high blood pressure and heart disease, controlling cholesterol levels, building resistance to viruses, and fighting diseases such as cancer.
Research indicates that lentinan extracted from shiitake may help some people with hepatitis. Case reports from Japan suggest that lentinan also may be helpful in treating people with HIV / AIDS. Lentinan is generally administered by injection and has been used as an agent to prolong the survival of people receiving conventional cancer therapy.
Benefits of shiitake for specific health conditions include the following:
Cancer. Japanese physicians have long used lentinan’s immune-stimulating capabilities in cancer treatment. Lentinan does not attack cancer cells directly. Instead, it activates the immune system’s lymphokine-activated killer (LAK) and natural killer (NK) cells to combat various types of cancers, including carcinoma, hepatoma, and sarcoma. Lentinan also counteracts the formation of prostaglandins that cause inflammation and keep the immune system’s T cells from reaching maturity.
Japanese physicians have found that lentinan stimulates the capacity of specialized blood cells to produce immune system chemicals, mainly interleukin and tumor necrosis factor (TNF), that prevent the growth and spread of cancer. Lentinan is especially useful when surgery is not feasible.Stomach cancer is unusually difficult to treat because the early symptoms are often so vague that the cancer is usually quite advanced by the time it is detected. Japanese physicians have found that when surgery for advanced stomach cancer is feasible, treatment with a combination of lentinan and chemotherapy improves the quality of life. In one case, a patient whose stomach cancer had spread to the liver and lymph nodes was still alive five years after surgery. The tumors in his liver disappeared after seventeen months of combined treatment with lentinan and the chemotherapy preparation uracil plus ftorafur (UFT).
Japanese physicians also use lentinan to treat breast cancer in women who have had mastectomies without follow-up radiation therapy. When chemotherapy is used, lentinan prevents immune-system damage if given before treatment begins. In addition, Japanese studies in animals have shown that lentinan increases the effectiveness of cancer treatment with a specific type of interleukin-2 (IL-2). When used together, the two treatments prevented the spread of breast cancers to the lung.
Even if cancer has spread to the lung, lentinan can increase survival time. In a group of sixteen people with advanced cancer, Japanese medical researchers injected lentinan directly into malignant areas. All of the patients eventually died, but the average survival time of patients who responded to the treatment was 129 days, compared with 49 days for those who were given the drug.
Chronic fatigue syndrome and Lyme disease. Japanese physicians report that lentinan is useful for low natural killer cell syndrome (LNKS), a disease that causes disabling fatigue. This disease causes symptoms that appear to be identical to chronic fatigue syndrome as it is diagnosed in the West. Lentinan treatment has been successful in reversing symptoms, including remittent fever, persistent fatigue, and low NK cell activity. The ability of this type of therapy to stimulate NK cells also makes it valuable in the treatment of Lyme disease.
Common cold and macular degeneration. Shiitake contains polysaccharides (complex sugars) that stimulate the immune system to fight colds. They also enhance production of interferon, which helps to rein in the blood-vessel overgrowth seen in macular degeneration.High cholesterol. Shiitake is beneficial in lowering levels of both total cholesterol and LDL (low-density lipoproteins, or “bad”) cholesterol. In animal studies using eritadenine, a chemical found in shiitake, total cholesterol levels were reduced by 25 percent in one week. This effect was more pronounced in subjects who ate high-fat diets than in those on low-fat diets. Japanese scientists have found that shiitake compounds accelerate the accumulation of LDL in the liver, where it is converted into HDL (high-density lipoprotein, or “good”) cholesterol.
Other medical uses – Viral infection.
Astragalus
Other names: Astragalus membranaceus, Huang Qi
Astragalus is a twining leguminous perennial plant that grows 11-1/2 to 39 inches high. The stem has many branches, slanting upward and slightly hairy. The pinnate leaves are alternate and the 9 to 21 leaflets are elliptical-shaped, 1/4 to 3/4 inches long and about 1/3 inch wide. The racemes are axillary and the peduncle slender, with anywhere from 3 to 9 flowers growing at the top. The pod is spindle-shaped, inflated, a little over an inch in length and beaked at its tip. Astragalus has 20 to 30 seeds. Astragalus grows in grasses or in thickets on hillsides in northwest China, Manchuria and Mongolia.
Medicinal value is in the root. Astragalus root is flexible and long, as large as your forefinger, and covered with a tough, wrinkled, yellowish- brown skin, which has a tendency to break up into woolly fibers. The woody interior is of a yellowish-white color and has a faint sweetish taste that reminds you of licorice root.
Uses
Tonic & endurance remedy – Astragalus is a classic energy tonic, perhaps even superior to ginseng for young people. In China it is believed to warm and tone the wei qi (a protective energy that circulates just beneath the skin), helping the body to adapt to external influences, especially to the cold. Astragalus raises immune resistance and manifestly improves physical endurance.
Control of fluids – Though a vasodilator (encouraging blood to flow to the surface), astragalus is used for excessive sweating, including night sweats. Astragalus is also helpful in both relieving fluid retention and reducing thirstiness. Astragalus encourages the system to function correctly.Immune stimulant – Not an herb for acute illness, astragalus is nonetheless a very useful medicine for viral infections such as the common cold.Other medical uses – Bone cancer, Breast cancer, Cervical cancer, Colorectal cancer, Endometrial cancer, Hodgkin’s disease, Kidney cancer, Liver cancer, Lung cancer, Ovarian cancer. Astragalus treats prolapsed organs, especially the uterus, and it is beneficial for uterine bleeding. Astragalus is often combined with Chinese angelica as a blood tonic to treat anemia.
If you are being treated for cancer, be aware of the battle that is going on in your body. Radiation therapy and chemotherapy add to the fatigue caused by the disease itself. Give your body the rest it needs so that you will feel better as time goes on. Exercise once you feel rested enough. Ask your cancer care team whether your cancer or its treatments might limit your exercise program or other activities. It is important that you consider your emotional, psychological, and spiritual health along with the physical aspects of your recovery from cancer.
Disclaimer The Content is not intended to be a substitute for professional medical advice, diagnosis, or treatment. Always seek the advice of your physician or other qualified health provider with any questions you may have regarding a medical condition.
As triathletes we put ourselves through a lot of training stress on a daily basis. Juggling three different sports often means that a day off is ‘just’ an easy swim or a bike spin. With this amount of training volume comes a lot of training fatigue and it’s not uncommon to feel tired after exercise. In fact, it’s kind of a package deal.
For most of triathletes it’s not just swim, bike and run. Usually it’s swim, work, bike, time with kids, run, work on projects. And, probably, a dozen of other little things in between. Needless to say, such intense schedule often leaves many triathletes exhausted. If not physically, then emotionally drained for sure. Sometimes a single exercise makes an athlete tired and not energized for the next few days.
It’s not only triathletes who suffer from post workout fatigue. Every athlete who challenges personal limits and looks to improve performance may found him- or herself tired after exercise.
Good news is that we don’t need to give up on our fitness goals to feel energized and lead a fulfilling life. Nor on our personal ones to be a competitive athlete. With some practical training, recovery and lifestyle changes it’s possible to combine intense training schedule with busy life. And have the energy to enjoy it.
There’s a lot to learn from triathletes about how to prevent feeling tired after exercise. Juggling three different sports requires a lot of effort and caution to maintain the workload while keeping fatigue at bay.
10 Training & lifestyle tips to stop feeling tired after exercise
Of course, it would be amazing to have the opportunity to organize the entire training schedule around recovery. Or at least take a longer nap in the middle of the day. But there’s a high chance that if you clicked on this post sport is not your main source of income.
Most of us have day jobs, families and other personal commitments. So, below are a few changes that every athlete can make to optimize the lifestyle and training process to feel energized instead of tired throughout the day.
#1 Shorter but frequent sessions to avoid feeling exhausted after exercise
Frequency and volume is the ‘secret sauce’ of every top athlete. Consistent easy exercise builds a solid foundation of strength and endurance. Later this foundation allows athletes to tolerate more training load, recover quicker and get even faster during more intense phases.
However, long sessions are not the only way to build that aerobic base. Splitting longer sessions into several shorter ones is a great way to reduce fatigue after exercise and trigger smaller but more frequent adaptations. This way athletes can add quite a lot of training volume and not feel tired after exercise.
#2 A (berry) smoothie every day to provide the body with nutrients
Drinking a smoothie every day may be one of the best things athletes can do to speed up their recovery. One made of fruits, vegetables and, especially, berries will provide everything that the body needs to recover from a training session.
Such a smoothie promotes an alkaline environment that reduces inflammation across the body. Not to mention that it’s nutrient dense – full of vitamins and minerals which our bodies need to restock after being pushed to the limits.
#3 Meditate to reduce mental stress
Stress is our mental response to everything that happens to us. It mobilizes the body, promotes release of adrenaline and cortisol which elevate heart rate, blood pressure and blood sugar level. That can be very exhaustive, as even small stress responses (like being late or stuck in traffic) add up during the day. For someone with an intense training schedule this additional pressure takes the energy away from recovery and is a big factor behind feeling tired after exercise.
There are more and more elite and amateur athletes who recognize the value of controlling their mental state and start to include meditation practice into their daily routines. Even 5-10 consistent minutes per day helps to train the mind to recognize thought patterns and control the response. That’s a particularly useful hack for athletes, as it helps to not only worry less, but also to build mental resilience for when things are not going well. Like getting a flat tyre halfway through the bike leg.
Read also: How To Get Started With Meditation – 8 Helpful Tips For Beginners
#4 Break up the time at threshold to reduce fatigue after workout
Training at lactate threshold is a great way to unlock a lot of speed. Tempo runs, VO2max intervals, FTP intervals – all of this provides a lot of fitness benefit. But it does come at a high cost and generates a lot of fatigue after exercise. For athletes who are not training 10+ hours per week prolonged efforts at threshold will result in feeling tired after exercise and will impact the rest of the week due to long recovery.
For lactate threshold to improve the most important factor is the total time at threshold effort. So, instead of a 30-minute tempo run, a more effective approach would be to cut the total effort into smaller chunks and add short aerobic breaks (Zones 1/2) in between. Having these short breaks helps the body to recover a little and this, in turn, allows to increase the amount of intervals and total time at threshold.
The Resilient Athlete
A Self-Coaching Guide to Next Level Performance in Sports & Life
Are you aiming to become a resilient athlete who is able to withstand any pressure? Be able to jump on any opportunity? Take any challenge life throws at you head on?
Then this book is for you.
Learn more
#5 Stay hydrated to speed up the removal of waste products
Water plays a key part in the process of energy production. Which is why it’s so important to stay hydrated throughout the day – not only during training. Without sufficient water intake the body will slow down all of its functions and will try to preserve the limited supply it has. Sweating during exercise makes things worse and makes an athlete even more tired and not energized.
For anyone who wants to be more energetic a good lifestyle hack is to drink more plain water – at least 2-3 litres per day (not counting what’s consumed during training). This will also help to flush out waste products from the body and speed up the recovery process.
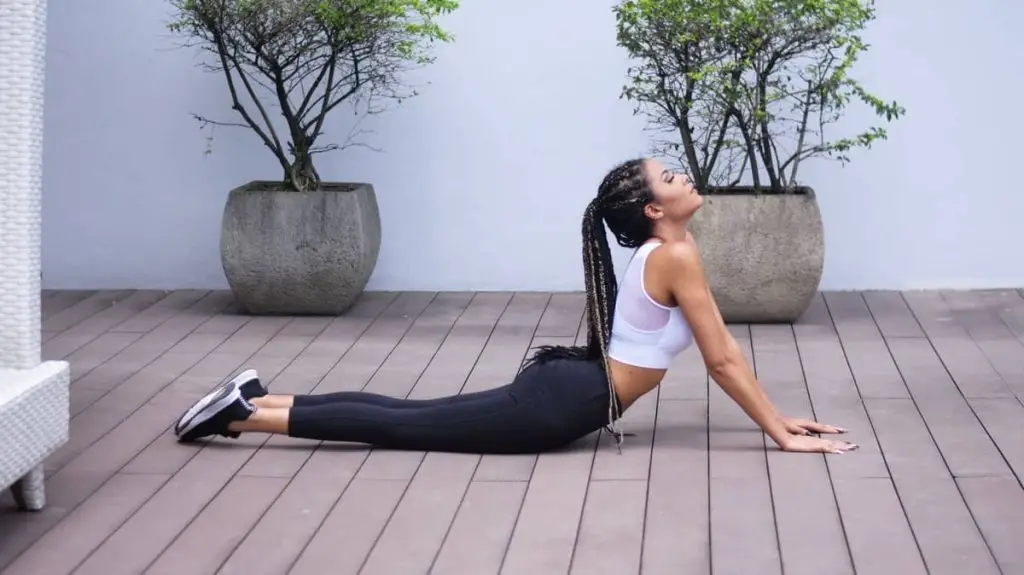
#6 Mobility or Yoga flow every morning to promote blood flow
One of the things that often limits performance is muscle tightness. It slows down oxygen transport, contributes to lactic acid build up and limits the power we can produce by reducing the range of motion.
As athletes we’re no strangers to that with all the time spent training in one specific motion. Add a desk job or working from home to that and such key muscles as hip flexors, glutes and hamstrings stop working as effectively as they should. Besides hindering performance, this can also cause such common issues like knee and lower back pain.
A 10-15 minute session of mobility or yoga flow (like Sun Salutation) is a great way to mobilize the body and wake it up. It helps to relieve the tension and promote blood flow to the muscles, which speeds up recovery, reduces post workout fatigue and makes our bodies operate more effectively.
Feeling tired after exercise? Do a form of mobility every day – it helps to open tight areas and allow blood to deliver oxygen and nutrients quicker.
#7 Add explosive strength training to make the body more efficient
There’s a lot of benefits strength training has for athletes of any sport – more power, better economy, injury prevention, growth hormone release and so on. But not all types of strength training fit the needs of triathletes due to the amount of fatigue they bring.
Besides core training, it’s a good idea to include a short explosive strength session to the training process. In base period athletes can use weight training, whereas in competition period it can be plyometric jumps (lower body) or throws (upper body). The focus of such sessions should be on producing maximum force using very high load (or explosiveness), low repetition count and long rest interval.
Read also: 12 Effective Strength Building Workouts For Any Experience Level
#8 Adopt a vegetarian or plant-based diet to reduce the load on digestive system
They say vegetarians are always energetic and happy. And for a good reason – vegetarian and plant-based meals are much easier to digest, so the body spends less energy on it. Eating more foods that are in their natural state (not processed) also helps to control blood sugar and reduce inflammation across the body.
If you constantly feel tired after a workout, try a more light diet. The less energy the body has to spend on digestion and dealing with inflammation, the more it can use to process fatigue after exercise. Isn’t that what we as athletes need?
#9 Use cold showers to quickly stop feeling tired after exercise
Cold exposure is a great recovery hack to reduce the overall inflammation that occurs in the body – be it muscle soreness or generally in response to overall stress. Shock effect from the cold speeds up the metabolism and helps to energize the body. On top of that, since cold helps to lower the body temperature it also trains the body to thermoregulate better. Even in the heat, which makes it a great strategy for heat adaptation and preparation for racing in hot conditions.
Research suggests that cold exposure is an effective way to reduce soreness, help muscle recovery, and potentially push harder during workouts. All thanks to reduced muscle inflammation and improved waste disposal from your body.
Many athletes use ice baths to reduce fatigue after workout. However, cold showers can provide a similar effect for the entire body. Start with a warm shower and gradually reduce the temperature to help the body adjust and finish off with a cold one.
#10 Light dinners to improve sleep quality
Juggling work, family and sport often results in very busy days. For many of the athletes that also means dinner is the biggest meal of the day, as that’s when there’s more time to unwind, prepare the food and eat it.
The problem with this is that starting at noon our metabolism starts to slow down. So, everything eaten at night takes much longer to get properly digested. Even though food gives us all the nutrients, consuming it close to bedtime interferes with recovery processes. Instead of resting and recovering, our body stays awake trying to process and digest the food. It’s no surprise some athletes feel exhausted after workout next day.
We are thrilled to invite you to take your career to the next level with Anatomy Trains Structural Integration (ATSI) certification training, led by Anatomy Trains author Tom Myers in San Diego, California, in 2024!
“The program exceeded my expectations. It gave me a recipe that I can follow to make sure I am taking care of the whole body and not just [the client’s] complaints.” – Kevin Hieber, ATSI 2022 Graduate
All three parts of this training event will be held in San Diego in 2024, with Part 1 beginning February 5th! There’s never been a better time to apply to this transformational training.
Enjoy a video invitation to Part 1 of the training from Tom Myers:
You are welcome to apply for just Part 1 of the program or all three parts and attain ATSI certification.
Tom Myers will be kick things off with his unique perspective on fascial research, the human condition in our electronic world, and the approaches we can use to restore ease, balance, and long-term resilience to the body in motion.
Supported by our experienced teaching and administrative staff, we will guide you into a new relationship with your own body – through work with classmate partners, teachers, and outside models – progressively building your skills in seeing the pattern and shaping the change.
Immerse yourself in regional anatomy, BodyReading, session strategy, and techniques in Part 1, learn and practice a 3 Series of Structural Integration with your classmate partner and with outside models during Part 2, and experience a full immersion into the ATSI 12 Series of Structural Integration with your classmate partner and with outside models during Part 3.
Benefit from experienced supervision and positive support throughout the program.
Apply Now!
Note: Anatomy Trains in Structure and Function is a prerequisite for ATSI. You can take this course in San Diego with Tom Myers!
Anatomy Trains in Structure and Function, January 26-28, 2024
ATSI Professional Certification is offered in three parts:
You may take each part separately, in consecutive order, as long as the next part is completed within two years of the previous part and based on space availability. That said, most people go through the full training with the same group over the 9 month period.
Full San Diego ATSI course schedule:
Part 1 – Structural Essentials 2024
February 5 – 9, 2024
February 12-16, 2024
February 19 -23, 2024
Part 2 – Structural Strategies 2024
April 22-26, 2024
April 29 – May 3, 2024
Part 3 – Structural Integration 2024
3.1
October 3-8, 2024
October 11-15, 2024
3.2
October 18-22, 2024
November 8-12, 2024
3.3 November 15-19, 2024
November 22-26, 2024
Learn more about the San Diego program and apply here.
In training it can be very easy to become overwhelmed very quickly. If you remove yourself from the advice, Instagram accounts and YouTube videos and look at strength training (or training in general for that matter) from a global perspective it boils down to
Organism experiences stress -> organism has time away from stress -> organism adapts to stress
That is pretty much the long and the short of it. I think it can become easy to get away from the most basic principles of training and to think that it is more complicated than that or since you have read a lot and have a good amount of understanding of the science that you can move away from that concept and go on to create shiny perodisation schemes and special exercises.
The most wooly headed or deluded training I come across online or opinions are always two or three steps removed from this kind of thinking and example of which could be
Problem I want to sprint faster
Line of rationale – I don’t spend any time on two feet really on my sport, my joint angles never really get below 90 and I want to be explosive. I should really look at doing something more specific to what I am wanting to develop or get better at.
Solution – single leg half split squats using dumbbells supersetted with single leg jump efforts like split squat hops.
Result – compromised force production, compromised speed, compromised muscle growth and adaptation.
Alternatively we could have a program where we lift heavy shit (squat, split squat, half squat, leg press, ssb squat whatever really), run fast (sprints, weighted sprints, plyometrics, throws) and perform full ROM lifts even better unilaterally to expose joints and muscles to training demands to bring up weak link and induce growth where we want it. Might seem way less sophisticated to someone looking at it with a surface level of understanding but is by far a better method of preparation.
The main difference for me is that the second approach looks at the attributes you want to develop then picks training interventions that best develop those attributes and then gets to work at getting better.
As soon as you take one, two or even three steps to get to your outcome the less effective your training is likely to be. That’s where I like the concept of the moving window because as the jumps in rationale reduce your training effectiveness so do jumps in time.
The moving window – basis in load management.
The moving window or just looking at a snapshot of time and using that in my decision making process has been something I have habitually done as a play off between wanting to be the most effective I can with the time I have with myself or an athlete and being pragmatic. When I started coaching people online I used to work in blocks of 4-5 weeks. Any person who is pragmatic and works with individuals will soon see how blocks are incredibly inefficient. You write out 4-8-12 weeks worth of training all of which is inter linked (meaning for it to be effective the work loads need to be completed sequentially) and the athlete gets sick, injured or can’t make workouts for work or family reasons and your 4-8-12 week plan is now down the toilet. If you keep working in the same paradigm of blocks of time that are delivered then you need to redraw up a modified plan in the same detail you did before.
When you are dealing with a lot of people at once the mean will be able to follow the block and it is easier to adapt to the few that can’t for any of the aforementioned reasons. Trying to indvidualise for a large group is a LOT more work than producing blocks and individualising ad hoc and the opposite is true for individuals.
When working in Rugby I was a lot more active in following sports science research and in particular field sport relevant sports science. Tim Gabbet was just producing a lot of his work using GPS and rugby players to produce the concept of the acute chronic work ratio
It’s basically a moving average of the past three weeks of training load either measured using RPE x TIME (Arbitrary Load Units) or another seperate or more objective metric like total distance through the use of GPS. You would be surprised how well GPS total distance and AU matched up with each other. This is a concept that has been in my head ever since however. I don’t think it is particularly useful for a sport like powerlifting where our load is so small it would lead to strange training decisions and training programs and from my knowledge hasn’t really been shown to have any real relationship with strength training (outside of it’s effect on a wider program of rugby team for example).
However it has lead me to develop the mental model of the moving window of training. It is something I use when programing for individuals and it helps frame decision making for training loads and weeks.
What is the moving window?
The moving window is a snapshot of what training the athlete has done in the past “arbitrary” amount of time I would probably use the last 3-6 weeks as my yardstick of training history that can help me to come upon a training decision.
A real world example.
You can see the trajectory of a lifter following a 12 week peak into a comptition where they performed three weeks of higher volume strength endurance work followed by a planned 4 week functional over reach and 5 week taper/peak into competition. The first blip was on week 5/12 when they reported far higher than expected RPEs during their workout.
The decision made here was using the past 4 weeks of training into context where all the preparatory work was completed, the first over reach week completed as expected meaning that this was an unexpected training result. The decision was to stay the course and see how it developed.
The next week the lifter performed better than expected with a 5×5 workout with an expected RPE of 8-9 for all sets and they completed the workout with an RPE of 7-8. Then the following week they failed to make the required volume load.
The coaching decision was to take a deload and pivot using the accrued work from the previous 6 weeks to taper from using more of an athlete lead or RPE influenced set up to try and make sure fatigue was best managed.
The athlete decided to try the top over reach workout again and failed to meet the required volume load by an even larger margin. The next 1.5 weeks became recovery focused with only 2 weeks of training to try and taper off and still be near competition level intensity.
The pivot in the end was successful netting a 4% increase but that would have been on the low end of what we would have expected given the training set up into the competition.
The above is an example of having a longer term plan (12 weeks into comp) put out in more granular detail and using the training window to inform decisions made. We didn’t blindly follow the trajectory set out in the program we check how our performance is matching up to what is expected and make decisions on the trajectory we take from there.
We use % of a relevant estimated maximum to set training loads in the ball park desired and use sets, reps and rest times to help push the training adaptation in the direction that we want it to take.
Plan in broad strokes and colour in the detail as we go.
This is where the moving window comes into practice. When I now lay out an annual plan I don’t worry too much about putting in too much minute detail. I take note of important dates (competitions, holidays and other engagements) and I then use that information to map out what I think would be the best use of that time in terms of developing the athlete’s capacity over the training year.
I then plan 1-3 weeks in advance. Initially I will plan 4 weeks, then once the athlete starts catching up I will then plan 1-3 weeks in advance asjusting before the start of each training week based on weights log information, training video and athlete feedback. We can also alter on the fly through athlete/coach real time communication but the time commitment required for this is not conducive to the coach having a life out of watts app so it’s an ad-hoc if and when sort of input and not a corner stone to the delivery.
Current week -6
Review???
Current week -5
Review??
Current week -4
Review?
Current week -3
Review
Current week -2
Review
Current week -1
Review
CURRENT WEEK
Review and adapt before and during week
Current week +1
Fill in detail end of previous week
Current week +2
have planned detail in place
Current week +3
have planned detail in place
This allows the direction of the training to emerge for example if the lifter is progressing faster than you had planned (RPEs are below what you expected) you can decide to hold them where they are if you want to consolidate or you can increase the rate of progress.
If the block isn’t developing as well as you would expect (RPEs above what you where expecting) then you can decide to hold them at the same level for a week or two to see if they can adapt, slow the expected rate of progress, repeat a training week or just pivot completely if the planned trajectory isn’t viable.
Many trainers and gyms go under the moniker of X.X.T.S. where the TS stands for training systems yet almost none of them use a systems lead approach. A simple setup like this gives a chance to plan inflows and then to see how it develops over time and to adjust them based on the results they are producing. Regular review is essential and decisions that are based upon that review and informed from the data/evidence from the previous week’s training results.
You can also build up observations and test training hypothesis for each individual by creating the training set up necessary and then see how it plays out or making notes on how they have responded to the previous training set up.
A very easy one is to see how certain training weeks affect the lifters sessional performance and well being/muscle stiffness. Allowing you to come up with a training set up that allows the lifter to perform maximally in each session.
This is also how I self coach I use a loose plan to lay out training goals and focuses for months and weeks and then I plan training 1-2 weeks in advance and use the performance from the previous 1-3 weeks to make decisions on training load and maybe adding or removing exercises from the training week.
There it is, it’s not a big or complicated idea but none of the useful ones are.
I hope you find this quick mental model or frame useful in the planning of your own or the training of others.


 Becky Stafferton is a full-time content creator, web publisher, and blogging coach. She continually strives to promote a realistic, sustainable and positive image of how to lead a healthy life. When she’s not writing she can be found running through muddy puddles, making lists of lists, having a good old moan, talking in funny voices to her dog, renovating her house in the country, and teaching others how to make money from their blogs.