As Christmas approaches I usually try to find something festive and anatomical. In the past we have looked at the flight of reindeer and how you process your Christmas dinner, an advent of eponymous terms, reindeer and angels, cold paws in the snow, and party shoes. This year I want to bring you an anatomical phenomenon that you may be completely unaware of.
I present to you the anatomical Christmas tree.
You probably haven’t seen this before unless you hang around in body building gyms or someone points it out to you (I encountered it the second way).
What creates this tree?
The edges of this tree are formed by the medial side of the latissimus dorsi muscles. These run all the way up the sides of the back and are used to pull the arms down, or body up if you are doing pull ups – these are the infamous Lats.
They do not go all the way to the spine because the whole of the lower back is covered with a sheet of fascia called the thoracolumbar fascia. This is formed by several layers of fascia – a connective tissue that can not be developed in the same way as the muscle fibers of the lats. Hence, as you develop your lats the differentiation between the bulging muscle and the flat sheet of connective tissue becomes more pronounced.
The trunk of the tree is made up from a group of muscles that extend all the way up the sides of the spine. This group is known collectively as the erector spinae muscles – they literally keep the spine erect.
The final step to revealing a Christmas tree is drop your body fat down to around 5%. I am obliged to point out that this is not advised. The advice is that your body fat should be around 20% (varies with age). Dropping down to 5% will affect some of the metabolic pathways in your body so if you want a Christmas tree you are probably better off popping down the shops.
Author: Anatomy Fundamentals
Janet Philp has spent a lifetime exploring fitness and wellbeing. Starting in group exercise, travelling through rugby to representing the UK at martial arts before including Yoga, meditation, Budokon and personal instruction. Her passion is anatomical function and educating people to use their bodies to their full potential.
View all posts by Anatomy Fundamentals
One of the more challenging parts about eating a higher protein diet is that it’s easy to overeat fats. Therefore, it’s essential to make good decisions about protein sources. Focusing on lean cuts of chicken, turkey, pork, fish, and steak is a good rule of thumb. In addition, there is evidence to suggest that most people can absorb between 25-50 grams of protein per meal. Spacing protein in your meals throughout the day helps ensure the body has adequate amino acids required for optimum performance. Liquid protein sources throughout the day help hit protein goals and satiate hunger. While there are many solid choices for protein supplements, Cal Strength has always relied on Muscle Milk as a partner. Muscle Milk products are NSF Certified for Sport and backed by the Gatorade Sports Science Institute, making them reliably safe and free of banned substances. It also ensures a reasonable level of label accuracy.
Conclusion
While there are numerous benefits of prioritizing protein in one’s diet, it’s also important to ensure a balanced intake of all macronutrients. Also, in certain populations (like my mother, who has a kidney disorder) may need to monitor protein intake carefully. Always consult with a registered dietitian or doctor when making significant changes to your diet. For most people, though, prioritizing protein in your diet will help increase or support existing muscle and help regulate blood sugar levels, keeping you energized and ready for the demands of your daily routine.
Calculating Your Protein Needs
Female Examples
Weight Gain
120bs female with 15% body fat = Lean Body Mass of
1.1 grams/lbs. of LBM = 112 grams/day
Weight Loss
185lbs female with 30% body fat
1 gram/lbs. of LBM = 130 grams/day
Weight Maintenance
145lbs female with 20% body fat
1 gram/lbs. of LBM = 116 grams/day
Male Examples
Weight Gain
130bs male – 10% body fat
1.1 grams/lbs. of LBM = 129 grams/day
Weight Loss
265lbs male – 30% body fat
1 gram/lbs. of LBM = 185 grams/day
Weight Maintenance
190lbs male – 15% body fat
gram/lbs. of LBM = 177 grams/day
References
Muscle Mass and Strength
Morton, R. W., et al. (2018). A systematic review, meta-analysis and meta-regression of the effect of protein supplementation on resistance training-induced gains in muscle mass and strength in healthy adults. British Journal of Sports Medicine, 52(6). This study found that protein supplementation led to increased gains in muscle mass and strength in individuals engaged in resistance training.
Satiety and Appetite Regulation
Paddon-Jones, D., et al. (2008). Protein, weight management, and satiety. The American Journal of Clinical Nutrition, 87(5). This study highlights that protein-induced satiety may aid in weight management.
Weight Loss and Body Composition
Layman, D. K., et al. (2009). Dietary protein and exercise have additive effects on body composition during weight loss in adult women. The Journal of Nutrition, 139(8). The study shows that a higher protein intake combined with exercise helps in better body composition during weight loss.
Leidy, H. J., et al. (2015). The role of protein in weight loss and maintenance. The American Journal of Clinical Nutrition, 101(6). This study discusses how dietary protein can be an essential aid in weight loss maintenance.
Thermogenesis and Energy Expenditure
Westerterp-Plantenga, M. S., et al. (2009). Dietary protein, metabolism, and body-weight regulation: dose–response effects. International Journal of Obesity, 33(3). This study suggests that dietary protein contributes to the maintenance of energy expenditure and preserves fat-free body mass during weight loss.
Blood Sugar Regulation and Diabetes
Gannon, M. C., & Nuttall, F. Q. (2004). Effect of a high-protein, low-carbohydrate diet on blood glucose control in people with type 2 diabetes. Diabetes, 53(9). The results suggest that a high-protein diet could be beneficial in managing blood sugar in type 2 diabetics.
Bone Health
Dawson-Hughes, B., & Harris, S. S. (2002). High-protein diets: potential effects on the risk of osteoporosis and kidney stones and on calcium metabolism. The American Journal of Clinical Nutrition, 75(1). While there is some controversy around protein intake and bone health, certain studies suggest that high protein intake can be associated with a positive impact on bone density, especially when combined with calcium.
Contrary to what the name might suggest, ‘zone 2 cardio’ doesn’t involve working out in any specific area of the gym. Instead, it’s a form of training in which individuals monitor their heart rates during aerobic exercise to enhance fitness levels. Instead, it’s a form of training where individuals monitor their heart rates during aerobic exercise to improve fitness levels.
This type of training is divided into zones from 1 to 4, with zone 4 representing your heart pumping with no ability to talk. In contrast, in zone 2 your heart rate is steady, and you feel your heart pumping, yet you’re able to carry a conversation comfortably.
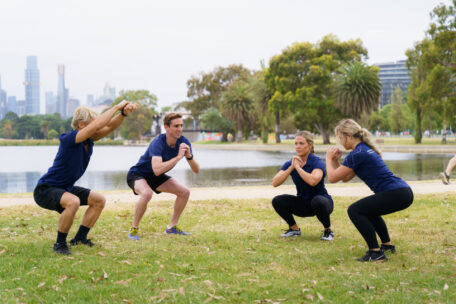
That’s where you should aim to be while performing this zone 2 cardio workout session, consisting of 8 exercises to perform for 30 seconds each, with no time to rest. The goal is to complete 7 rounds while consistently maintaining your heart rate in zone 2. All combined, this workout should last 30 minutes.
Quadruped shoulder taps
Jumping jacks
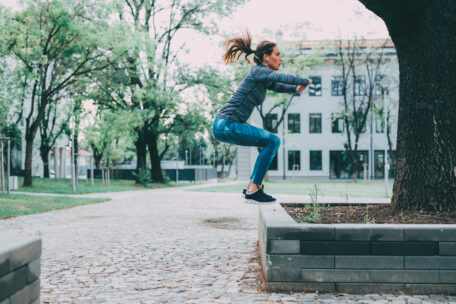
Bodyweight Squats
Up and down planks
Squat to lunge
Mountain climbers
Burpees
Single leg tuck-ups
Let’s get that heart pumping!
WORKOUT SETUP
8 exercises
30 seconds each
No rest
7 rounds
30 minutes total
Equipment: Gym mat
WORKOUT EXERCISE LIST
7 rounds
1 – QUADRUPED SHOULDER TAPS
30 seconds
Begin on your hands and knees, all fours — knees beneath hips and hands beneath shoulders.
Maintain your head in a neutral position.
Lift one hand off the floor and tap the opposite shoulder. Try not to shift your hips or weight.
Repeat the movement, but now with the other hand.
Repeat.
2 – JUMPING JACKS
30 seconds
Start in a standing position with your arms by your sides. Engage the core slightly and set the shoulders, ready for movement.
Keeping arms and legs straight (but not locked out) simultaneously jump the legs out to the sides and raise the arms to shoulder height. Stabilise the hips, core and shoulder girdle.
Return to start and continue at a controlled rhythmic pace for 30 seconds.
3 – BODYWEIGHT SQUATS
30 seconds
Stand on your feet placing them at the same distance as your shoulder lines.
Engage the core and go down to the floor, maintaining your knees on the line of your feet. Maintain abs and glutes tight, to control your hip and stabilize the movement.
Keep your arms tight by your side, and use them to help your balance.
Keep your feet attached to the floor and squat as down as possible without lifting the heels or feeling pain in your lower back.
4 – UP AND DOWN PLANKS
30 seconds
Begin in a plank position, with your hands under your shoulders and your body in a straight line from head to heels. Engage your core.
One arm at a time, lower yourself onto your forearms, keeping your elbows beneath the shoulders.
Hold for a moment in the forearm plank position.
Push yourself back up, with the same arm you started the descent, one arm at a time until you’re in the starting position.
Repeat changing arms.
5 – SQUAT TO LUNGE
30 seconds
Standing up tall will be the starting position.
Do a squat and immediately get back up.
Now do a lunge on one side and get back to the starting position.
Squat down and back up again followed by a lunge with the other leg.
Return to the starting position and repeat.
6 – MOUNTAIN CLIMBERS
30 seconds
Start with your hands on the floor at shoulder-width, with arms extended.
The hands must be in line with your chest line.
Try to maintain your trunk straight while you pull your knee to the projected chest line on the floor.
Pull your knees alternately to your chest.
Make sure you’re standing on your hands with a tight core.
7 – BURPEES
30 seconds
Start in a standing position and engage the core.
Begin the movement by quickly bending down, reaching the hands towards the floor in front of the feet.
As you do this, simultaneously jump, bring your legs back and land on the floor in a push-up position.
Perform a push-up and, on the way up, drive the hips up rapidly and jump into a squat position.
Return to upright and repeat.
8 – SINGLE LEG TUCK-UPS
30 seconds
Lay down on your back, legs stretched and arms by your side.
Crunch forward while bringing one knee close to the chest.
The opposite foot stays straight and touches the ground.
Finish with hands down by foot that you bring close to the chest.
Repeat.
After this zone 2 cardio workout, you can start choosing your next challenge:
This collection of 50 Best Vegan Pumpkin Dessert Recipes will inspire you to create the best healthy pumpkin desserts—from cookies and bars to pies and puddings—ever!
When pumpkin season comes, it’s so warm and welcoming! The creamy, earthy touch of golden pumpkin adds so much possibility to a whole wide world of pumpkin desserts, from baked goods to pies to creamy desserts. It’s hard to imagine that with every spoonful of pumpkin, we are adding healthy veggies to our day, too. That’s the health power of pumpkin, which is packed with fiber, slow-digesting carbs, and phytochemicals. And healthy pumpkin desserts can be tasty too (as we full well know)! I asked some of my favorite bloggers to share their best vegan pumpkin dessert recipes in this collection of simply awesome easy pumpkin desserts. Enjoy!
Pumpkin Bread, Uma Raghupathi, Simple Sumptuous Cooking (shown above)
Pumpkin Bread with Pumpkin Seeds, Sharon Palmer, MSFS, RDN, The Plant-Powered Dietitian (shown above) Pumpkin Brownies, Jennifer Bell, A Sweet Alternative
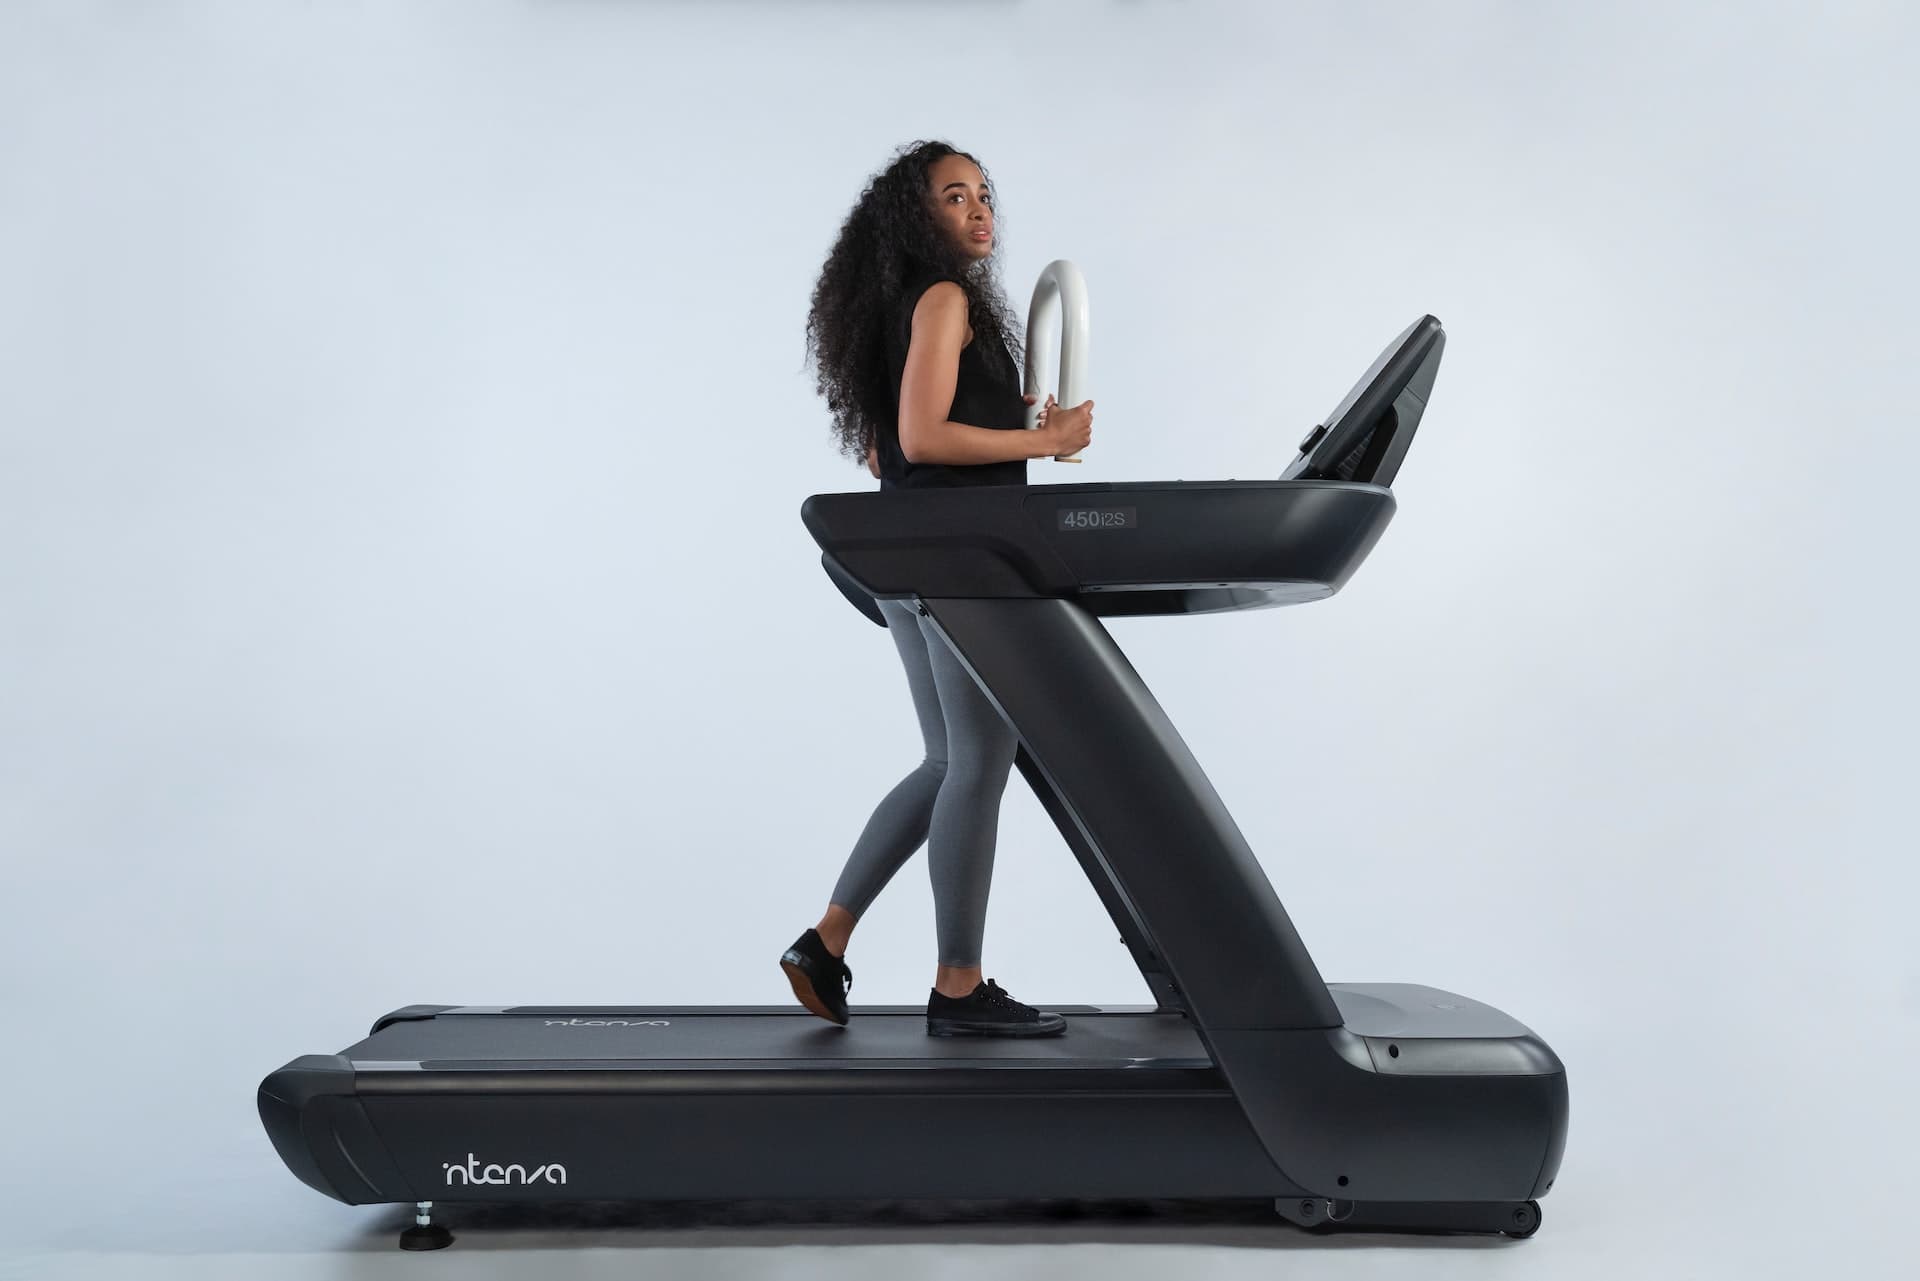
Technically, you can do what you want if you are at home. If you are at a gym or using someone else’s equipment, it’s best to ask about their preference. But what are the benefits and risks of going barefoot or socks only on the treadmill?
Why You Should Wear the Shoes
Wearing shoes while running or walking on a treadmill has many benefits. There are different shoes for different types of exercise purposes, but you don’t need to run out and grab one of each kind. You DO need to understand the benefits of wearing shoes, and the right kind, during your treadmill workout session.
Impact Absorption
The movement of running on a treadmill greatly impacts your feet, ankles, knees, and calves at the bare minimum. Wearing the right pair of shoes helps absorb some of that impact. That means there is less direct pressure on your lower body.
Provides Cushion for the Pushin’
Running shoes are designed differently than, say, shoes for tennis or volleyball. Runners have basically one movement, and that is forward. Sports players have to turn quickly, shuffle side-to-side, etc. Those who run, run forward. Wearing a well-padded shoe allows you to push forward without feeling like you’re digging your toes into the pavement.
Get a Grip on the Belt
The bottom of your shoes matters more than you think. With good running shoes, you know you have a much lower chance of slipping and falling during your run. Even while you are pouring sweat all over the belt, your shoes will grab on much better than slippery socks or sweating bare feet.
Arch and Ankle Support
You have to get the RIGHT kind of shoe, and that includes how it supports your foot. We all fall into three categories of arch support: neutral (the most common), flat-footed, and high arch. Wearing the right shoe will support your arch and ankle, eliminating injuries like Achilles tendonitis, Plantar Fasciitis, shin splints, or ankle sprains and strains.
Consider the following qualities when picking out the best show for you:
Lightweight
Breathable to eliminate sweating and hot feet
Flexible at the ball of the shoe to allow the best movement
Support for YOUR arch type
Comfortable
Designed for running- not sports
Take the Plunge and Unlace Your Shoes
Now you know the benefits of wearing shoes on your treadmill run, but what if you want to consider NOT wearing shoes? That is an option too. Let’s take a look at the flip side of the shoes or no shoes dilemma.
Building Muscle
When you wear shoes all the time, you don’t allow those supported muscles to work and get stronger. Going barefoot or in socks only pushes you to use all the muscles in your feet and calves. It also helps to strengthen existing muscle use to continue building on what you already use daily.
Balance
Have you ever seen a gymnast on the balance beam? They are always barefoot so they can feel the beam (and lack thereof) and keep their balance. You won’t feel an uneven path if you wear shoes while running. You, therefore, can’t correct the placement of your feet in time to avoid twisting an ankle or losing your balance. Going shoeless lets you feel the belt under your feet and make split-second placement changes.
Less Impact
Going barefoot stops you from landing on the heel of your foot like you would when wearing shoes. Landing on the balls of your feet instead of hitting harder on your entire foot eliminates that ankle impact. This movement helps propel your body forward and, in turn, reduces the stride of each step. Not landing fully on your foot means less impact on your body and less potential injury.
Precautions of both Shoes and No Shoes
There is no right or wrong answer on whether or not you should wear shoes on a treadmill. If you walk, the impact will be much lower than if you go for a run, so you could shuck the shoes.
If you always wear shoes for any activity, don your favorite Kicks and hit start on the treadmill. Either way, there are concerns with either option you choose.
Risks of Wearing Shoes
Wearing shoes while running the belt supports your ankle and arch, but providing such support COULD lead to weakened bones and muscles. That means the protection you seek could cause soreness and twisted ankles during other activities because your body isn’t used to supporting itself. It relies on the side of the shoe that isn’t there.
If you don’t get the right shoe, you risk sore feet and blisters because they rub the wrong way or are too tight. I used to go for long mild-paced walks, and within 30 minutes, my feet were tingling and numb. I couldn’t figure out why, and I eventually dropped the shoes, and it went away.
Risks of Going Barefoot or Shoeless
Whether socks or bare feet, you lose a lot of grip support. Sure, you automatically use your toes for that, but on a flat surface like a treadmill, you run the risk of no grip or friction. That leads to a bigger possibility of slipping.
Your feet are going to sweat, and that sweat leads to slippery surfaces, and that slippery surface leads to falling down or stubbing a toe.
If you have diabetes, it is NOT recommended you do anything without shoes, according to many doctors.
Blisters and burns are other risks you take by not adding the protection of shoes. The longer you run, the hotter the belt gets. If you are running barefoot, you will feel the burn…and not in a good way.
If you only wear socks, you will go through socks like crazy. The wear-and-tear shoes are designed to take do not carry over to your socks unless you use specially designed socks for running.
Searching for the best therapist for anxiety in Chicago? Do you struggle with fear, panic, worry, and stress? Have you been diagnosed with an anxiety or panic disorder?
If the answer is yes, you aren’t alone. It is estimated that nearly 40 million Americans have some form of anxiety, according to the Anxiety and Depression Association of America. The exact number of men living with anxiety is largely unknown, but it is thought that males make up a large percentage of the total number.
Because we are a Chicago based blog, we thought it might be helpful to share feedback from some of our readers on who they feel to be the best therapists for anxiety in Chicago.
Anxiety Therapists in Chicago
This page is designed to help you find the best anxiety therapist near you to fit your needs. Next to each person, we’ve also included some basic information about their specialty.
It is important to keep in mind that when a person has an anxiety disorder, it is considered a clinical condition that has been diagnosed by a licensed professional.
We mention this because many people claim to “treat” anxiety, but that doesn’t mean they hold the specialized training or background to be helpful.
Common Anxiety Disorders
There are several different anxiety disorders that are commonly agreed upon by the psychiatric community. These include:
Generalized anxiety disorder
Panic Disorder
Phobia related disorders
Regardless of which anxiety condition you have been diagnosed with, it is critical to work with someone who has the necessary training and experience to treat your situation.
We are fond of natural treatments that work in conjunction with any medications you may be taking. Examples of holistic approaches include:
Mindfulness therapy
EMDR (Eye Movement Desensitization and Reprocessing)
Hypnotherapy or commonly referred to as hypnosis
Meditation therapy
Cognitive behavior therapy (CBT)
Best Anxiety Therapists Chicago
What follows is our list of five therapists that offer the best counseling for anxiety in Chicago.
2nd Story Counseling
655 W. Irving Park Road, #204, Chicago, IL 60613
Ph: (773) 528-1777
Website: www.mychicagotherapist.com
Located in the Lakeview neighborhood of Chicago, just two blocks away from Thorek Hospital and just over a mile away from Wrigley Field, at the Irving Park Exit off Lake Shore Drive are the offices of 2nd Story Counseling.
All of the therapists have specialized training in anxiety treatment and offer compassionate, caring and results oriented counseling for men and women. Mindfulness and CBT are part of their approach.
Many of the counselors offer virtual counseling, sometimes referred to as remote therapy using a secure, HIPAA compliant platform. BCBS PPO insurance.
Calm Anxiety CBT Therapy Clinic
3354 N. Paulina St, STE 209, Chicago, IL 60657
Ph: (773) 234-1350
Best Anxiety Therapist Chicago
Located near the home of the Chicago Cubs – Wrigley Field, in an area consider to be the outskirts of “Boystown”, near the Chicago neighborhood of Roscoe Village and nor far from the Rogers Park community, on the corner of N. Lincoln Avenue and N. Paulina St is the Calm Anxiety Therapy Clinic.
The associated psychotherapists offer solution focused anxiety therapy for men and women using an integrative approach that includes mindfulness, CBT, guided imagery, and hypnosis are part of his approach.
In person and virtual counseling services may be available, depending on your needs. BCBS PPO insurance accepted.
Forest Bluff Counseling
49 Sherwood Terrace suite R, Lake Bluff, IL 60044
Ph: (847) 582-0588
Website: www.forestbluffcounseling.com
Located in one of Chicago’s northern suburbs in the community of Lake Bluff, not far from the suburb of Lake Forest, just off Skokie Highway and nestled in an office building are the offices of Forest Bluff Counseling.
The counselors specialize in working with adults and children struggling with various anxiety disorders and use mindfulness-based approaches to create positive change. Check to see which insurance carriers they are paneled with.
In person and virtual therapy appointments may be available, depending on your needs.
Guy Counseling & Life Coaching
655 W. Irving Park Rd, Chicago, IL 60613
Ph: (773) 704.5300
Website: www.guycounselingchicago.com
Located in the East Lakeview neighborhood of Chicago, straddling the zip codes of 60613 and 60657, half a mile away from Wrigley Field and a few blocks off Chicago’s iconic Lake Shore Drive, now called DuSable Lake Shore Drive, are the offices Guy Counseling and Life Coaching.
The anxiety specialist here use mindfulness based approaches, including hypnosis, to help calm fears, worries, panic, and stress. All of the associated helping professionals are licensed therapists.
In person and virtual therapy may be available, depending on your unique needs.
Inspire Therapeutic Services, LLC
310 N Hammes Ave Ste 300B, Joliet, IL 60435
Ph: (630) 755-5300
Website: www.inspiretherapeuticservices.com
Located roughly 45 miles outside of Chicago proper, in the counties of Will and Kendall, you will find the offices of Inspire Therapeutic Services, LLC.
All of the therapists specialize in anxiety related issues and use a holistic approach to treatment. Mindfulness based strategies and meditation are part of the dynamic.
In person and virtual appointments may be available, depending on your situation. Contact them for information about use of insurance.
Related Posts
Should I be worried if I don’t have morning wood?!
I wasn’t a morning person until one completely packed day that changed my thinking. It was a stressful day, but there was virtually no time to take a rest or squeeze in a workout. The only option left was to make an early morning training session before all the extravaganza begins.
I still remember waking up just after 4, having a quick half-asleep breakfast and taking my kayak at the crack of dawn for a 1.5-hour session. It was very exciting, but I was still nervous if I have enough time for everything that day.
The moment I started my session everything began to change. Suddenly, all the haste started to subside and slowly I became very calm.
After 15 or 20 minutes my mind got quiet and I have even stopped thinking of what I had to do throughout the day. It was pure joy.
As I began my session I was able to disconnect and appreciate the beauty of the nature and the peace around.
The best things was that I was able to carry that feeling with me throughout the day. I maintained peace, good sense of humor and generally was in a very good mood, despite the stress.
I came a long way since that day. Though still exciting, waking up early is no longer a problem for me. And early morning training has become an almost daily practice of mine.
Early morning training
It turns out many athletes and famous people schedule their training early in the morning.
Some use it as a time management solution, others feel they have more energy early on in the day. There also seems to be a growing number of people (myself included) who see it as a time for meditation and brainstorming.
And it makes so much sense. As you wake up the brain is least cluttered and most creative ideas and outside-the-box solutions pop up.
A great bonus is that early in the morning everyone is asleep and there’s nobody who can bother you. It’s like spending time with yourself and accomplishing everything that you don’t have time for during the day.
There is always a high chance that something will come up in the afternoon and good practices are usually the first ones to go.
Early morning training eliminates that.
The reason why I was able to maintain energy during that stressful day is because I had nothing more planned for the evening. I did not feel bad about missing something. My evening was free and I looked forward to relaxing instead of a long training session.
What does the research say?
In fact, even if you’re not pursuing athletic goals, research suggests that morning exercise might reduce a person’s risk of stroke or coronary heart disease. Compared to exercising later in the day.
In the study, those who were most active in the early morning (before 8am) or late morning (8-11am) had 11 percent and 16 percent (respectively) lower risks of incident coronary artery disease. Those who were most active in the late morning had a 17% decreased risk of incident stroke.
Now that’s a good reason to get your morning exercise, isn’t it?
The Resilient Athlete
A Self-Coaching Guide to Next Level Performance in Sports & Life
Are you aiming to become a resilient athlete who is able to withstand any pressure? Be able to jump on any opportunity? Take any challenge life throws at you head on?
Then this book is for you.
Learn more
My early morning training tips
I know, people would say there are morning and night people. But I was as far from a morning person as I could imagine. I would stay up past midnight and wake up only 30 minutes before I had to leave.
As I had more and more commitments I started to test out waking up earlier – sometimes for a week, sometimes for a month. Over time I did re-consider my habits and now I can’t wait to jump out of bed before dawn.
I would even go as far as saying it’s the most valuable practice I do to stay productive.
There is something special about staying awake while everyone is asleep.
Here are some of the habits that helped me get started.
Create a schedule and stick to it
The first one’s a biggie.
The single most important thing to ensure you wake up early every day is to go to sleep early. Sure, you can wake up tomorrow at 5 am and survive on 4 hours of sleep. But 2-3 days like that and you’ll be stressed, tired and angry.
Instead, subtract 7-8 hours of sleep from when you plan to wake up and make it a priority to go to sleep then. For instance, if you plan to wake up before 6, set a goal to go to sleep no longer than 10pm.
It will take some getting used to, so bring the bedtime hour down gradually over several week. 10 minutes earlier every day would be perfect.
Get organized
Going for a run or even a yoga session is rarely the first thing you think of once you wake up. I’ve been there.
To avoid thoughts that would keep me in bed for longer than I’d want to, I try to automate the morning. That includes preparing the clothes I’ll wear the night before and have a routine for the first 30 minutes of the day.
It takes time for the brain to power on, so having a plan helps you keep yourself on track when brain is still in standby mode.
Take it easy
While morning is when physical energy is at its peak, scheduling an intense session right after waking up is not a good idea. Hard efforts on empty stomach will only put unnecessary stress on the body.
Instead, it’s best to stick to Zones 1 and 2 and think of it like a long warmup for the day. Or factor in at least 1.5 hours to eat a proper breakfast and digest the food for a more intense session.
You’ll be surprised how consistent easy early morning training will improve your aerobic base over time.
Related: 5 Heart Rate Training Zones – Guide To Maximum Endurance Gains
Remember to drink plenty of water and have a nutritious breakfast at the ready once you complete workout. After 7-8 hours of fasting and a training session on top your body will demand some good food.
Did you find this information useful? Share the post with others using the buttons below.
My first marathon training update
Update: I ran my first marathon and it was a roller coaster of emotions. Read my race report here, if you’re interested.
Another couple of weeks of solid training are in the books. It’s good to be back to extensive training and spend more time outside.
Last week I did a total of 13 hours of training, which I haven’t done in a while. Apart from running, I did 2 strength training sessions, 3 morning swims and even went kayaking.
It’s challenging to include so much training into a normal work schedule, to say the least. As you might have guessed from this post, I do most of the sessions in the morning and during the weekends to keep my evenings as free as possible.
With so much training, however, there’s no other way than to have 2 sessions in a day. In such cases, I like to shift intensity between morning and evening sessions. Sometimes I do harder intervals in the morning, but sometimes I use morning for easy exercising.
My training progression
My training is still heavily in the aerobic zone with only a small fraction of faster intervals (both long and short). For me it’s more important to have a solid aerobic base and muscles that can sustain prolonged hours of exercise than speed.
After all, long races like marathon have to be done at lower intensity, so most of the training has to be focused on improving running efficiency and maintaining a steady pace.
Lately I started to feel that my legs are getting tighter from running every day, which is why I’m adding more swimming and kayaking to take some stress away from lower body. I’m planning to reduce the intensity during the next week to allow the muscles to recover.
Hi! I love the work of Tom Myers. Could he discuss his views on electric massage tools?
Tom:
Thanks for the question! Three levels of answer:
1) I am an advocate for the human hand – for human touch, its skill and its comfort and connection to a beating heart, far above any tool or machine I have ever experienced. The Metaverse might yet produce a superior hands-on treatment, but I doubt it.
That said, and given that skilled human touch is often expensive and not always available, let’s go to another level:
2) Using a tool – theraballs and cups of various sizes, physioballs, kinesiotape, postural clothes, foam rollers of all types, or Graston or similar scraping implements – is a great way to go to touch yourself through the instrument. Yamuna Zake, Jill Miller, Sue Hitzman, Ellen Saltonstall, and many others have put out good programs and tools for them. I am all in favor of these self-help programs. They’ve done a lot of good at relieving pain and restriction.
With the best of intentions, however, the ball cannot feel you the way the human hand can, which leads to these ‘guns’.
3) All the benefits of using a tool still apply to the theraguns. (Don’t we have enough guns in America already? Isn’t there some other name?). But one detriment additionally applies with the gun: It’s electric and keeps its own tempo, rather than adjusting as my hand does to the tempo of the tissue to which it’s being applied.
Last night, where I’m staying right now, a friend who was feeling poorly was trying to stimulate her lymph with one of these guns. She, like most lay people who get these machines, had it turned up to 11. “Faster / harder must be better” has been drilled into us by our culture, so we drill these machines into ourselves to try to get the demons out. I had her turn it down to the slowest oscillation (still not slow enough IMHO) and use it lightly along the lymph channels – much better results and much less stress to her system.
So hey, if you are getting the results you want, more electrical power to you. If you want to use such tools to explore, please feel empowered – I love it when my clients take self-responsibility.
But if you’re asking whether I’ve seen anything new or startlingly unique coming from these theraguns, I have to say no, and please slow it down and go lighter in most cases.
The barbell back squat, like the deadlift, is one of the most effective exercises out there—check out our Deadlift technique post for information on that exercise.
It is also one of the most difficult to learn and get right, as it can cause injuries if not done correctly. Therefore, it is always good to practice with just the bar until you develop a safe technique. Small weight will only cause small errors with no injury, whereas big weights will cause big errors and may result in more severe injuries.
Things to remember
The first thing to get right is the trunk positioning. You should do this part of the movement without any weight to begin with. The key is to make sure your trunk is kept upright, your head should be pulled back, your chest raised, and you should have a slight/ neutral arch in your lower back. A common mistake is excessive forward flexion (bending too far at the waist), especially when the weight is too heavy, and thus losing the natural lordic curve—the slight arch in your lower back.
Your eyes should be looking straight ahead, which will help you to keep your head still. Maintain a level head position throughout the movement. Do not look up or down.
In addition to this, foot position is very important during the squat. A general guide is to ensure that your feet are positioned at shoulder width or slightly wider than shoulder width apart. Your toes should be turned out approximately 10-15 degrees. Your knees should be slightly flexed (bent) and this will enable a strong and stable starting position.
Apparatus
The best place to carry out the barbell back squat is in the squat rack. It’s made for this and has safety guards inbuilt. Failing that, a power cage is also great. You will need to adjust the pins on a power cage to a height just below where the bottom of your movement will be. The right height is crucial so that if you need to bail, you can safely rest the weight and get out without causing injury.
Finding your top position. This is the point where you remove and replace the bar. When using a squat rack, there are numerous slots to choose from. It’s important to choose the correct slotting so that when you replace the weight, you won’t need to jump it into the slot. This can be dangerous, as if you miss one side or both the weight will come crashing down. Similarly, with the power cage you need to make sure the top J hooks are at the right level. A good way to find the correct level is to have the bar at a height that is just under your lower chest line.
You may have noticed people using a towel or padding whilst carrying out this movement. And whilst this can make the exercise more comfortable, it can also add some stability issues. With padding, the weight is allowed to rock due to less contact with the body. It is good to try to build up your tolerance to using just the bar. Try to have the bar resting on your upper trapezius muscles (upper back muscles). If there isn’t much muscle mass there, consider working in some trapezius exercises such as barbell shrugs.
Now place your hands on the bar a comfortable distance from your shoulders; a similar placing to that which you’d use for a normal chest press. Make sure that the weight is evenly distributed on both sides to avoid it tipping to one side. Most bars have a grip area in the middle which will help you place your back and hands in an even position. Now you can go up to take the weight off the rack and onto your back, keeping that upright back position throughout.
The movement
The first part of the movement is the walk back. This can be the part of the movement that causes many injuries. Either by taking the weight off the rack incorrectly or tripping when walking back. Make sure that your area is clear of any water bottles, journals, weights and anything else that might trip you. Take one step backwards and make sure that you are clear of any slots on the squat rack.
Stand with feet shoulder width apart with the toes facing slightly outward. Begin movement by bending at the hips and the knees, keeping the feet flat on the floor, head and chest up, body balanced and spine maintaining normal lordotic curve. Engage the core to protect the spine. Lower to the point you feel comfortable going down to with the weight on your back. The goal is to get your knees bent past 90 degrees, however everyone is different so if you can’t get that low, don’t push it. Once at the bottom, engage the muscles of the legs and the glutes to push up.
On the push upwards, maintain the same principles as lowering: keeping the feet flat on the floor, head and chest up, body balanced and spine maintaining normal lordotic curve. Focus on engaging the legs and glutes for power, and avoid pushing hard with the back.
Once you have carried out your reps, return the weight to the hooks and place back gently. Make sure the bar is safely rested both side before fully releasing.
To recap:
Teaching points
Rack should be slightly lower than shoulder height
Step under bar and position it on upper trapezius muscles and back of shoulder
Hands as close as possible to shoulders with elbows pointing down (Create a ‘W’position with your arms)
Stand up and take one step backwards
Stand with feet shoulder width apart OR shoulder width plus width of foot apart, head and chest up and eyes looking forward—NORMAL POSTURE
Begin movement by bending at the hips and the knees, keeping the feet flat on the floor, head and chest up, body balanced and spine maintaining normal lordotic curve
Descend as far as possible while keeping spine in neutral position (slight curve in back)
Keep knees over toes and heels on the floor
Reverse movement on way up maintaining correct posture at all times
Common errors
Heels lifting off floor—trying to keep back vertical (straight) by keeping the chest up and pushing through the heels
Knees traveling excessively forward over toes
Bending at waist and losing lordotic curve
Head and chest dropping
Movement analysis
Joint
Action at each joint during the concentric phase
Main muscles performing the action at each joint
Exercise Classification
Hip
Extension
Gluteus Maximus
Hamstrings
Compound
Knee
Extension
Quadriceps
Compound
Ankle
Plantar Flexion (Passive)
Gastrocnemius
Soleus
Compound
Squat variations
With this exercise there are more than 40 different variations, each recruiting different muscles and requiring a different technique. The most popular being:
Body weight squat – same movement, but without any added weight
Pistol squat (one-legged squat) – similar movement, but requiring balance. The leg that is not in use is pointed forward, to replicate the image of a pistol.
Sumo squat – wide stance with toes pointed far out. The bottom position replicates how a sumo might crouch in a fight.
Jump squat – using plyometric muscle recruitment, jump then lower into position, creating extra load
Front barbell squat – instead of having the barbell resting on your back, you place the weight in front of your neck, resting on your shoulders. The movement requires you to sit back more to maintain balance, it is good for keeping the back more upright.
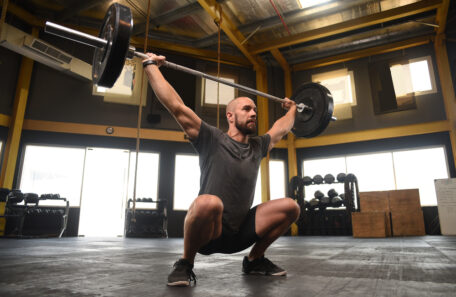
Overhead squat – holding the weight high above your head, in the top position of the shoulder press, then squat like this. Requires more balance and stability.
Goblet squat – holding a dumbbell vertically, like a goblet, in front of your chest. Adds weight in a different place to recruit different muscles.
What are barbell squats good for?
The barbell back squat, like the deadlift, is one of the most effective exercises.
What are the top tips for a barbell squat?
Hands as close as possible to shoulders with elbows pointing down (Create a ‘W’position with your arms)
Stand with feet shoulder width apart OR shoulder width plus width of foot apart, head and chest up and eyes looking forward—NORMAL POSTURE
Begin movement by bending at the hips and the knees, keeping the feet flat on the floor, head and chest up, body balanced and spine maintaining normal lordotic curve
Descend as far as possible while keeping spine in neutral position (slight curve in back)
Keep knees over toes and heels on the floor
Reverse movement on way up maintaining correct posture at all times
What are the most common errors with barbell squats?
1. Heels lifting off floor—trying to keep back vertical (straight) by keeping the chest up and pushing through the heels
2. Knees traveling excessively forward over toes
3. Bending at waist and losing lordotic curve
4. Head and chest dropping
{
“@context”: “https://schema.org”,
“@type”: “FAQPage”,
“mainEntity”: [
{
“@type”: “Question”,
“name”: “What are barbell squats good for?”,
“acceptedAnswer”: {
“@type”: “Answer”,
“text”: “The barbell back squat, like the deadlift, is one of the most effective exercises.”
}
}
, {
“@type”: “Question”,
“name”: “What are the top tips for a barbell squat?”,
“acceptedAnswer”: {
“@type”: “Answer”,
“text”: “Hands as close as possible to shoulders with elbows pointing down (Create a ‘W’position with your arms)
Stand with feet shoulder width apart OR shoulder width plus width of foot apart, head and chest up and eyes looking forward—NORMAL POSTURE
Begin movement by bending at the hips and the knees, keeping the feet flat on the floor, head and chest up, body balanced and spine maintaining normal lordotic curve
Descend as far as possible while keeping spine in neutral position (slight curve in back)
Keep knees over toes and heels on the floor
Reverse movement on way up maintaining correct posture at all times”
}
}
, {
“@type”: “Question”,
“name”: “What are the most common errors with barbell squats?”,
“acceptedAnswer”: {
“@type”: “Answer”,
“text”: “1. Heels lifting off floor—trying to keep back vertical (straight) by keeping the chest up and pushing through the heels
2. Knees traveling excessively forward over toes
3. Bending at waist and losing lordotic curve
4. Head and chest dropping”
}
}
]
}
The post How to Squat: Proper Barbell Squat Technique appeared first on Australian Fitness Academy.