
The barbell back squat, like the deadlift, is one of the most effective exercises out there—check out our Deadlift technique post for information on that exercise.
It is also one of the most difficult to learn and get right, as it can cause injuries if not done correctly. Therefore, it is always good to practice with just the bar until you develop a safe technique. Small weight will only cause small errors with no injury, whereas big weights will cause big errors and may result in more severe injuries.
Things to remember
The first thing to get right is the trunk positioning. You should do this part of the movement without any weight to begin with. The key is to make sure your trunk is kept upright, your head should be pulled back, your chest raised, and you should have a slight/ neutral arch in your lower back. A common mistake is excessive forward flexion (bending too far at the waist), especially when the weight is too heavy, and thus losing the natural lordic curve—the slight arch in your lower back.
Your eyes should be looking straight ahead, which will help you to keep your head still. Maintain a level head position throughout the movement. Do not look up or down.
In addition to this, foot position is very important during the squat. A general guide is to ensure that your feet are positioned at shoulder width or slightly wider than shoulder width apart. Your toes should be turned out approximately 10-15 degrees. Your knees should be slightly flexed (bent) and this will enable a strong and stable starting position.
Apparatus
The best place to carry out the barbell back squat is in the squat rack. It’s made for this and has safety guards inbuilt. Failing that, a power cage is also great. You will need to adjust the pins on a power cage to a height just below where the bottom of your movement will be. The right height is crucial so that if you need to bail, you can safely rest the weight and get out without causing injury.
Finding your top position. This is the point where you remove and replace the bar. When using a squat rack, there are numerous slots to choose from. It’s important to choose the correct slotting so that when you replace the weight, you won’t need to jump it into the slot. This can be dangerous, as if you miss one side or both the weight will come crashing down. Similarly, with the power cage you need to make sure the top J hooks are at the right level. A good way to find the correct level is to have the bar at a height that is just under your lower chest line.
You may have noticed people using a towel or padding whilst carrying out this movement. And whilst this can make the exercise more comfortable, it can also add some stability issues. With padding, the weight is allowed to rock due to less contact with the body. It is good to try to build up your tolerance to using just the bar. Try to have the bar resting on your upper trapezius muscles (upper back muscles). If there isn’t much muscle mass there, consider working in some trapezius exercises such as barbell shrugs.
Now place your hands on the bar a comfortable distance from your shoulders; a similar placing to that which you’d use for a normal chest press. Make sure that the weight is evenly distributed on both sides to avoid it tipping to one side. Most bars have a grip area in the middle which will help you place your back and hands in an even position. Now you can go up to take the weight off the rack and onto your back, keeping that upright back position throughout.
The movement
The first part of the movement is the walk back. This can be the part of the movement that causes many injuries. Either by taking the weight off the rack incorrectly or tripping when walking back. Make sure that your area is clear of any water bottles, journals, weights and anything else that might trip you. Take one step backwards and make sure that you are clear of any slots on the squat rack.
Stand with feet shoulder width apart with the toes facing slightly outward. Begin movement by bending at the hips and the knees, keeping the feet flat on the floor, head and chest up, body balanced and spine maintaining normal lordotic curve. Engage the core to protect the spine. Lower to the point you feel comfortable going down to with the weight on your back. The goal is to get your knees bent past 90 degrees, however everyone is different so if you can’t get that low, don’t push it. Once at the bottom, engage the muscles of the legs and the glutes to push up.
On the push upwards, maintain the same principles as lowering: keeping the feet flat on the floor, head and chest up, body balanced and spine maintaining normal lordotic curve. Focus on engaging the legs and glutes for power, and avoid pushing hard with the back.
Once you have carried out your reps, return the weight to the hooks and place back gently. Make sure the bar is safely rested both side before fully releasing.
To recap:
Teaching points
- Rack should be slightly lower than shoulder height
- Step under bar and position it on upper trapezius muscles and back of shoulder
- Hands as close as possible to shoulders with elbows pointing down (Create a ‘W’position with your arms)
- Stand up and take one step backwards
- Stand with feet shoulder width apart OR shoulder width plus width of foot apart, head and chest up and eyes looking forward—NORMAL POSTURE
- Begin movement by bending at the hips and the knees, keeping the feet flat on the floor, head and chest up, body balanced and spine maintaining normal lordotic curve
- Descend as far as possible while keeping spine in neutral position (slight curve in back)
- Keep knees over toes and heels on the floor
- Reverse movement on way up maintaining correct posture at all times
Common errors
- Heels lifting off floor—trying to keep back vertical (straight) by keeping the chest up and pushing through the heels
- Knees traveling excessively forward over toes
- Bending at waist and losing lordotic curve
- Head and chest dropping
Movement analysis
| Joint | Action at each joint during the concentric phase | Main muscles performing the action at each joint | Exercise Classification |
| Hip | Extension | Gluteus Maximus
Hamstrings |
Compound |
| Knee | Extension | Quadriceps | Compound |
| Ankle | Plantar Flexion (Passive) | Gastrocnemius
Soleus |
Compound |
Squat variations
With this exercise there are more than 40 different variations, each recruiting different muscles and requiring a different technique. The most popular being:
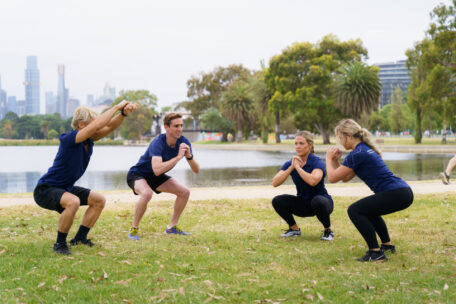
- Body weight squat – same movement, but without any added weight
- Pistol squat (one-legged squat) – similar movement, but requiring balance. The leg that is not in use is pointed forward, to replicate the image of a pistol.

- Sumo squat – wide stance with toes pointed far out. The bottom position replicates how a sumo might crouch in a fight.

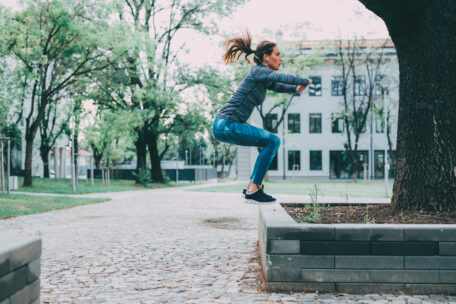
- Jump squat – using plyometric muscle recruitment, jump then lower into position, creating extra load
- Front barbell squat – instead of having the barbell resting on your back, you place the weight in front of your neck, resting on your shoulders. The movement requires you to sit back more to maintain balance, it is good for keeping the back more upright.

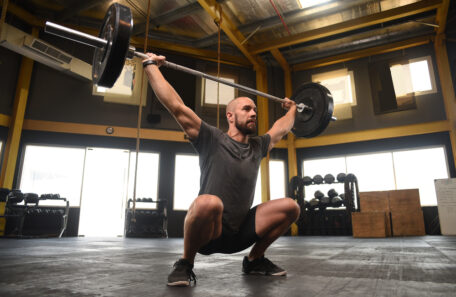
- Overhead squat – holding the weight high above your head, in the top position of the shoulder press, then squat like this. Requires more balance and stability.
- Goblet squat – holding a dumbbell vertically, like a goblet, in front of your chest. Adds weight in a different place to recruit different muscles.

What are barbell squats good for?
The barbell back squat, like the deadlift, is one of the most effective exercises.
What are the top tips for a barbell squat?
Hands as close as possible to shoulders with elbows pointing down (Create a ‘W’position with your arms)
Stand with feet shoulder width apart OR shoulder width plus width of foot apart, head and chest up and eyes looking forward—NORMAL POSTURE
Begin movement by bending at the hips and the knees, keeping the feet flat on the floor, head and chest up, body balanced and spine maintaining normal lordotic curve
Descend as far as possible while keeping spine in neutral position (slight curve in back)
Keep knees over toes and heels on the floor
Reverse movement on way up maintaining correct posture at all times
What are the most common errors with barbell squats?
1. Heels lifting off floor—trying to keep back vertical (straight) by keeping the chest up and pushing through the heels
2. Knees traveling excessively forward over toes
3. Bending at waist and losing lordotic curve
4. Head and chest dropping
{
“@context”: “https://schema.org”,
“@type”: “FAQPage”,
“mainEntity”: [
{
“@type”: “Question”,
“name”: “What are barbell squats good for?”,
“acceptedAnswer”: {
“@type”: “Answer”,
“text”: “The barbell back squat, like the deadlift, is one of the most effective exercises.”
}
}
, {
“@type”: “Question”,
“name”: “What are the top tips for a barbell squat?”,
“acceptedAnswer”: {
“@type”: “Answer”,
“text”: “Hands as close as possible to shoulders with elbows pointing down (Create a ‘W’position with your arms)
Stand with feet shoulder width apart OR shoulder width plus width of foot apart, head and chest up and eyes looking forward—NORMAL POSTURE
Begin movement by bending at the hips and the knees, keeping the feet flat on the floor, head and chest up, body balanced and spine maintaining normal lordotic curve
Descend as far as possible while keeping spine in neutral position (slight curve in back)
Keep knees over toes and heels on the floor
Reverse movement on way up maintaining correct posture at all times”
}
}
, {
“@type”: “Question”,
“name”: “What are the most common errors with barbell squats?”,
“acceptedAnswer”: {
“@type”: “Answer”,
“text”: “1. Heels lifting off floor—trying to keep back vertical (straight) by keeping the chest up and pushing through the heels
2. Knees traveling excessively forward over toes
3. Bending at waist and losing lordotic curve
4. Head and chest dropping”
}
}
]
}
The post How to Squat: Proper Barbell Squat Technique appeared first on Australian Fitness Academy.