Best Medicine Ball Training - Training Plan Method
A collection of 7 beginner-friendly medicine ball routines to improve strength, stability, and general fitness.

For many people, gymnastic balls are only familiar in everyday life. The ball is mainly used in the office or at home during daily sitting to relieve the spine and prevent back pain by sitting up. Sitting on the exercise ball, you finally sat up straight.
The muscle focus during gymnastics training is on the core of the body, including the abdominal, back, and pelvic floor muscles. Additionally, it claims to target numerous smaller muscle groups, so working out with a gymnastic ball can be considered a full-body workout. Plus, bodybuilding exercises, like exercise balls, are gentle on the joints. The gymnastic ball truly is the miracle weapon of the sport.
Practice 7 Times With A Medicine Ball
Medicine Balls offers a variety of quality exercises for beginners and advanced. Light exercise at the beginning should be included in the first training program so that you can get used to the exercise equipment. After an adjustment period, or already advanced, we recommend exercises with, for example, balance requirements that can be added or additional exercise equipment, such as a sling trainer, for weights or fitness bands to be more difficult. Here we present some exercises, both for beginners and advanced.
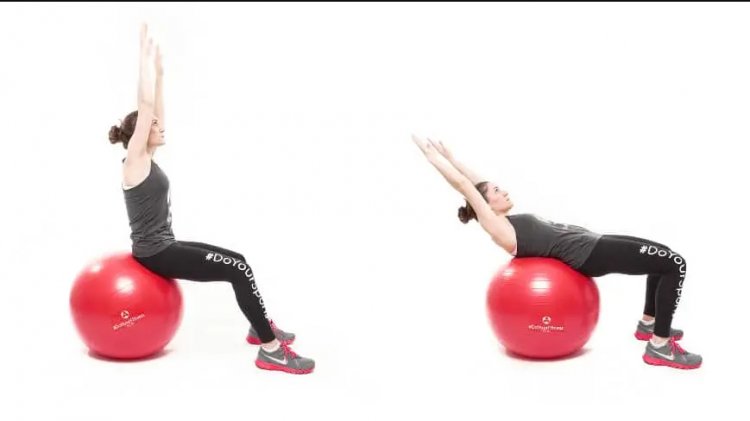
Practice Ball Drills: #1 - Drop Down
The Down Twist is equally suitable for beginners and advanced while addressing many muscle groups in the body.
First set of positions: First, you take the starting position. To do this, you lie on your exercise ball with your legs shoulder-width apart and your knees bent at 90 degrees. Stretch your arms behind your ears. The viewpoints to the ceiling.
2. Drip and drop: You slowly lift yourself up with the help of your arms and balance yourself so that your feet don't separate from the ground. Make sure to keep your arms behind your head at all times. Ideally, you will sit in a seated position, keeping your stomach tight. You then return to the starting position under tension and repeat the exercise.
NOTE: Please make sure your feet are firmly planted on the ground and do not lift.
Training goals: Strengthen the back muscle chain (legs, hips, back) and abdominal muscles and improve coordination and balance
Repetitions and Patterns: We recommend 3 sets of 8 - 20 repetitions (depending on ability) with 30 - 60 seconds of rest. Advanced users can increase their repetitions and volume, or put extra weight in their hands.
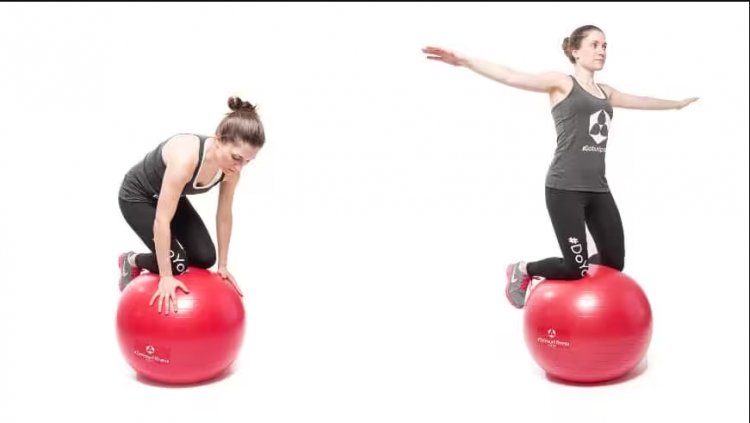
Exercise Ball Exercise: #2 Knees on a Medicine Ball
This sport requires a lot of balance, so there's more focus on improving muscle balance.
First set of positions: First, you need the correct basic position so you can balance yourself. Place your hands on the ball about hip-width apart and press your knees into the ball. Now you shift your weight forward and release your feet from the ground until you are in a crouch. Make sure you balance your weight and don't move forward.
2. Hold: Now point your upper body and try to reach to one side. You should hold this position for about 30-60 seconds. You then slowly lower with the help of your arms and repeat the exercise.
Training Goals: Strengthen core muscles, improve coordination and balance
Repetition and Sentence Patterns: We recommend that you hold position a'3 - 5 sentences for 30 seconds and then you can increase your own.
Exercise Ball Exercise: #3 - Push Up on the Medicine Ball
There are two variations on how to do push-ups on a medicine ball: For beginners, it's easier to do push-ups with your hands on a medicine ball because your upper body is slightly taller, so the weight is heavier on your feet than on the rest of your body. . For those of you who are already used to a medicine ball, we recommend placing your feet on the medicine ball and doing push-ups from there.
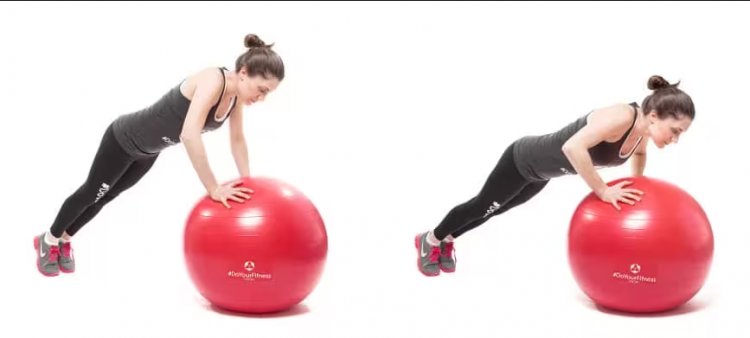
Variation #1: Push up on the exercise ball with your hands
The first set of positions: reach the starting position first. You place your hands on top of the ball with your fingertips pointing outward. You lift your knees and your body becomes like a board.
2. Press Ups: Now press for push-ups. Also, you bend your arms so your sternum is close to the ball. Then you slowly lower yourself back to the starting position.
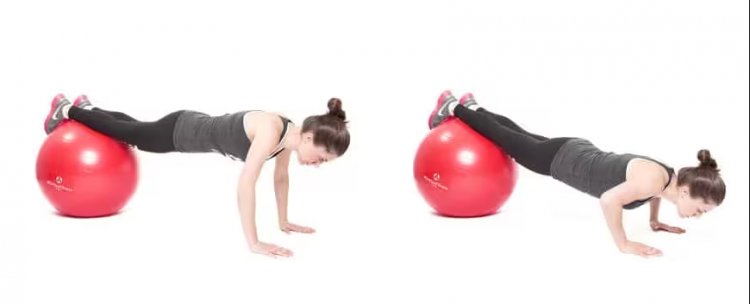
Variation #2: Push Up with Your Feet on an Exercise Ball
First set of positions: First you have to get into the starting position, which already requires a lot of coordination. To do this, lie on an exercise ball with your belly in front of you, then move forward until only your shins are in contact with the ball. The arms always remain extended. The body is now tense so it forms a straight line (like a board), avoid hollow crosses! You are now in a fixed position.
2. Push-ups: Now perform push-ups by bending your elbows and slowly lowering your upper body to the floor. Advanced users may try touching their noses to the ground, but push-ups should be performed at least at elbow height. You then return to the starting position and repeat the exercise.
Training Goal: Strengthen chest, shoulder, and arm muscles as well as abdominal muscles by maintaining the starting position. The second variant also requires coordination on your part.
Repetition and Sentence Structure: Push-ups are a particularly effective exercise for strengthening muscles, but they can also be very stressful. Therefore, we recommend 3-5 sets of 5 - 8 repetitions, increasing based on your ability.
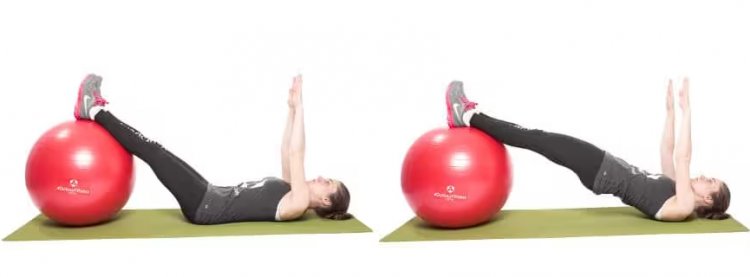
Exercise Ball Exercise: #4 - Pelvic Lift
Pelvic lifts with an exercise ball are very popular for targeting the buttocks, especially in women, and should also be considered by men as there are different variations that can increase the difficulty a lot (for example, a one-leg pelvic lift).
The first set of positions: reach the starting position first. To do this, lie on the floor on your back with your feet on the highest point of the ball and your arms extended to the sides.
2. Lift: Now, by tensing your hips, extend your hips as high as possible. Only your shoulders, head, and arms touch the ground.
3. Higher difficulty: If you want to increase the difficulty, you can do single-leg exercises by placing one leg at an angle or extending the leg over the other.
Training Goal: Strengthen upper thigh, buttocks, and back muscles.
Repetitions and Sentence Patterns: We recommend you start by performing 3 to 5 sets of 8 to 10 repetitions. Then you can increase the difficulty level.
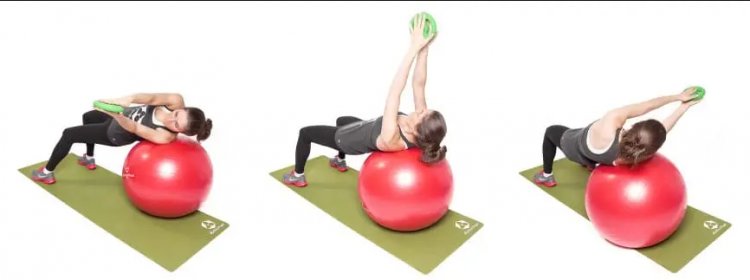
Practice Ball Drills: #5 – Russian Twist
For Advanced Users: The Russian Twist can initially be performed without additional weight. In this case, the exercises are especially suitable for beginners. However, the Russian twist with extra weight is very effective and, due to its difficulty, suitable for advanced users who are already used to exercise balls and want to use extra weight. The basic version of both models remains the same, with the weight being more difficult to hold with your hands.
The first set of positions: The Russian twist always starts from the starting position. To do this, lie down with your back to the medicine ball. Place your feet flat on the floor and bend your knees to 90 degrees. Use your hands to extend your arms (weight if necessary).
2. Twist: Now, as the ball rolls over your back shoulder, twist your arms and torso to one side. You turn so far that your arms are parallel to the ground. Hold this position for a moment and then return to the starting position. Now you turn to the other side.
Note: Please make sure your feet are firmly on the ground and do not lift.
Training Goal: Strengthen the buttocks and abdominal muscles (obliques)
Repetitions and Patterns: We recommend you perform 3-5 sets of 8 to 10 reps on each side.
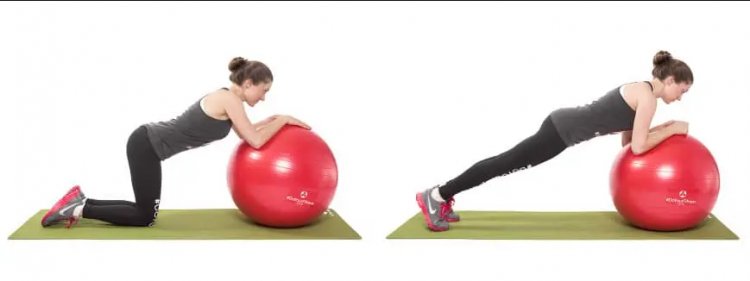
Exercise Ball Exercises: #6 – Forearm Support on a Medicine Ball
For advanced users: Lath is currently on everyone's lips and bodyweight training has hard-to-beat results as it claims the entire body, especially the front and rear torso muscles. The "planks" on the exercise ball give you an extra layer of difficulty because you have to maintain balance as well as simple hold.
The first set of positions: Get into the correct starting position first. To do this, you kneel down and place your thighs on the floor. Forearms on an exercise ball. Make sure your elbows are under your shoulders.
2. Plank: Now you lower your belly and lift your knees and hips until your body forms a line from head to toe (the plank). Maintain this position, but make sure your pelvis does not sink but remains straight throughout.
3. Higher difficulty: To increase the difficulty, you can move your feet back and forth or alternately lift one arm/leg. Additionally, you can place weights on your hips to increase the difficulty.
Tip: Is the forearm support too heavy for you? You can perform the exercise on your knees first and then move to your feet.
Training goal: strengthen the abdominal muscles, in addition, a large number of other muscle areas are involved in static holding work (for example, triceps, shoulders, chest, and leg muscles)
Repetition and layout: The world record for planks is about 8 hours. So while there is a lot of air, a good goal is to hold the position for 60-90 seconds.
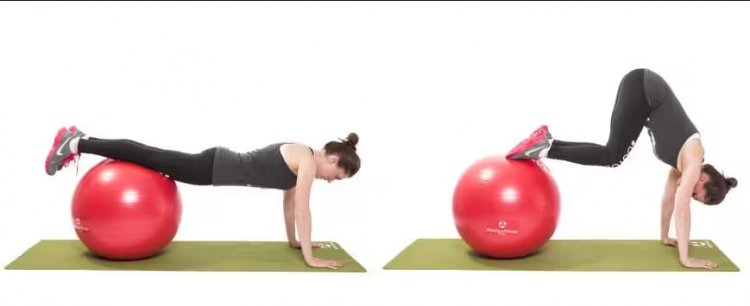
Exercise Ball Exercise: #7 – Knee Pleats
For Advanced: Knee Tuck is a versatile alternative to normal SitUps for strengthening abdominal muscles. However, this exercise is very demanding and should therefore be practiced by advanced students.
Set 1: In the starting position, you're in a push-up position - your hands shoulder-width apart on the floor and the ball on top.
2. Tuck: Now you pull your knees to your chest, lift your hips, and roll the ball with you until your toes are on the ball. Your back is arched and your abdominal muscles are contracted. Then you return to the starting position.
NOTE: It is very important not to let your back sag - this can lead to hollow crosses!
Training goal: mainly strengthen abdominal muscles, shoulder muscles, and hip flexors
Repeats and Formulation: We recommend that you perform 3 to 5 sets of 8 - 10 repetitions.
What's Your Reaction?